UK based
Prices for UK customers are shown inc 20% VAT
Other countries, inc EU, prices shown are ex VAT.

KASTENLOK INDEX
Gooische Stoomtram 18
Bouwhandleiding

Building instructions


UK based
Prices for UK customers are shown inc 20% VAT
Other countries, inc EU, prices shown are ex VAT.
KASTENLOK INDEX
Gooische Stoomtram 18
Bouwhandleiding
Building instructions

Belangrijk als u de instructies wilt PRINTEN: scroll eerst helemaal naar het einde van de pagina om alle plaatjes te laden, voordat u print. Anders krijgt u alleen tekst met lege kaders.
Important information if you would like to PRINT the instructions: first scroll to the bottom a the desired page, to load all images, before you print. Otherwise you will only get text with empty frames.
Volg deze link voor honderden referentiefoto’s van het origineel.
Follow this link for hundreds of very detailed pictures of the original.
Nederlandse instructies
Gebruikte verf en andere vloeistoffen
Grondverf:
Halfords Etch Primer
Halford Acryl Primer
Vallejo verf:
Zwart: Black 169/70.950/RAL 9005
Groen: Luftwaffe Cam. Green 086/70.823/RAL 6020
Rood: Flat red 031/70.957
Lichtgrijs: Sky grey 154/70989
Donkergrijs: Dark grey 168/70.862/RAL 7021
Wit: White 001/70.951
Humbrol/Revell enamel verf:
Messing: Humbrol 16
Blank staal: Revell 90/Humbrol 11
Koper: Revell 93/Humbrol 12
Lijm:
‘Kristal Klear’
Sneldrogende tweecomponentenlijm
‘Slo-ZAP’, langzaam drogende secondenlijm
English instructions
Used paint and other liquids
Primer:
Halfords Etch Primer
Halford Acryl Primer
Vallejo paint:
Black 169/70.950/RAL 9005
Green: Luftwaffe Cam. Green 086/70.823/RAL 6020
Red: Flat red 031/70.957
Light grey: Sky grey 154/70989
Dark grey: Dark grey 168/70.862/RAL 7021
White 001/70.951
Humbrol/Revell enamel paint:
Brass: Humbrol 16
Blank steel: Revell 90/Humbrol 11
Copper: Revell 93/Humbrol 12
Glue:
‘Kristal Klear’
Fast drying (5 minutes) two components glue
‘Slo-ZAP’, slower drying super glue
Benodigd gereedschap
- Soldeerapparaat (25w) en soldeerpasta, of lijm
- Brander voor solderen
- Fijne vijlen, schuurpapier
- Glasvezelpotlood
- Algemeen modelbouwgereedschap

Used tools
- Soldering iron (25w) and soldering paste or glue
- Soldering torch
- Fine files, sand paper
- Fiberglass pencil
- General modelling tools
Allereerst: dit is geen moeilijke kit. Het echt moeilijke werk, de aandrijving, het vouwen van de kast en het solderen van de strook klinknagels is reeds voor je gedaan. Je kunt de kit verder gewoon lijmen, maar ik soldeer ‘m liever. Het is allemaal redelijk simpel. Mocht je een stuk zo verprutsen dat het niet meer bruikbaar is, stuur dan even een mailtje, dan lossen we dat even op. Er is geen reden ergens bang voor te zijn. De nummers refereren naar de onderdelenlijst.
Zo wordt de kast (2) geleverd, gevouwen met de strook klinknagels gesoldeerd. Alsjeblieft, bespaar ik je zomaar een uur werk.
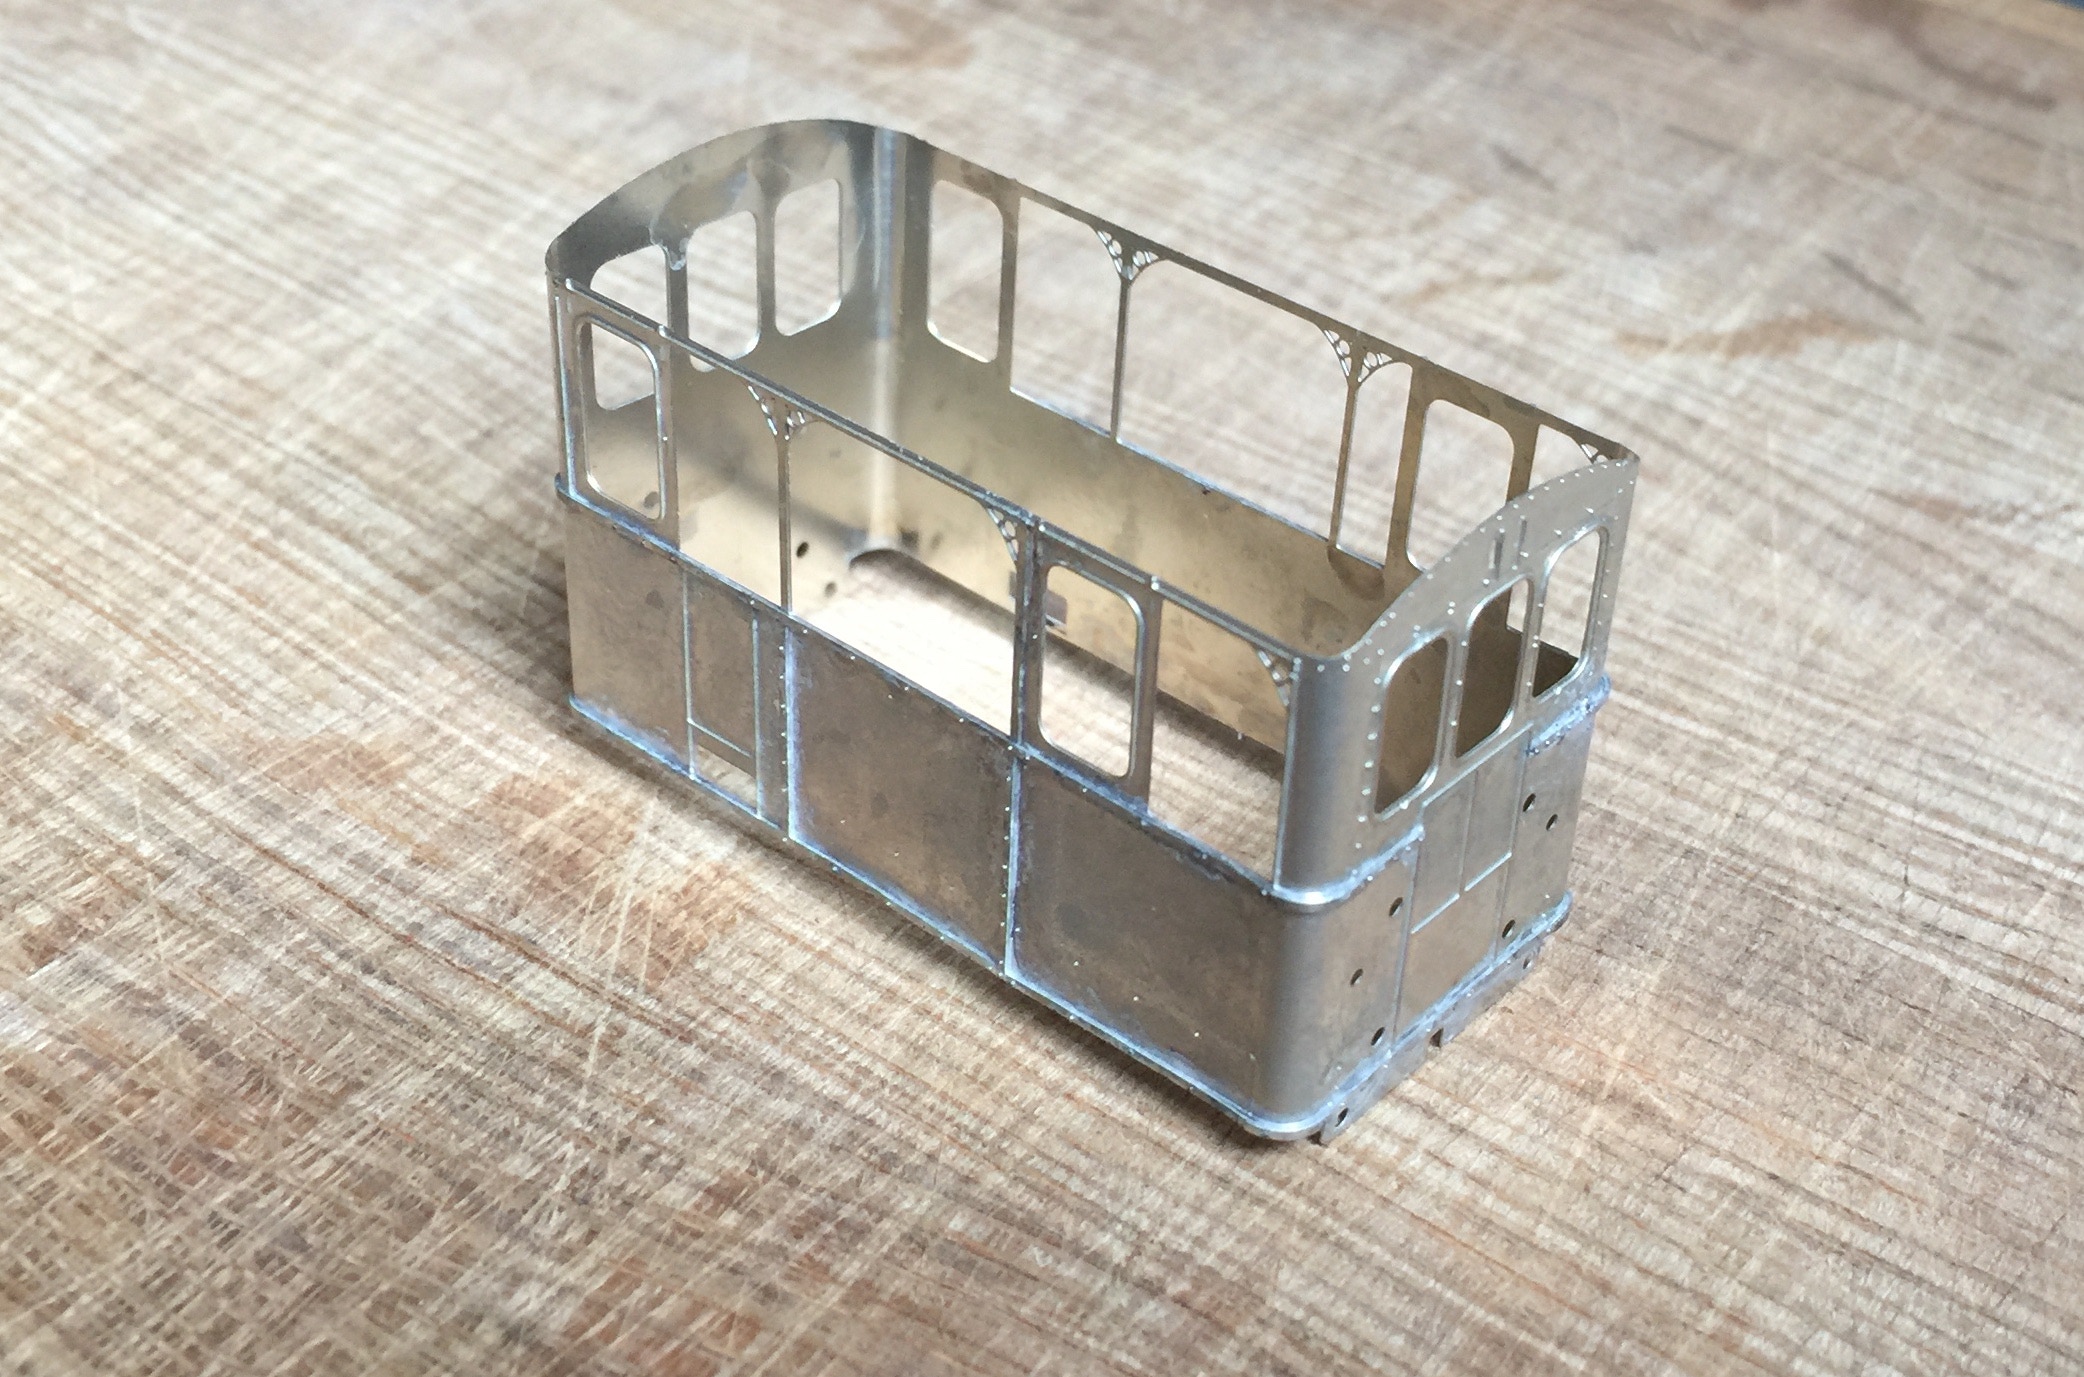
First of all, this is not a difficult kit. The real difficult stuff, the traction, folding the box and soldering the rivets on the box, have already been done for you. You can glue the rest of the kit, but I prefer to solder it. Where it says “solder” in the instructions, you can always replace it with glue. It is pretty straight forward. If you are destroying an item beyond repair, while building the tram, just send an email to the Tramfabriek and I’ll sort you out. So you don’t need any fear approaching the build. The part numbers used in this instruction refers to the part number on the Part list (see top of page).
The text boxes below are the translations to the corresponding box with Dutch text on the left.
This is how the box (2) is supplied, folded with the rivets already soldered. There you go, I just saved you an hour of work.
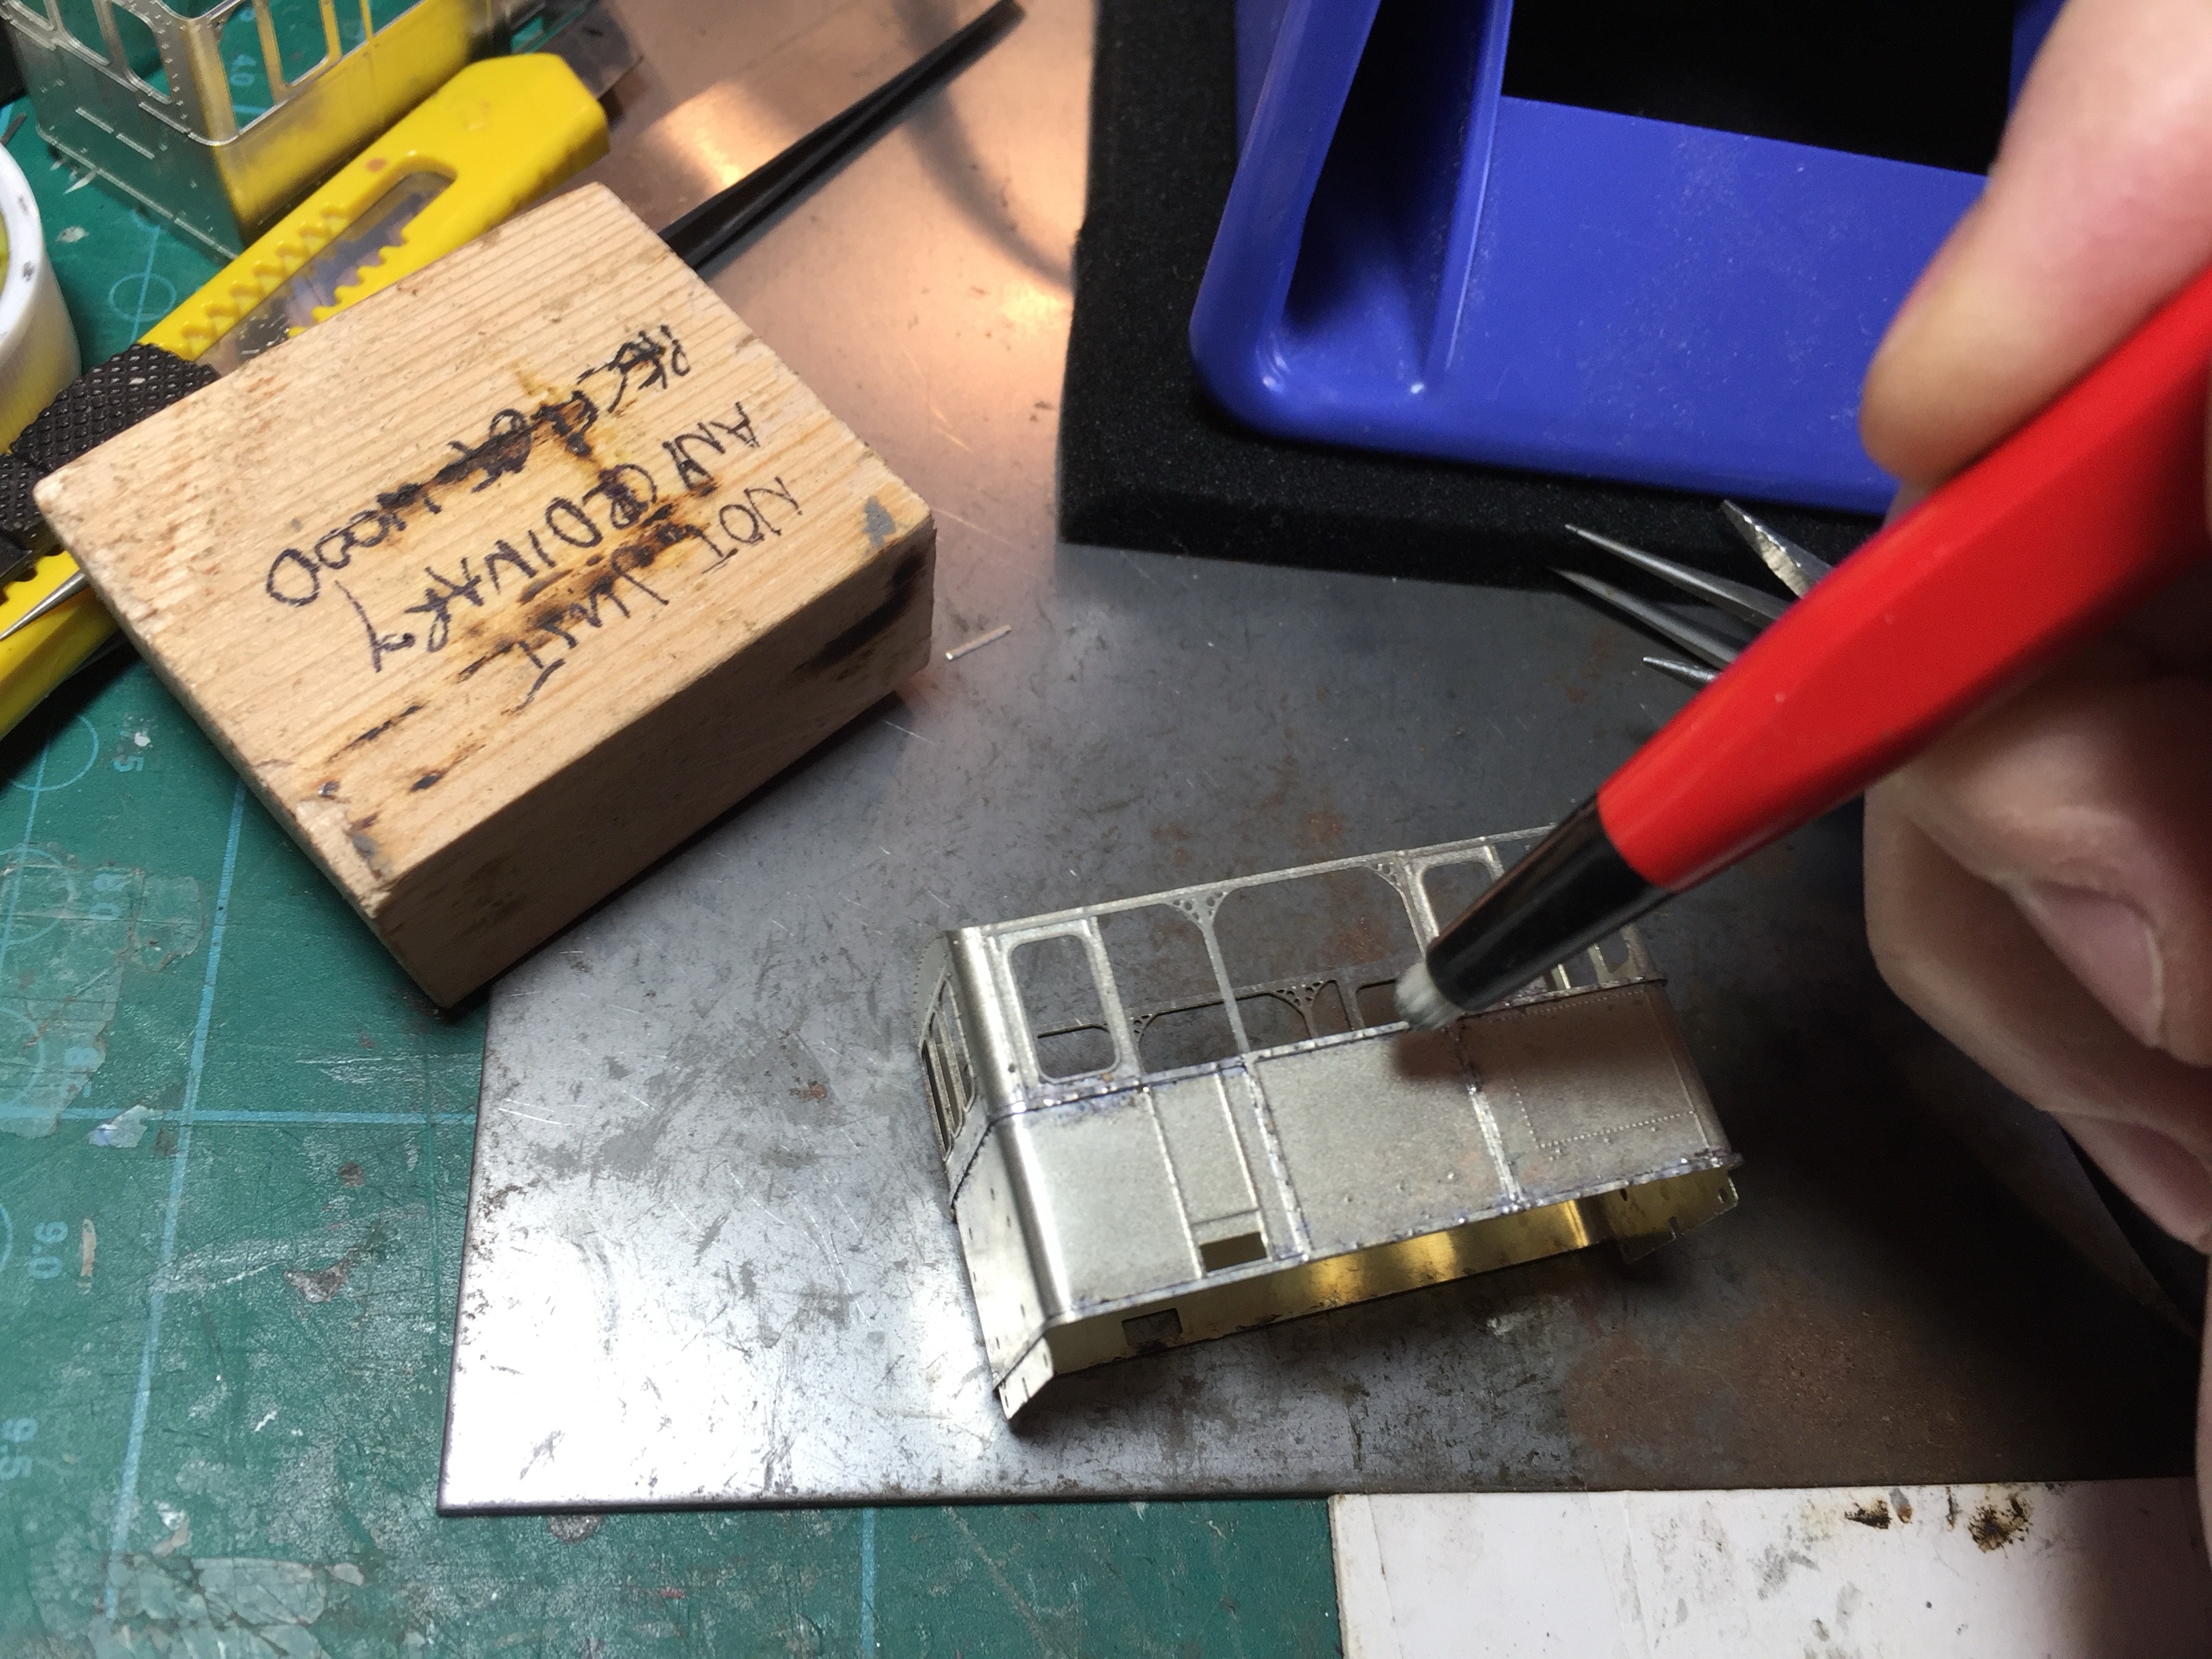
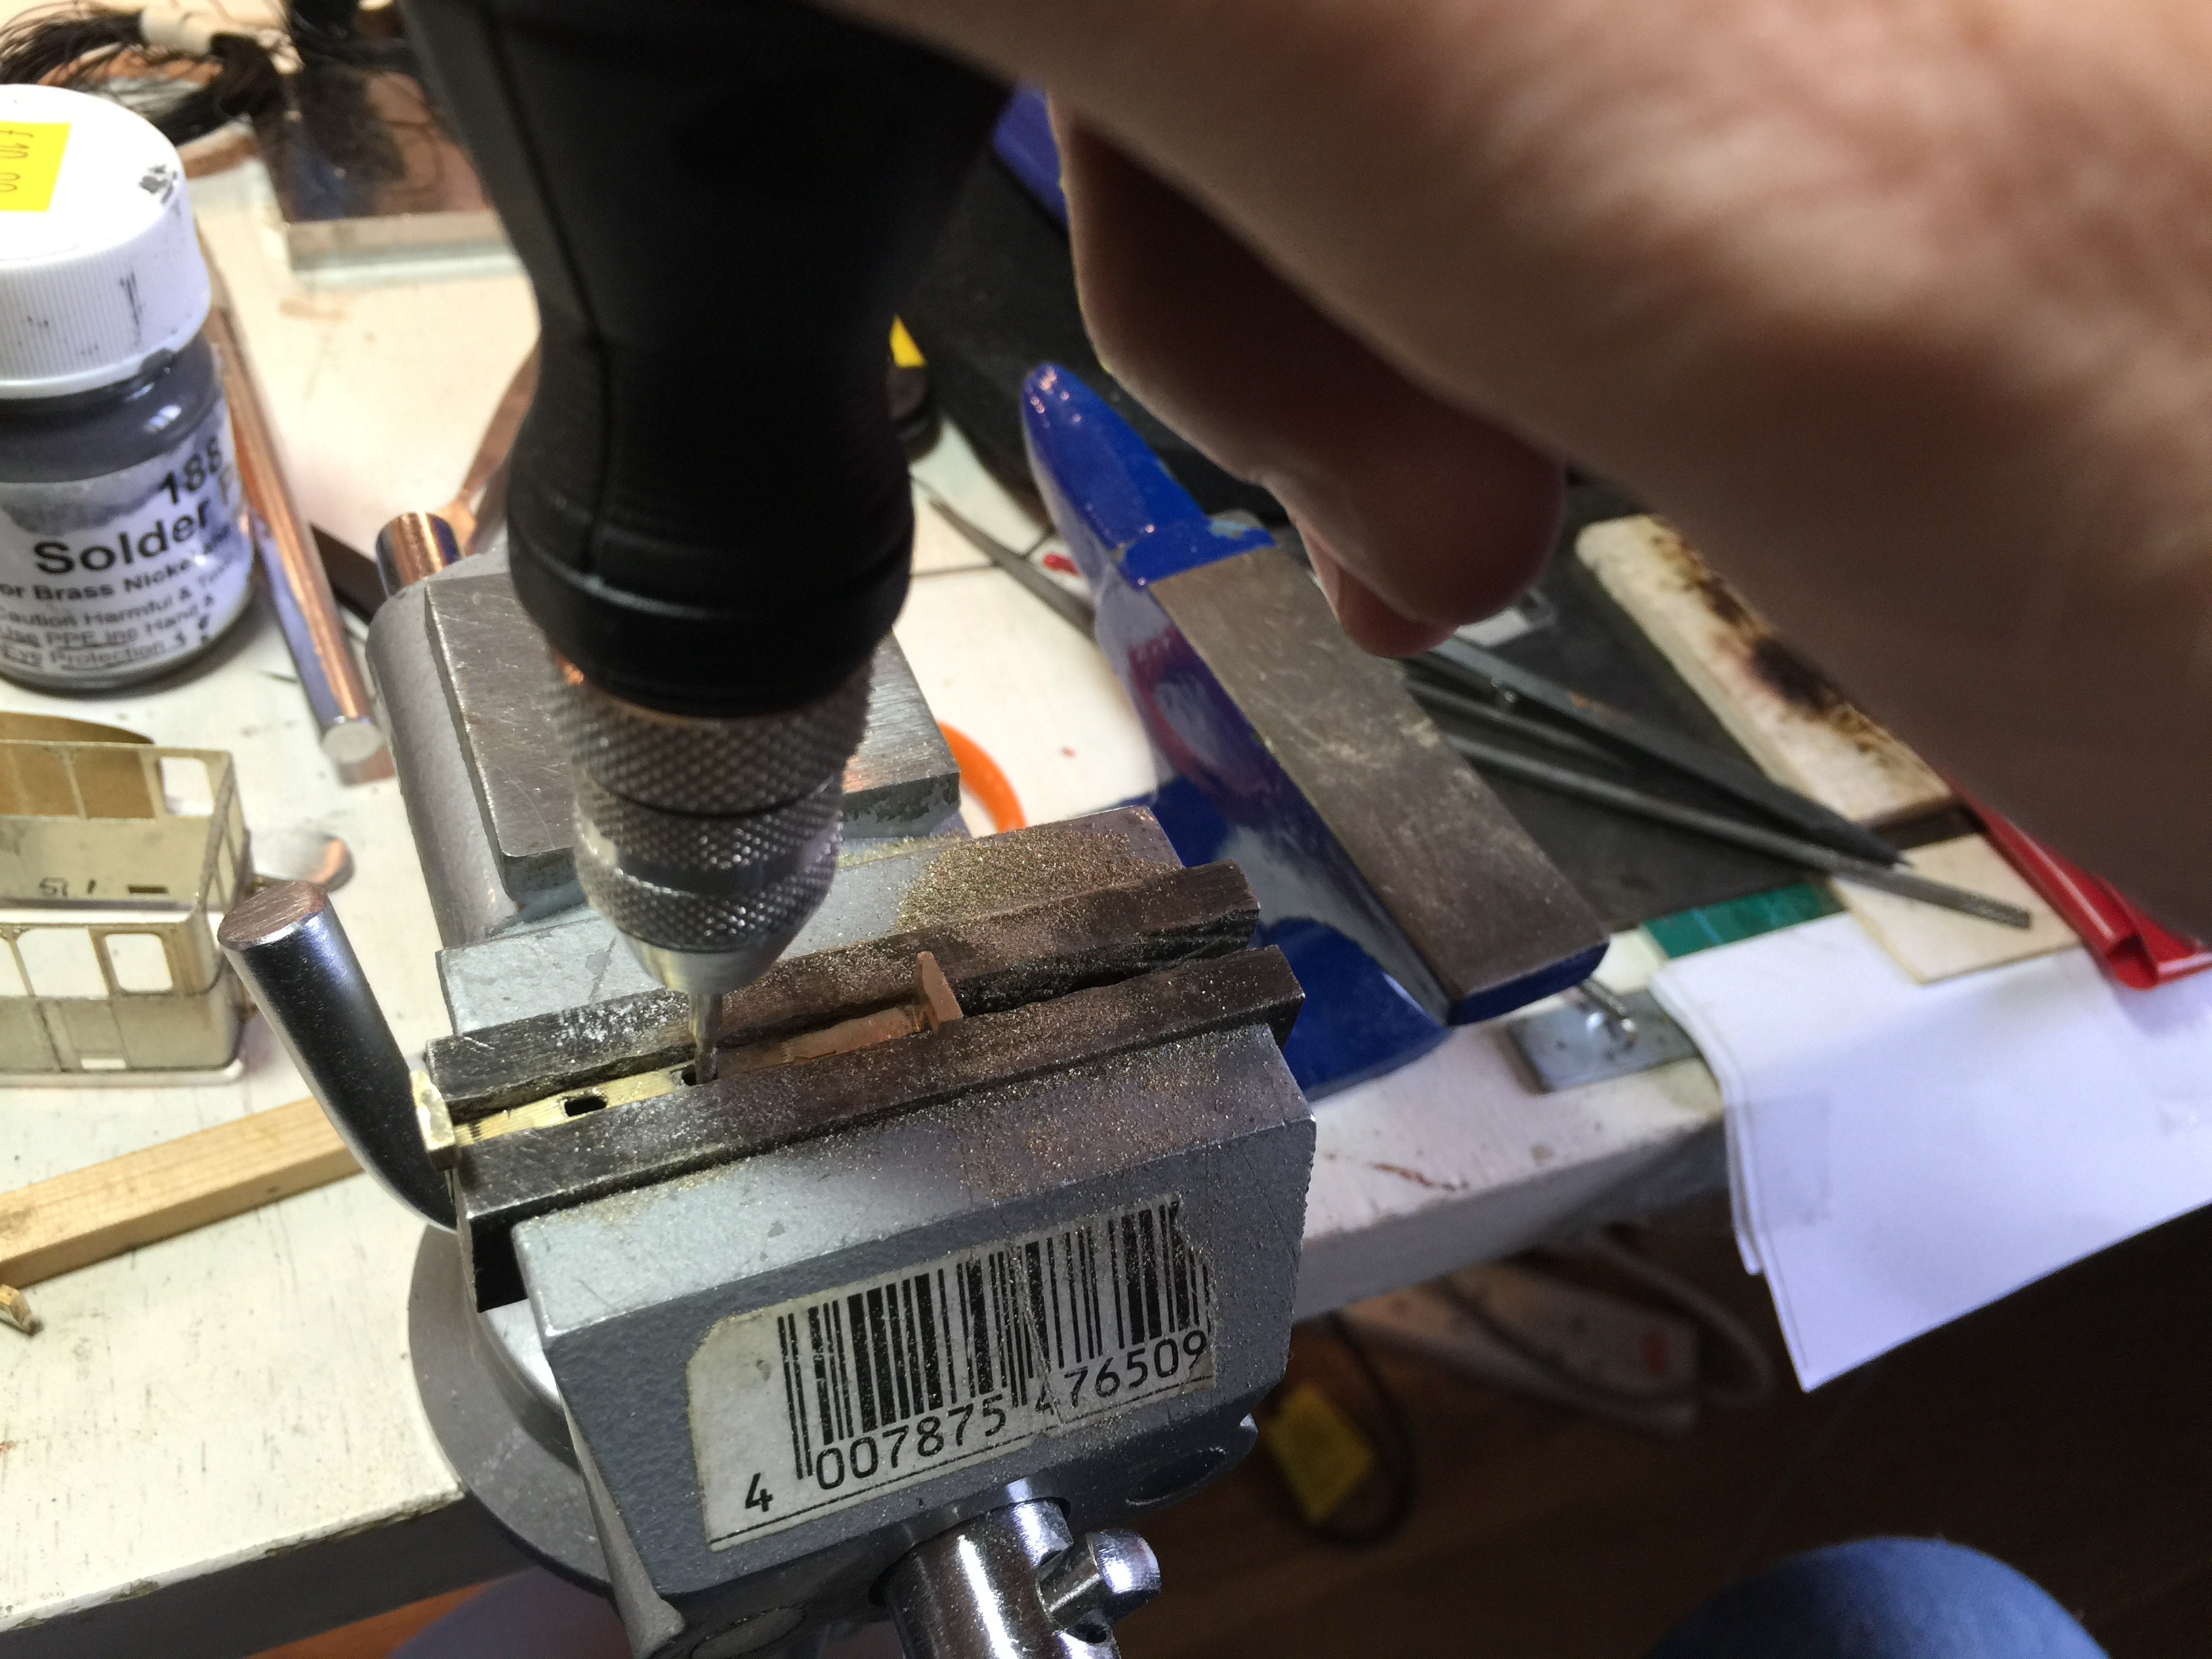
Overtollig soldeer weghalen met glasvezelpotlood. Leg een stukje hout oid in de kast zodat je iets meer druk uit kan oefenen. Handschoenen en gezichtsbescherming dragen!! (ik doe dit nu in een diep, leeg doosje. Het is rotzooi)
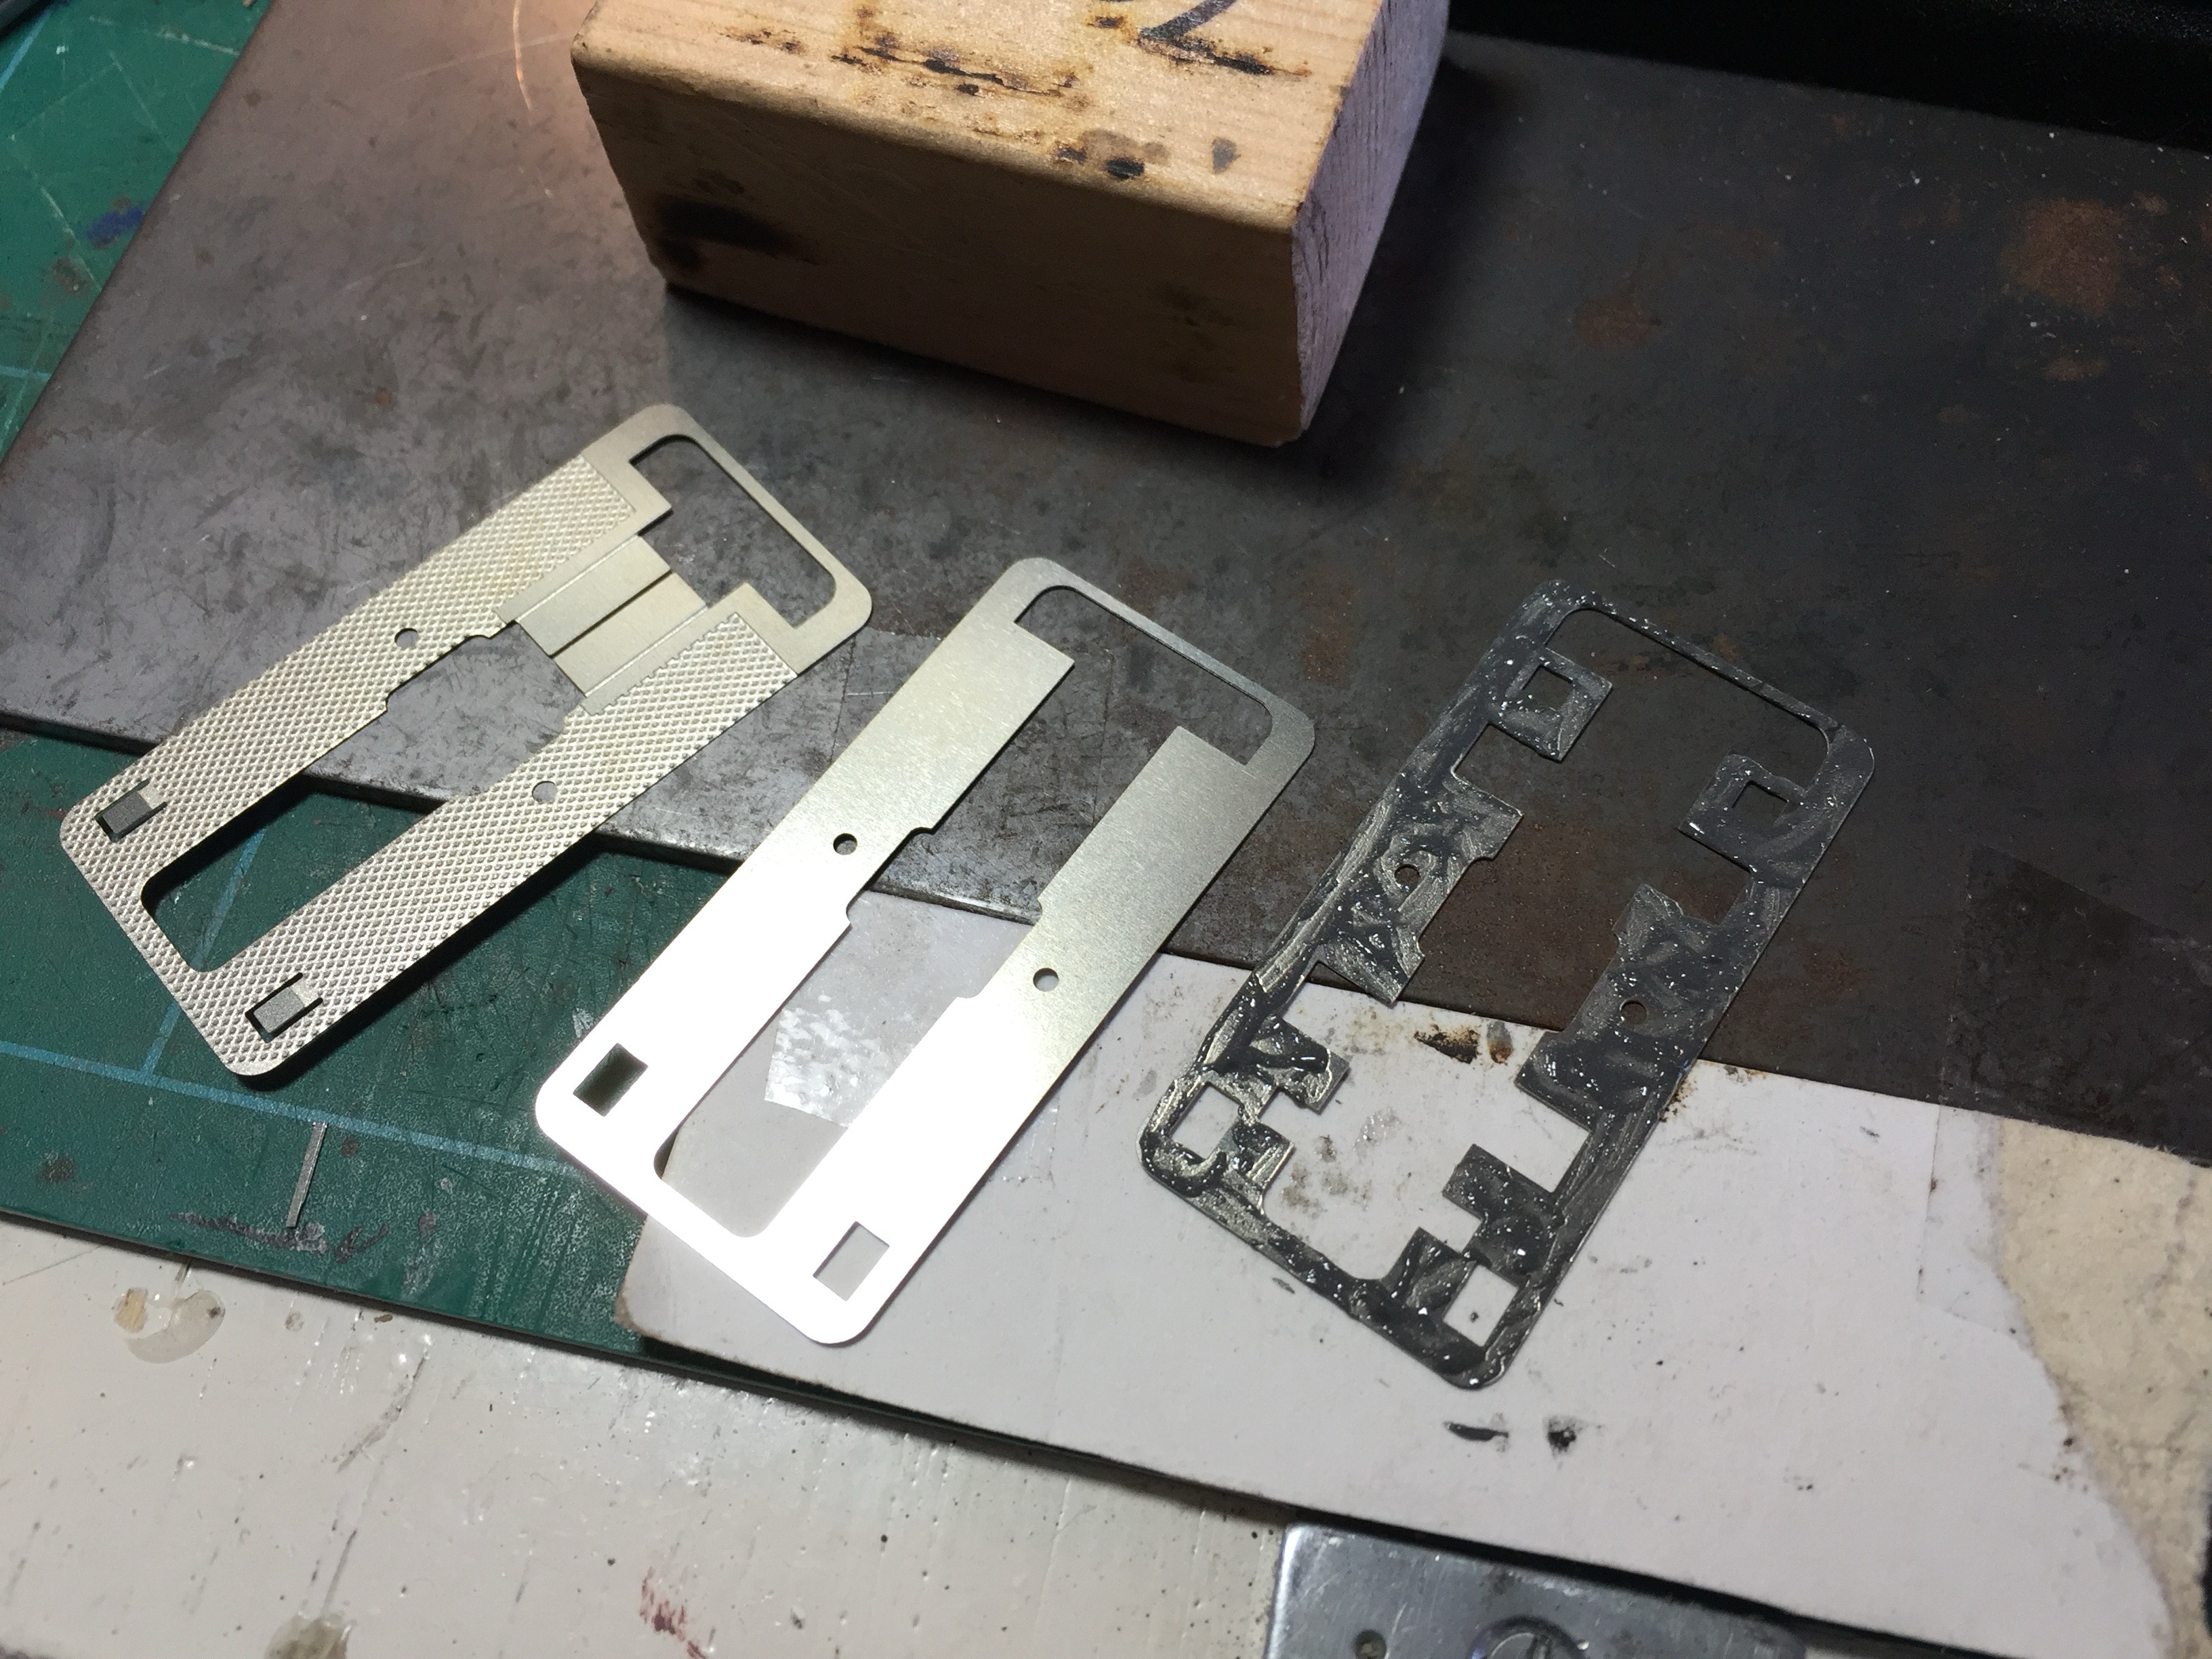
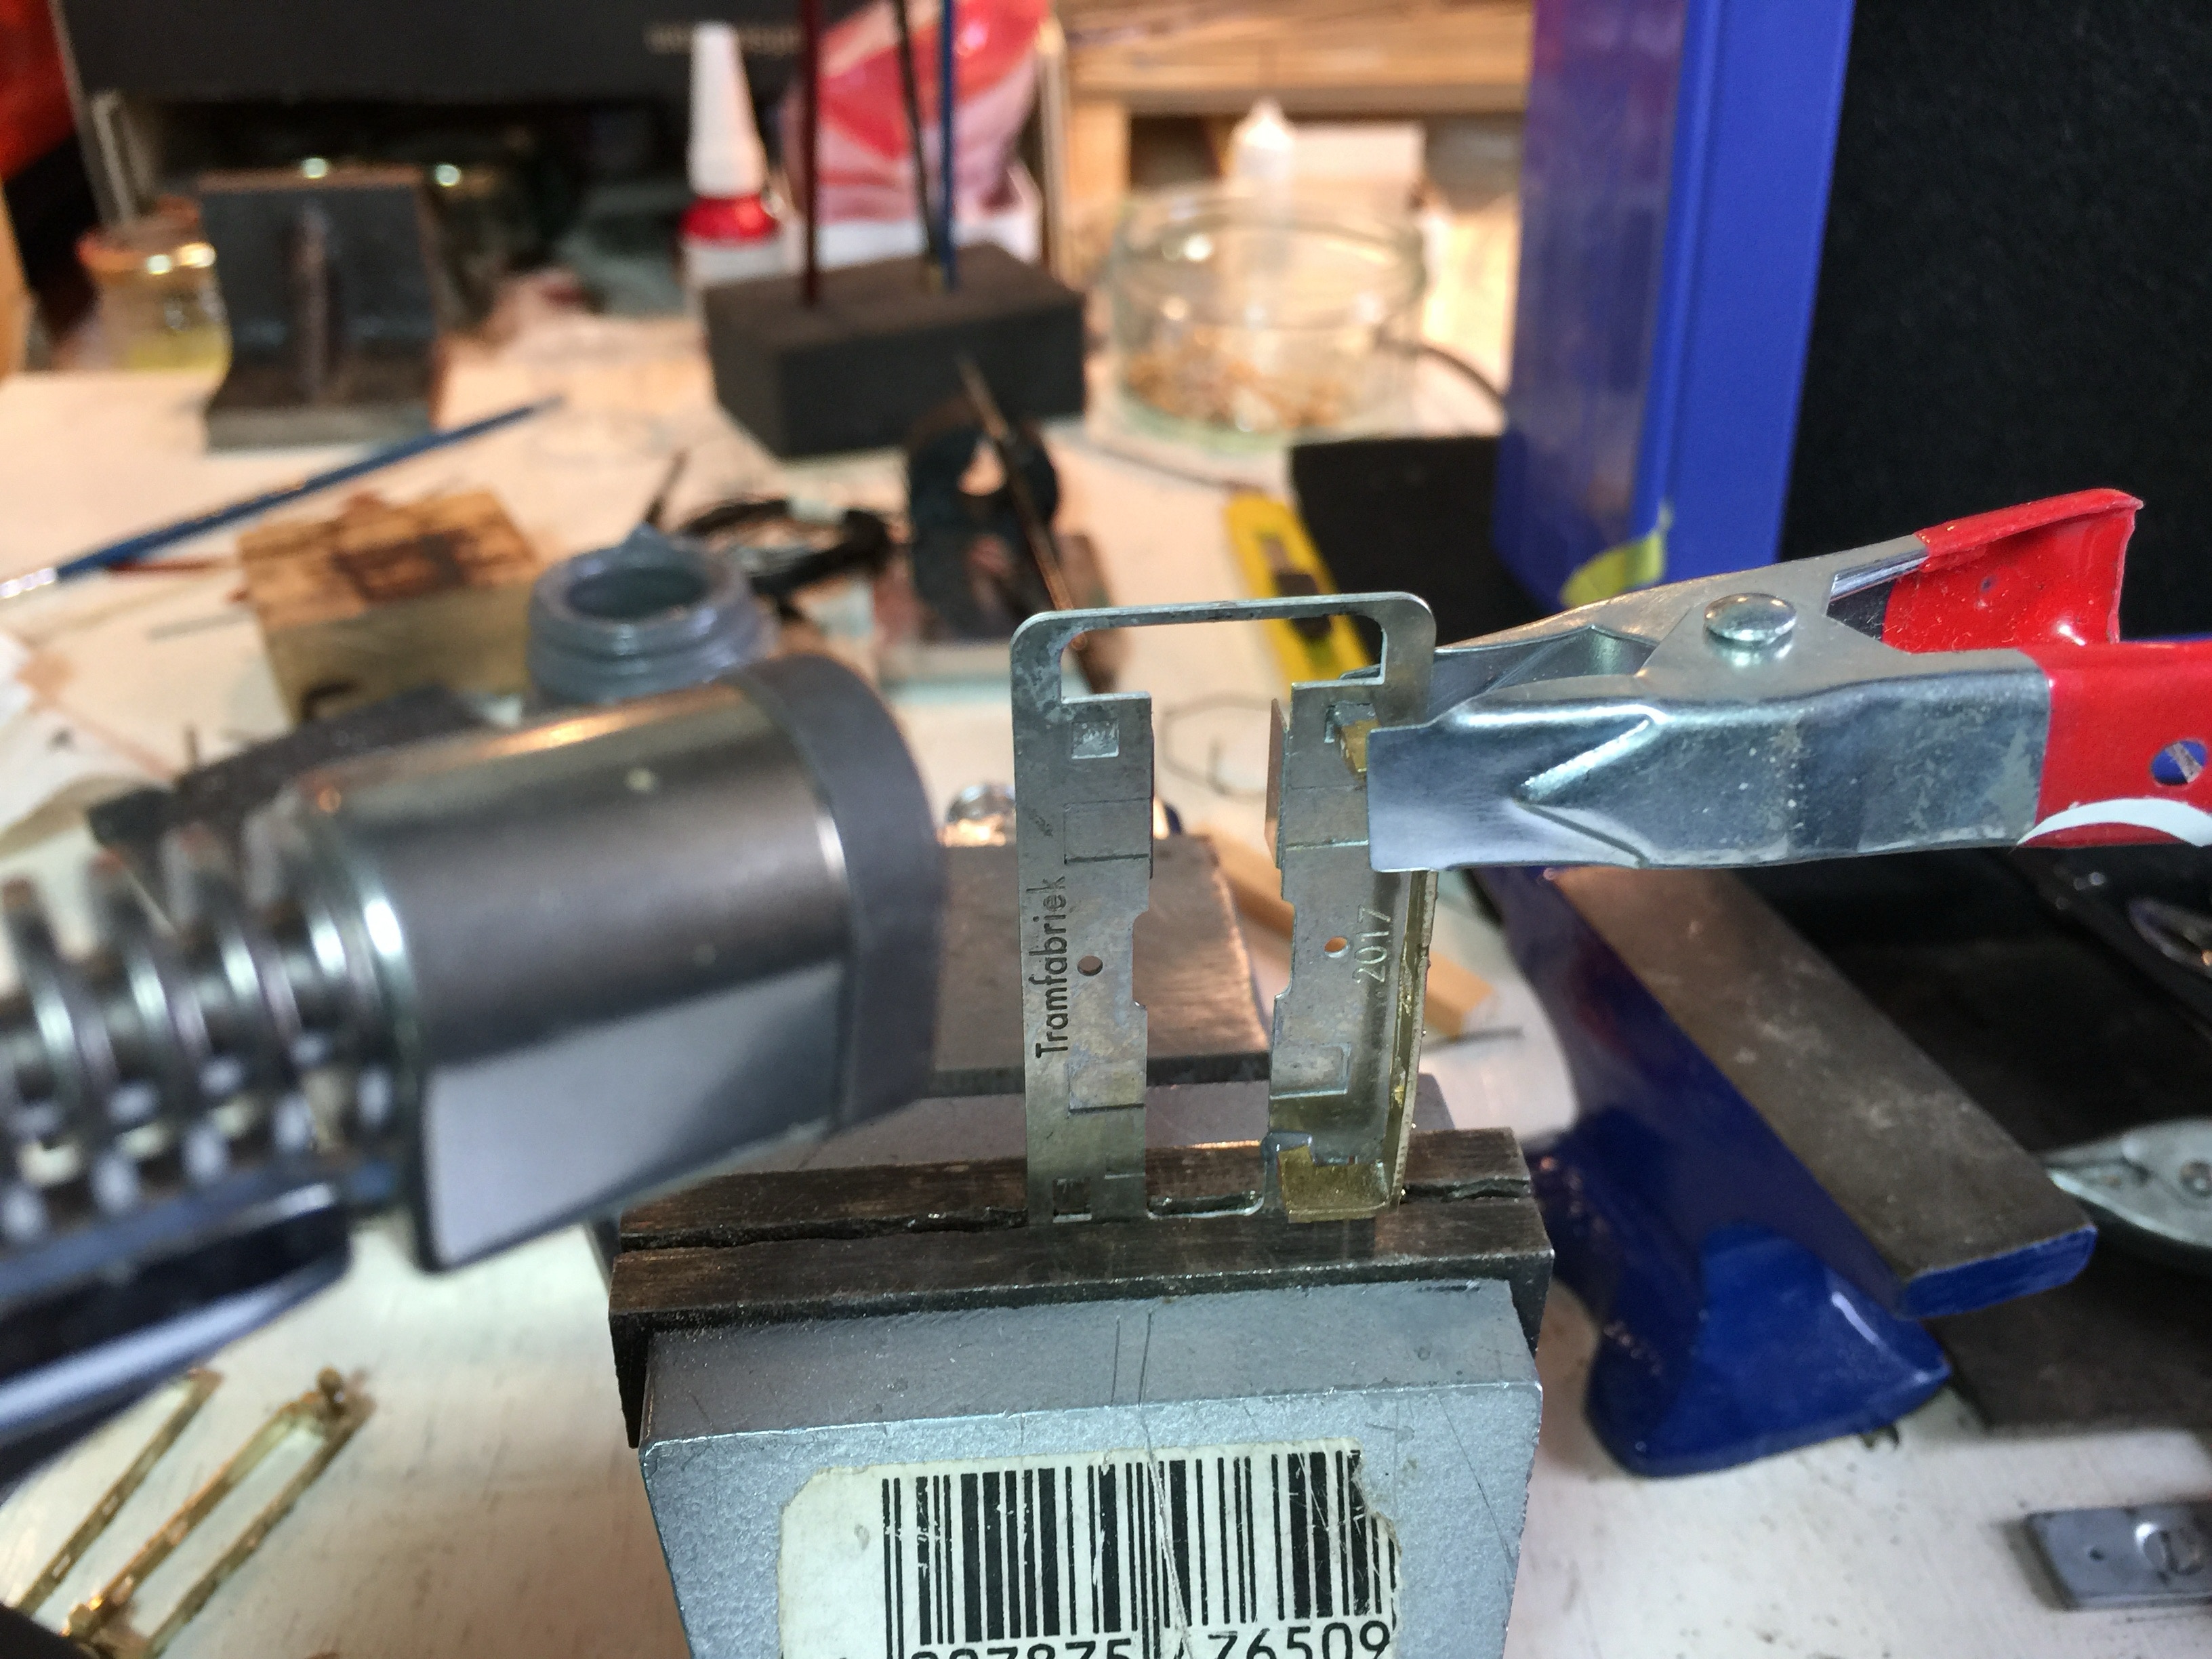
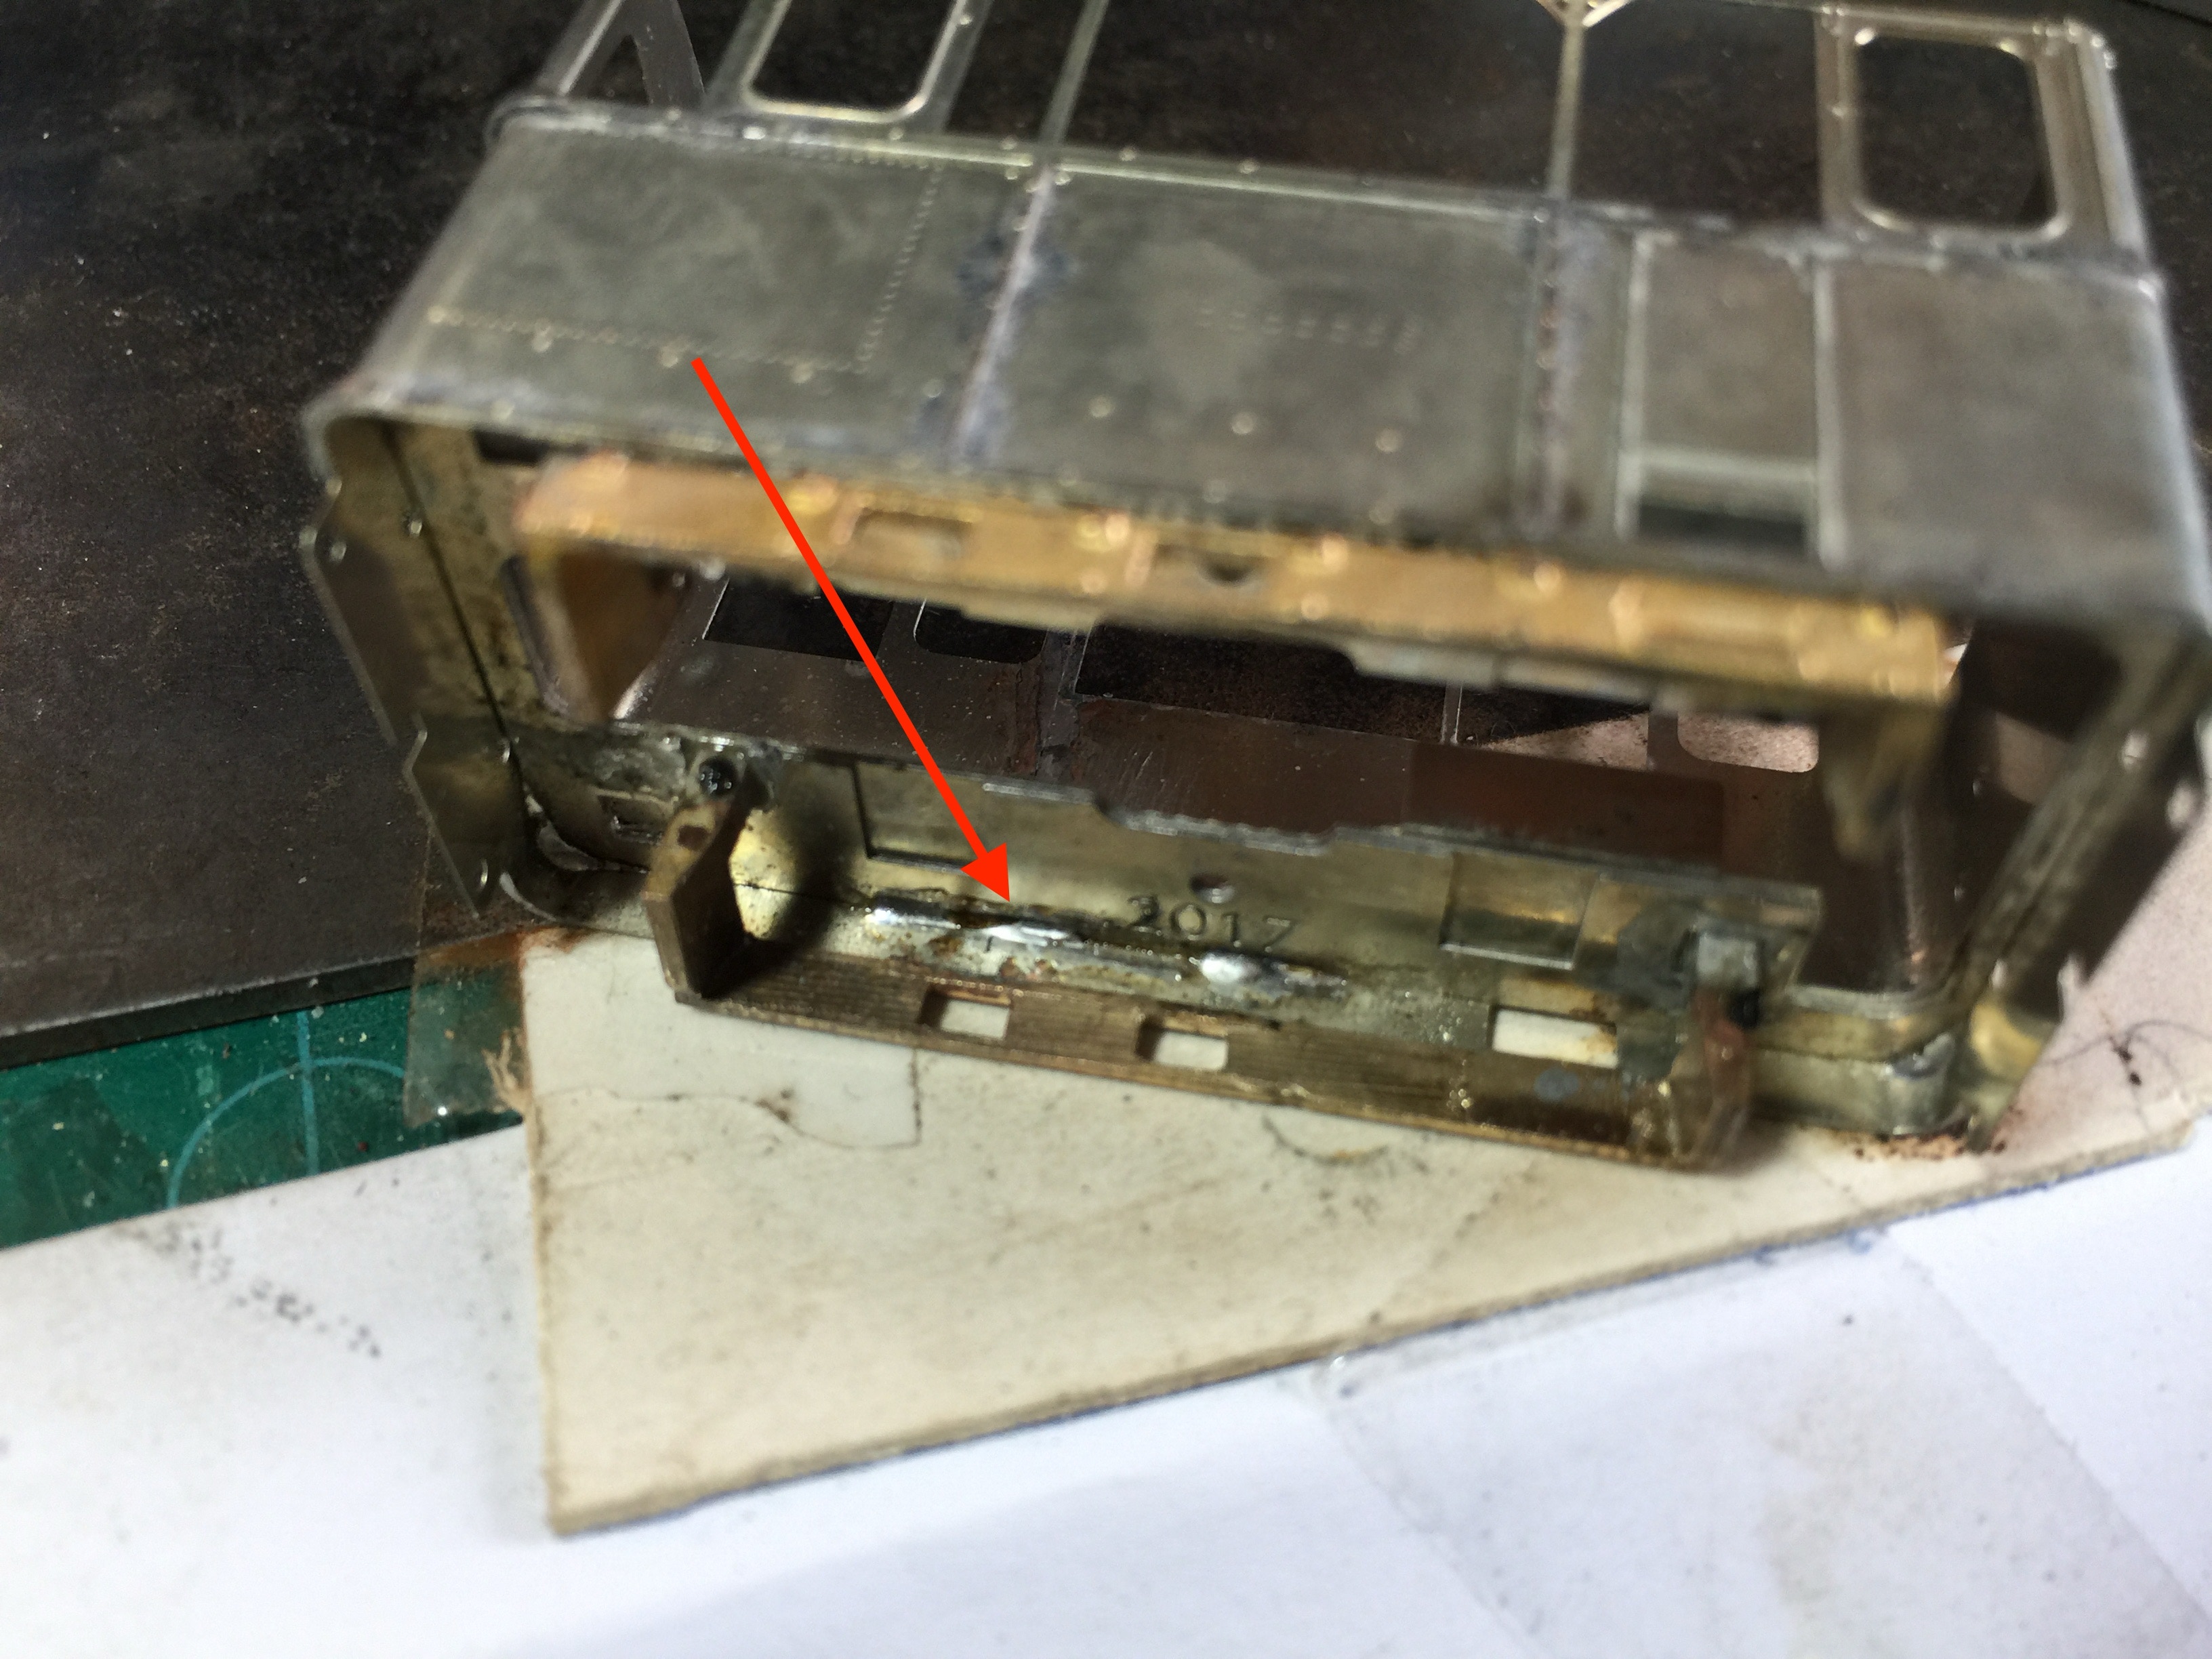
Bodemplaat bestaat uit drie delen. Traanplaat (15) is bovenkant, met tekst ‘Tramfabriek 2017’ (13) is onderkant. Het middenstuk (14) is gelijk aan beide zijden, maar het schroefgaten zijn voorbewerkt voor de schroef.
Remove the remains of the solder with a fibreglass pencil. You can put a piece of wood in the box, so you can apply more pressure.
Very important to use thick gloves, a mouth+nose mask and eye protection. I do the work in a box and in the garden. This is vicious stuff.
Bottom plate consists of three parts. Top part (15) has a relief, part with Tramfabriek 2017 (13) is bottom part. The middle part (14) is equal on both sides, but I have pre-drilled the screw hole with a tapping tool.
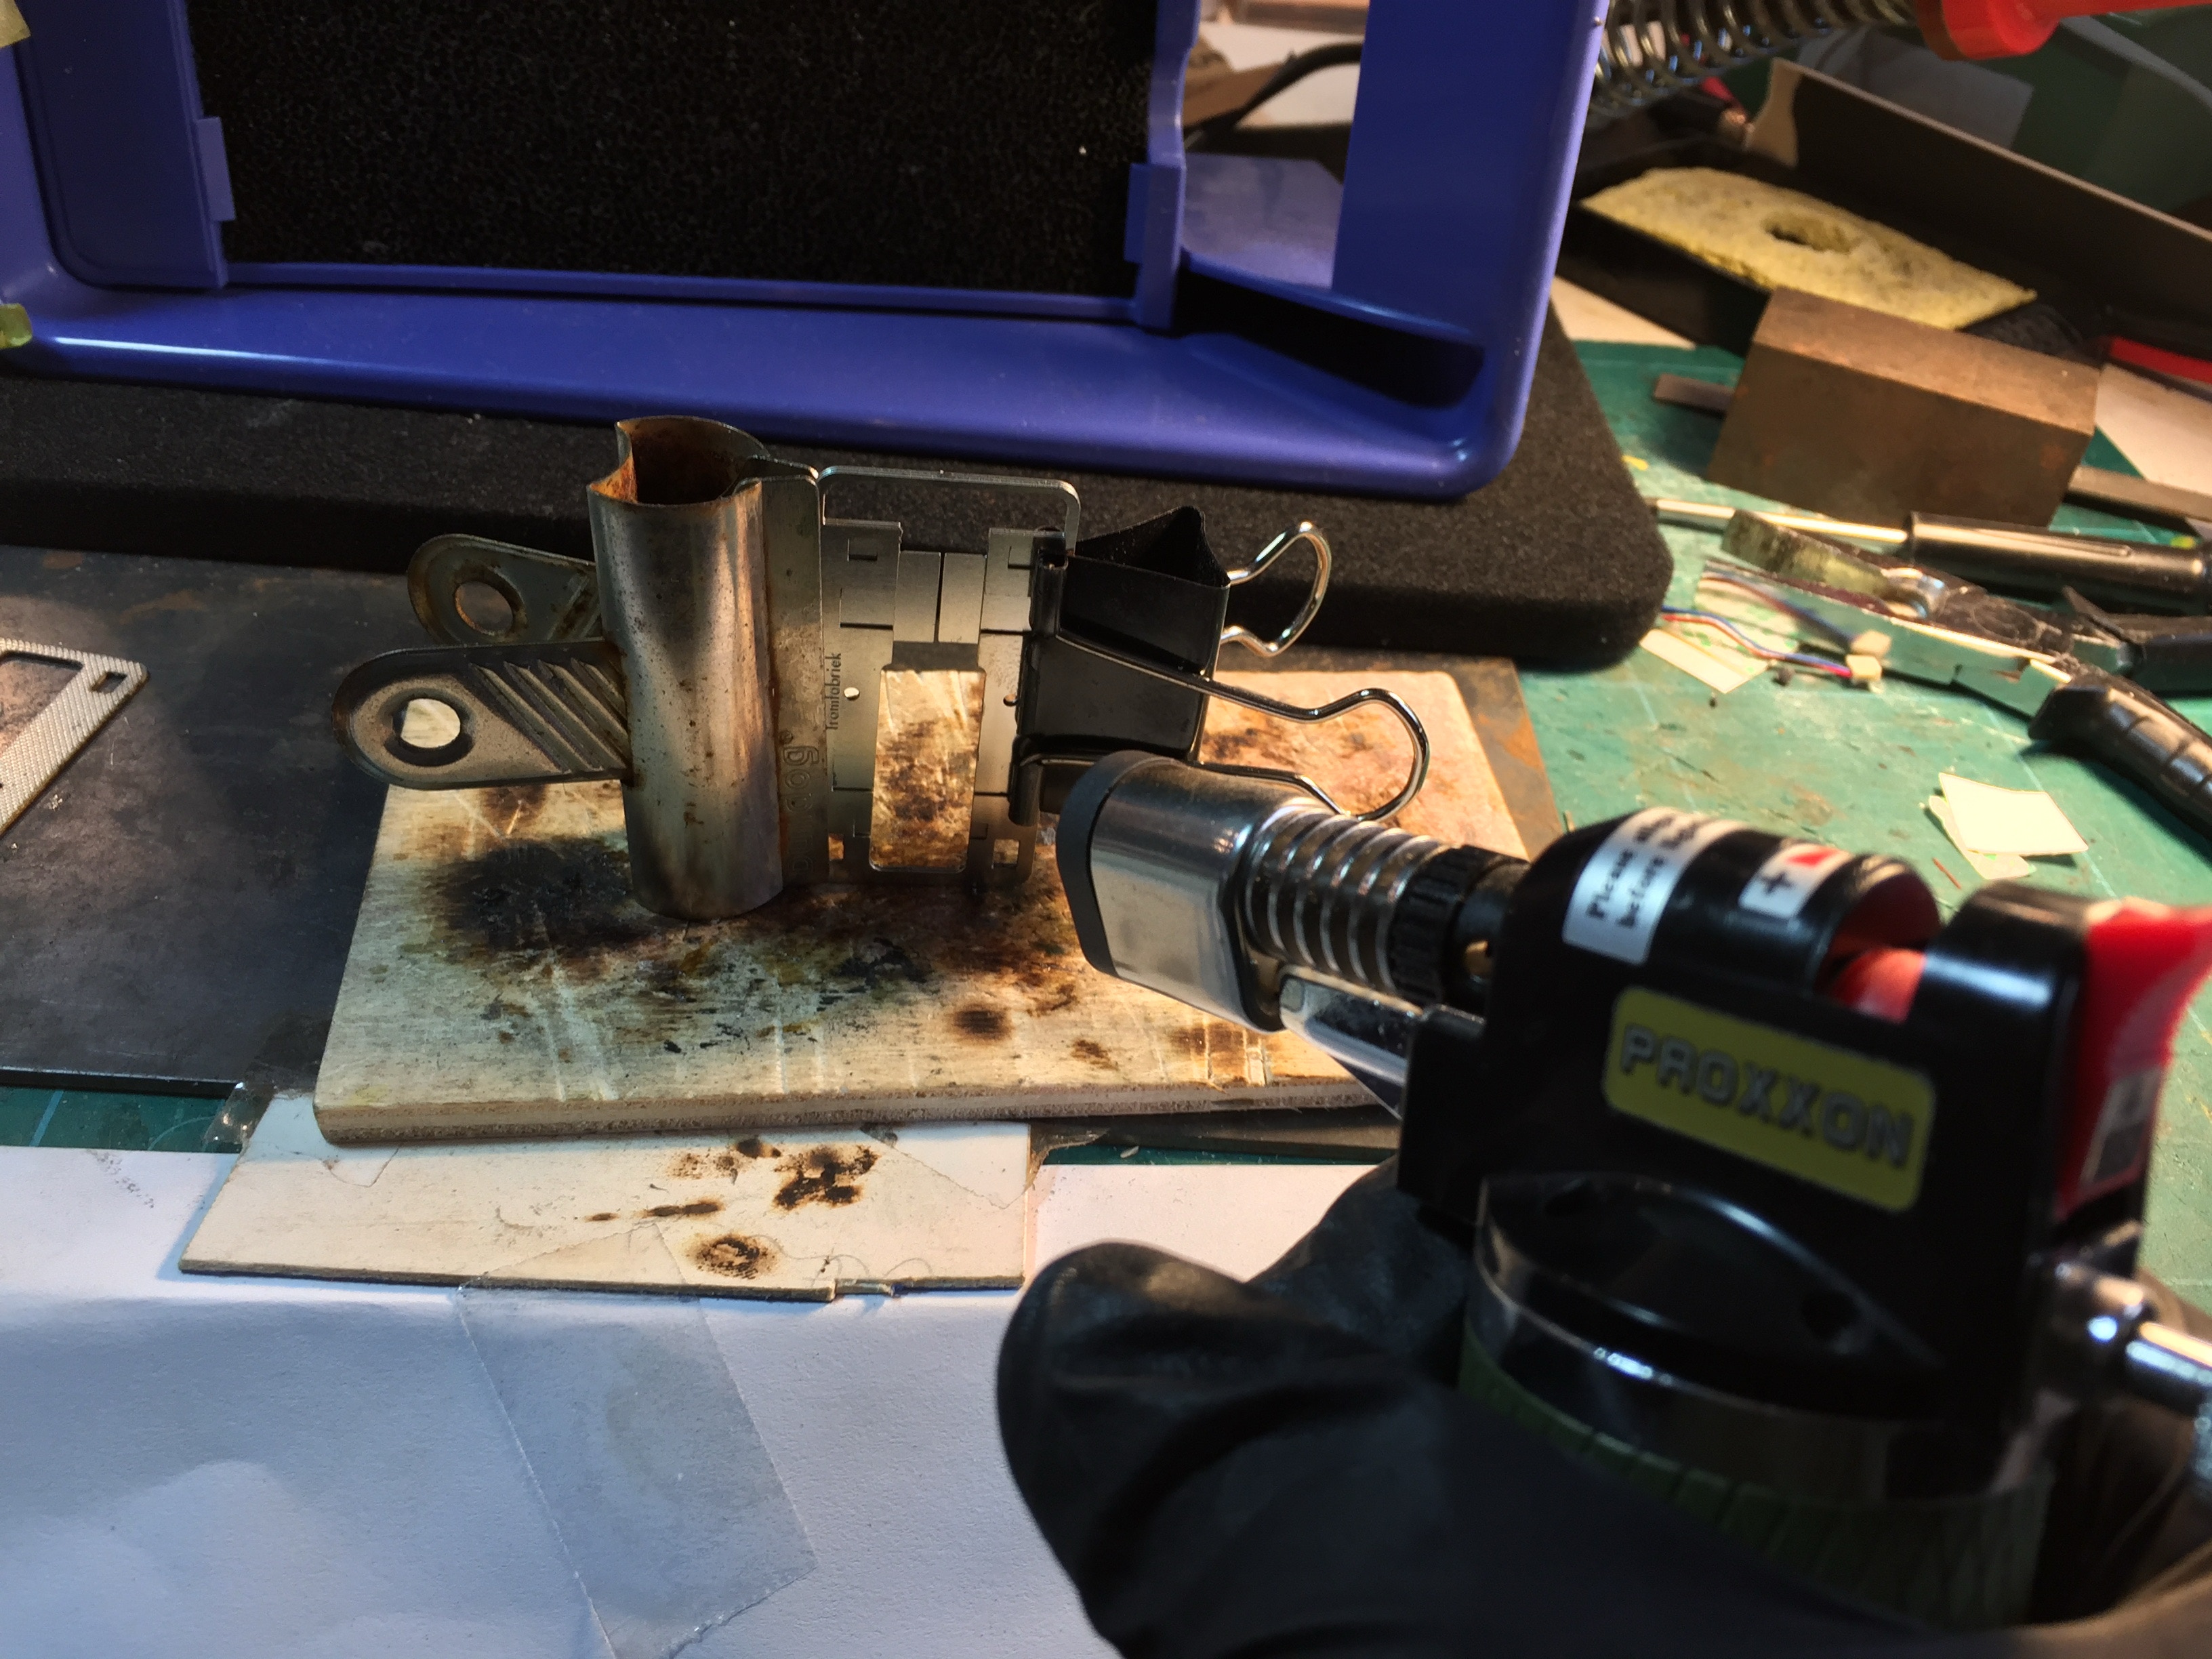
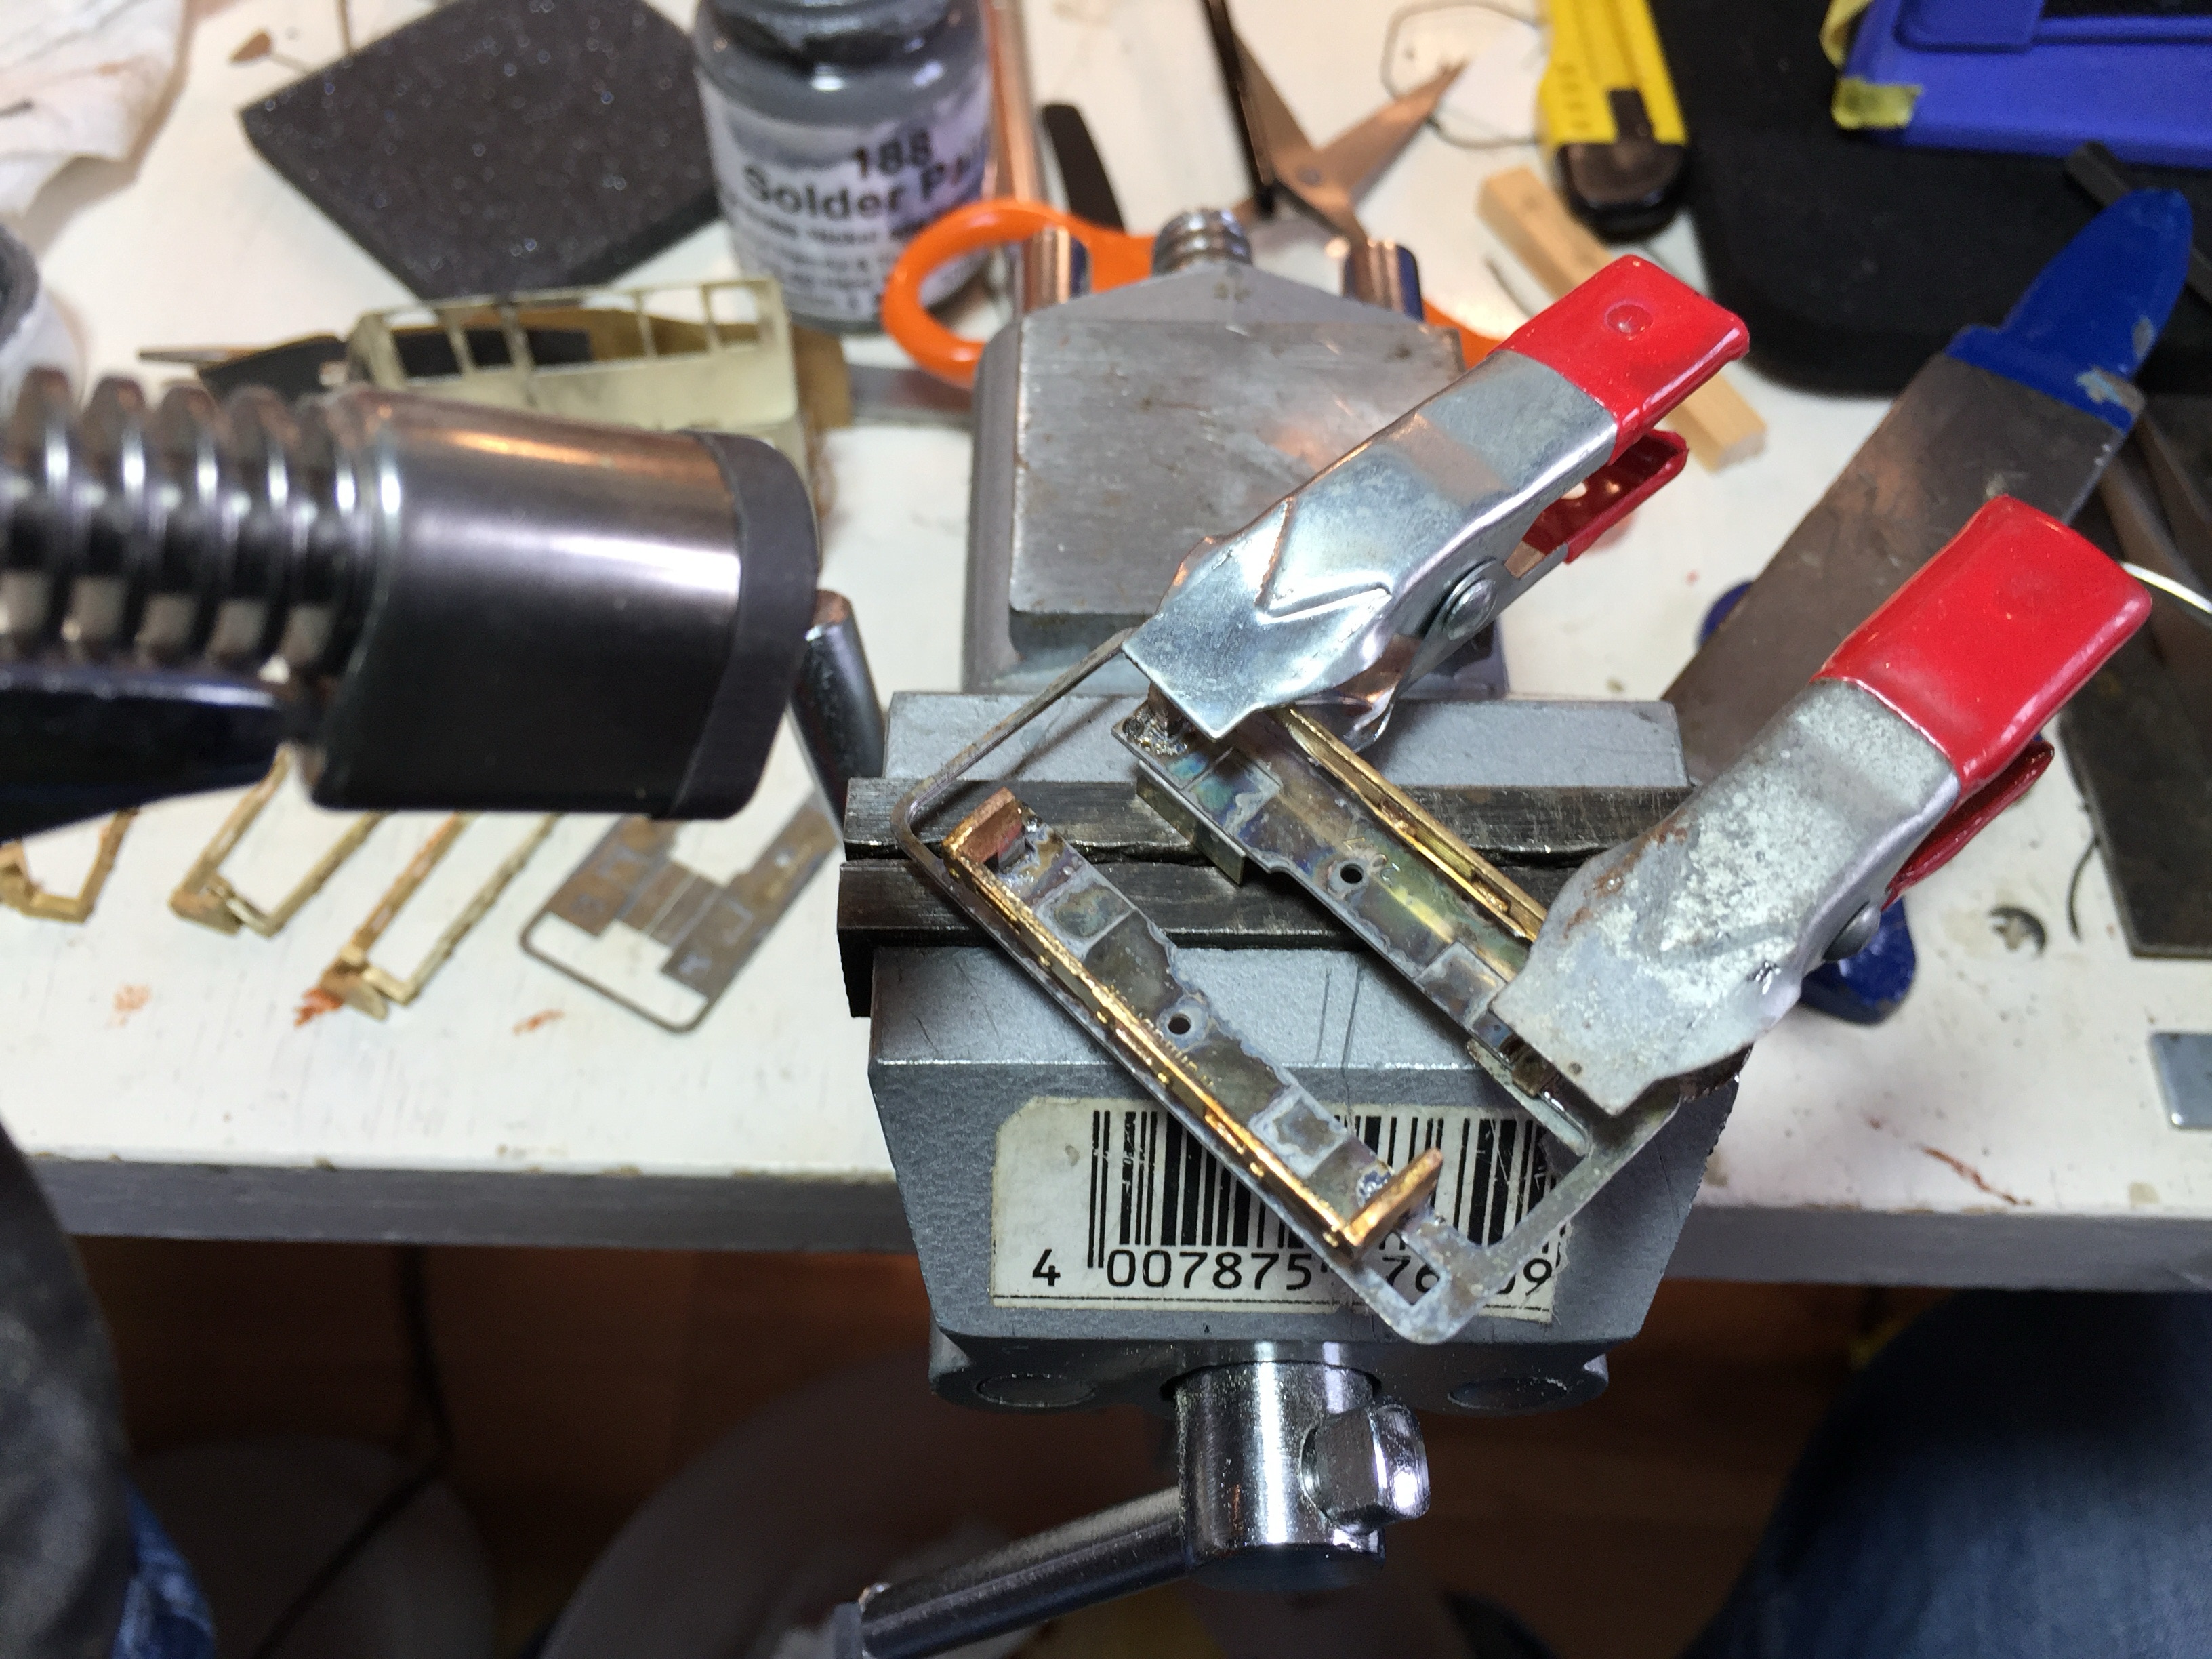
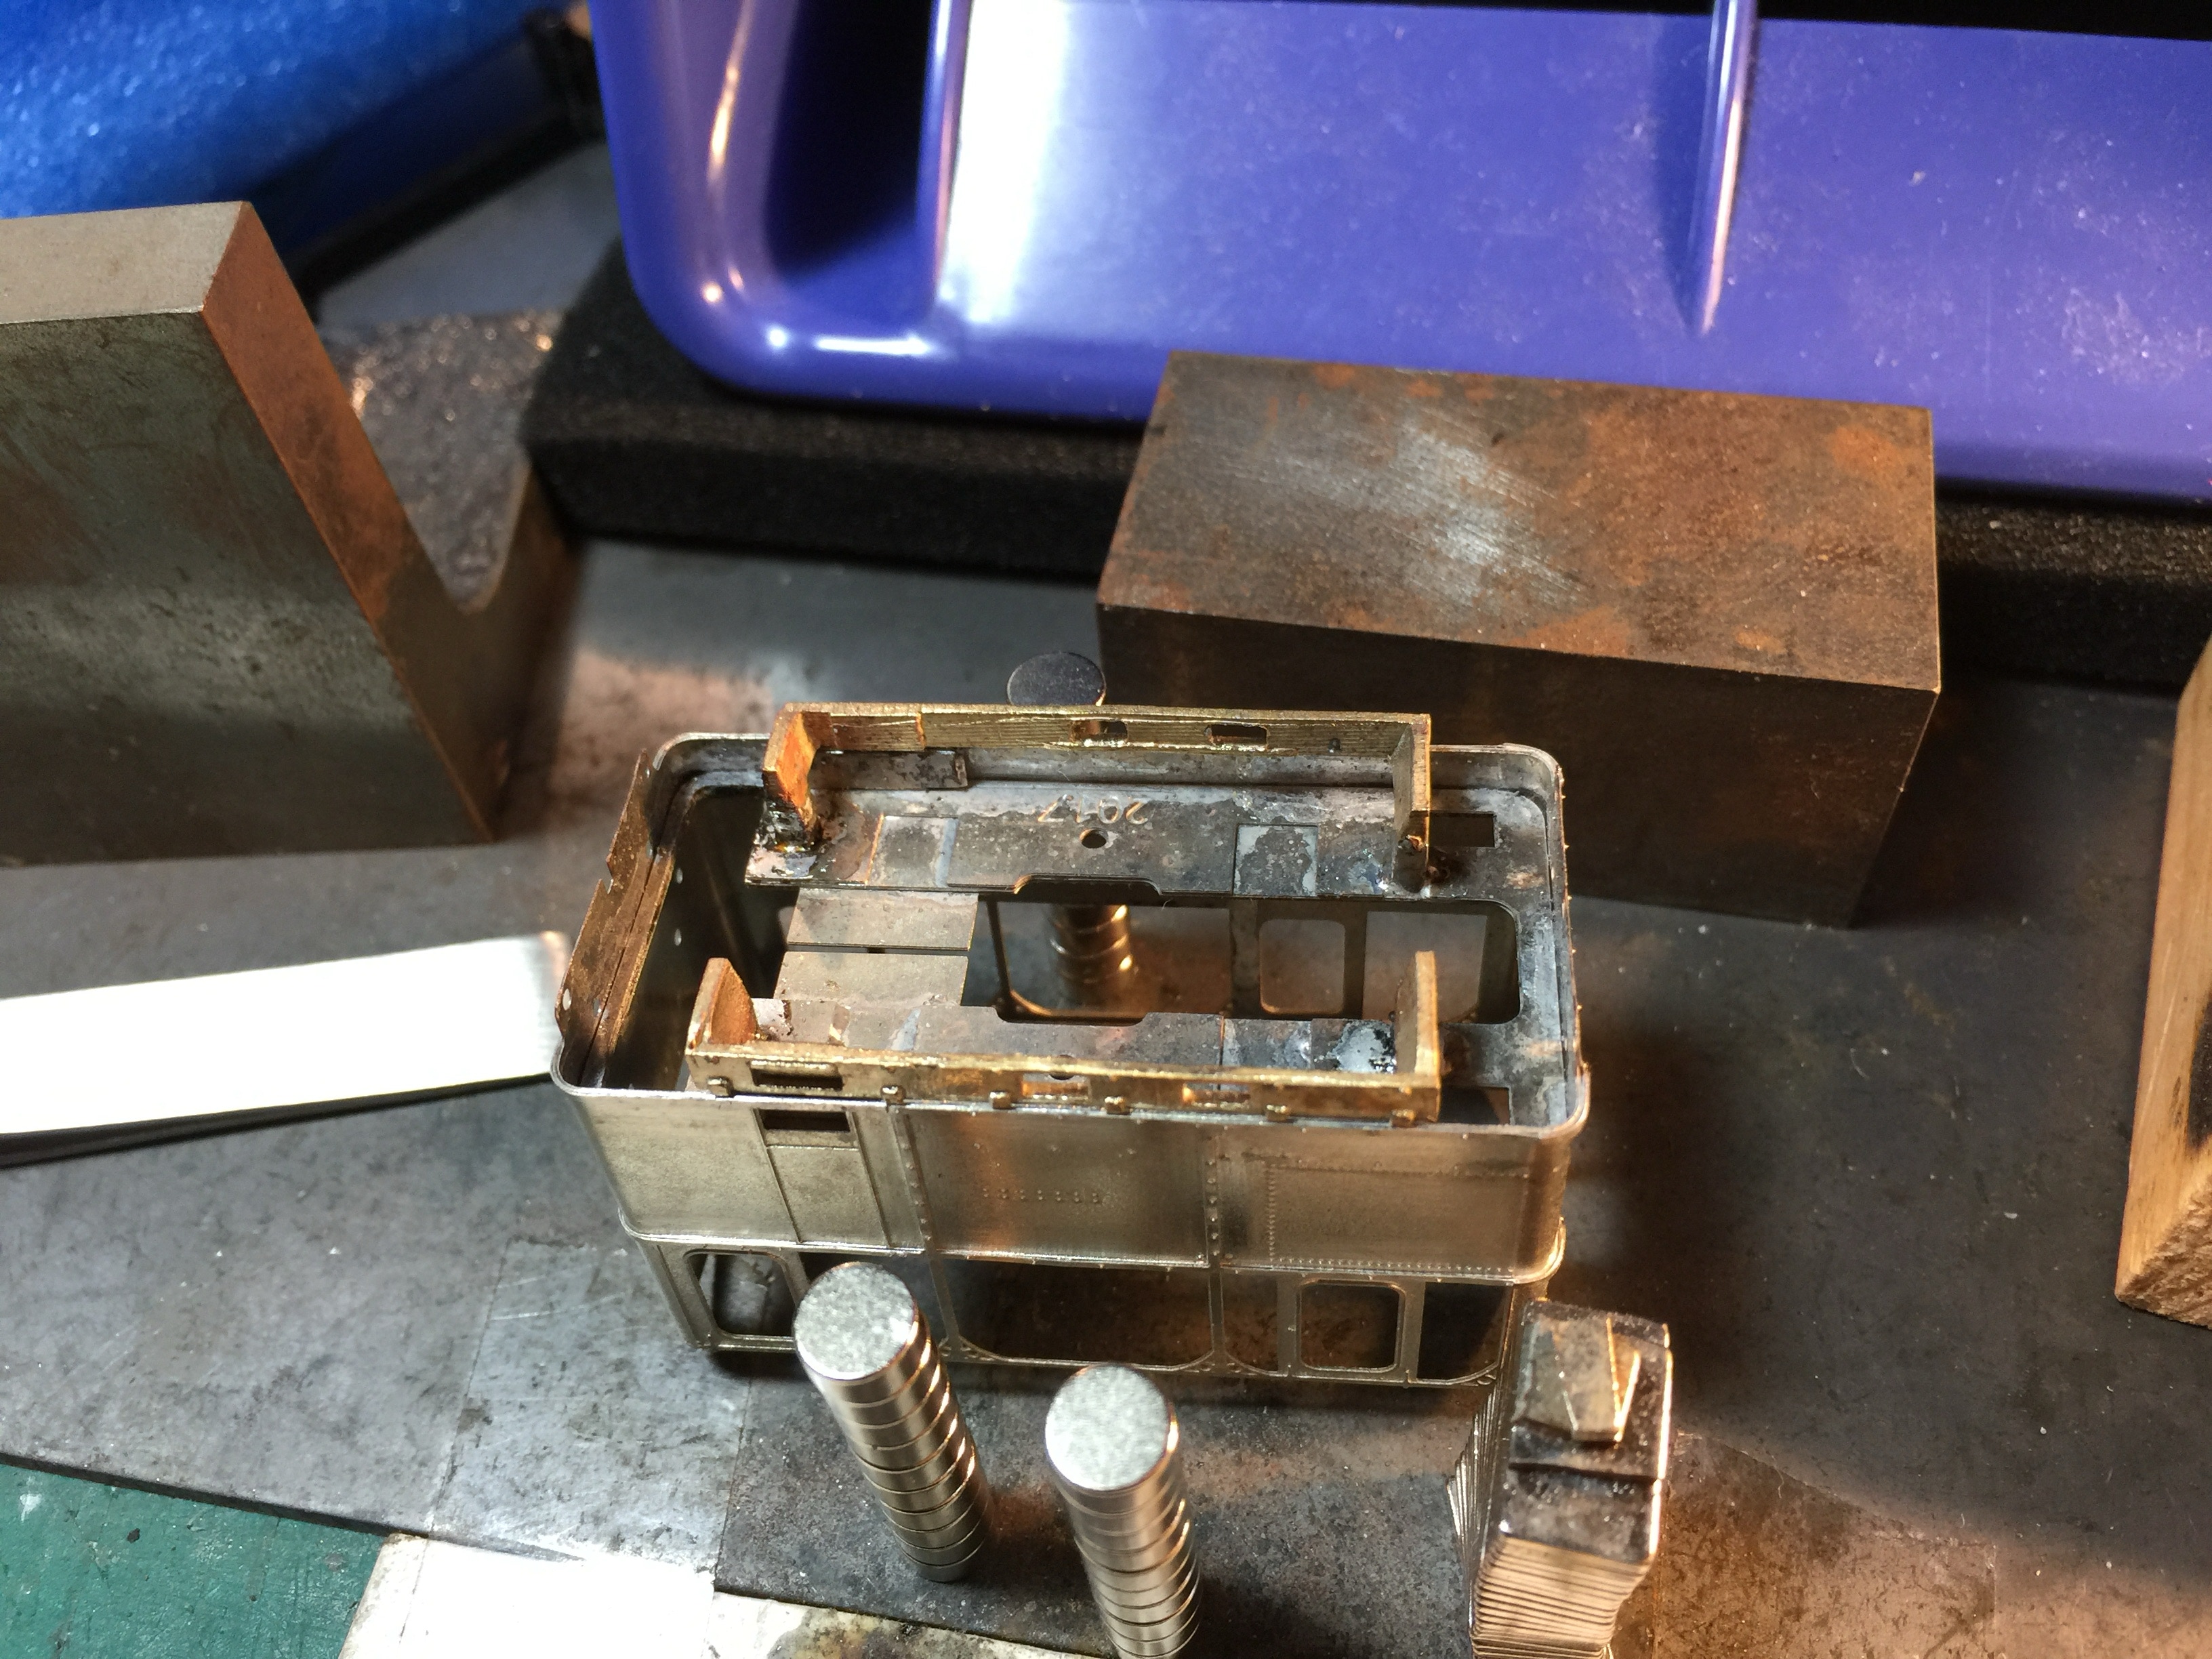
Ik smeer zelf alle lagen in met soldeerpasta, zet ze in een klem en zet de vlam van mijn Proxxon brander erop. Na een paar seconden begint het te pruttelen, dan is het klaar.

I apply soldering paste to one plate, then hold them together with clamps and use a Proxxon torch to melt the paste. When it start sizzling after a few seconds it’s done.
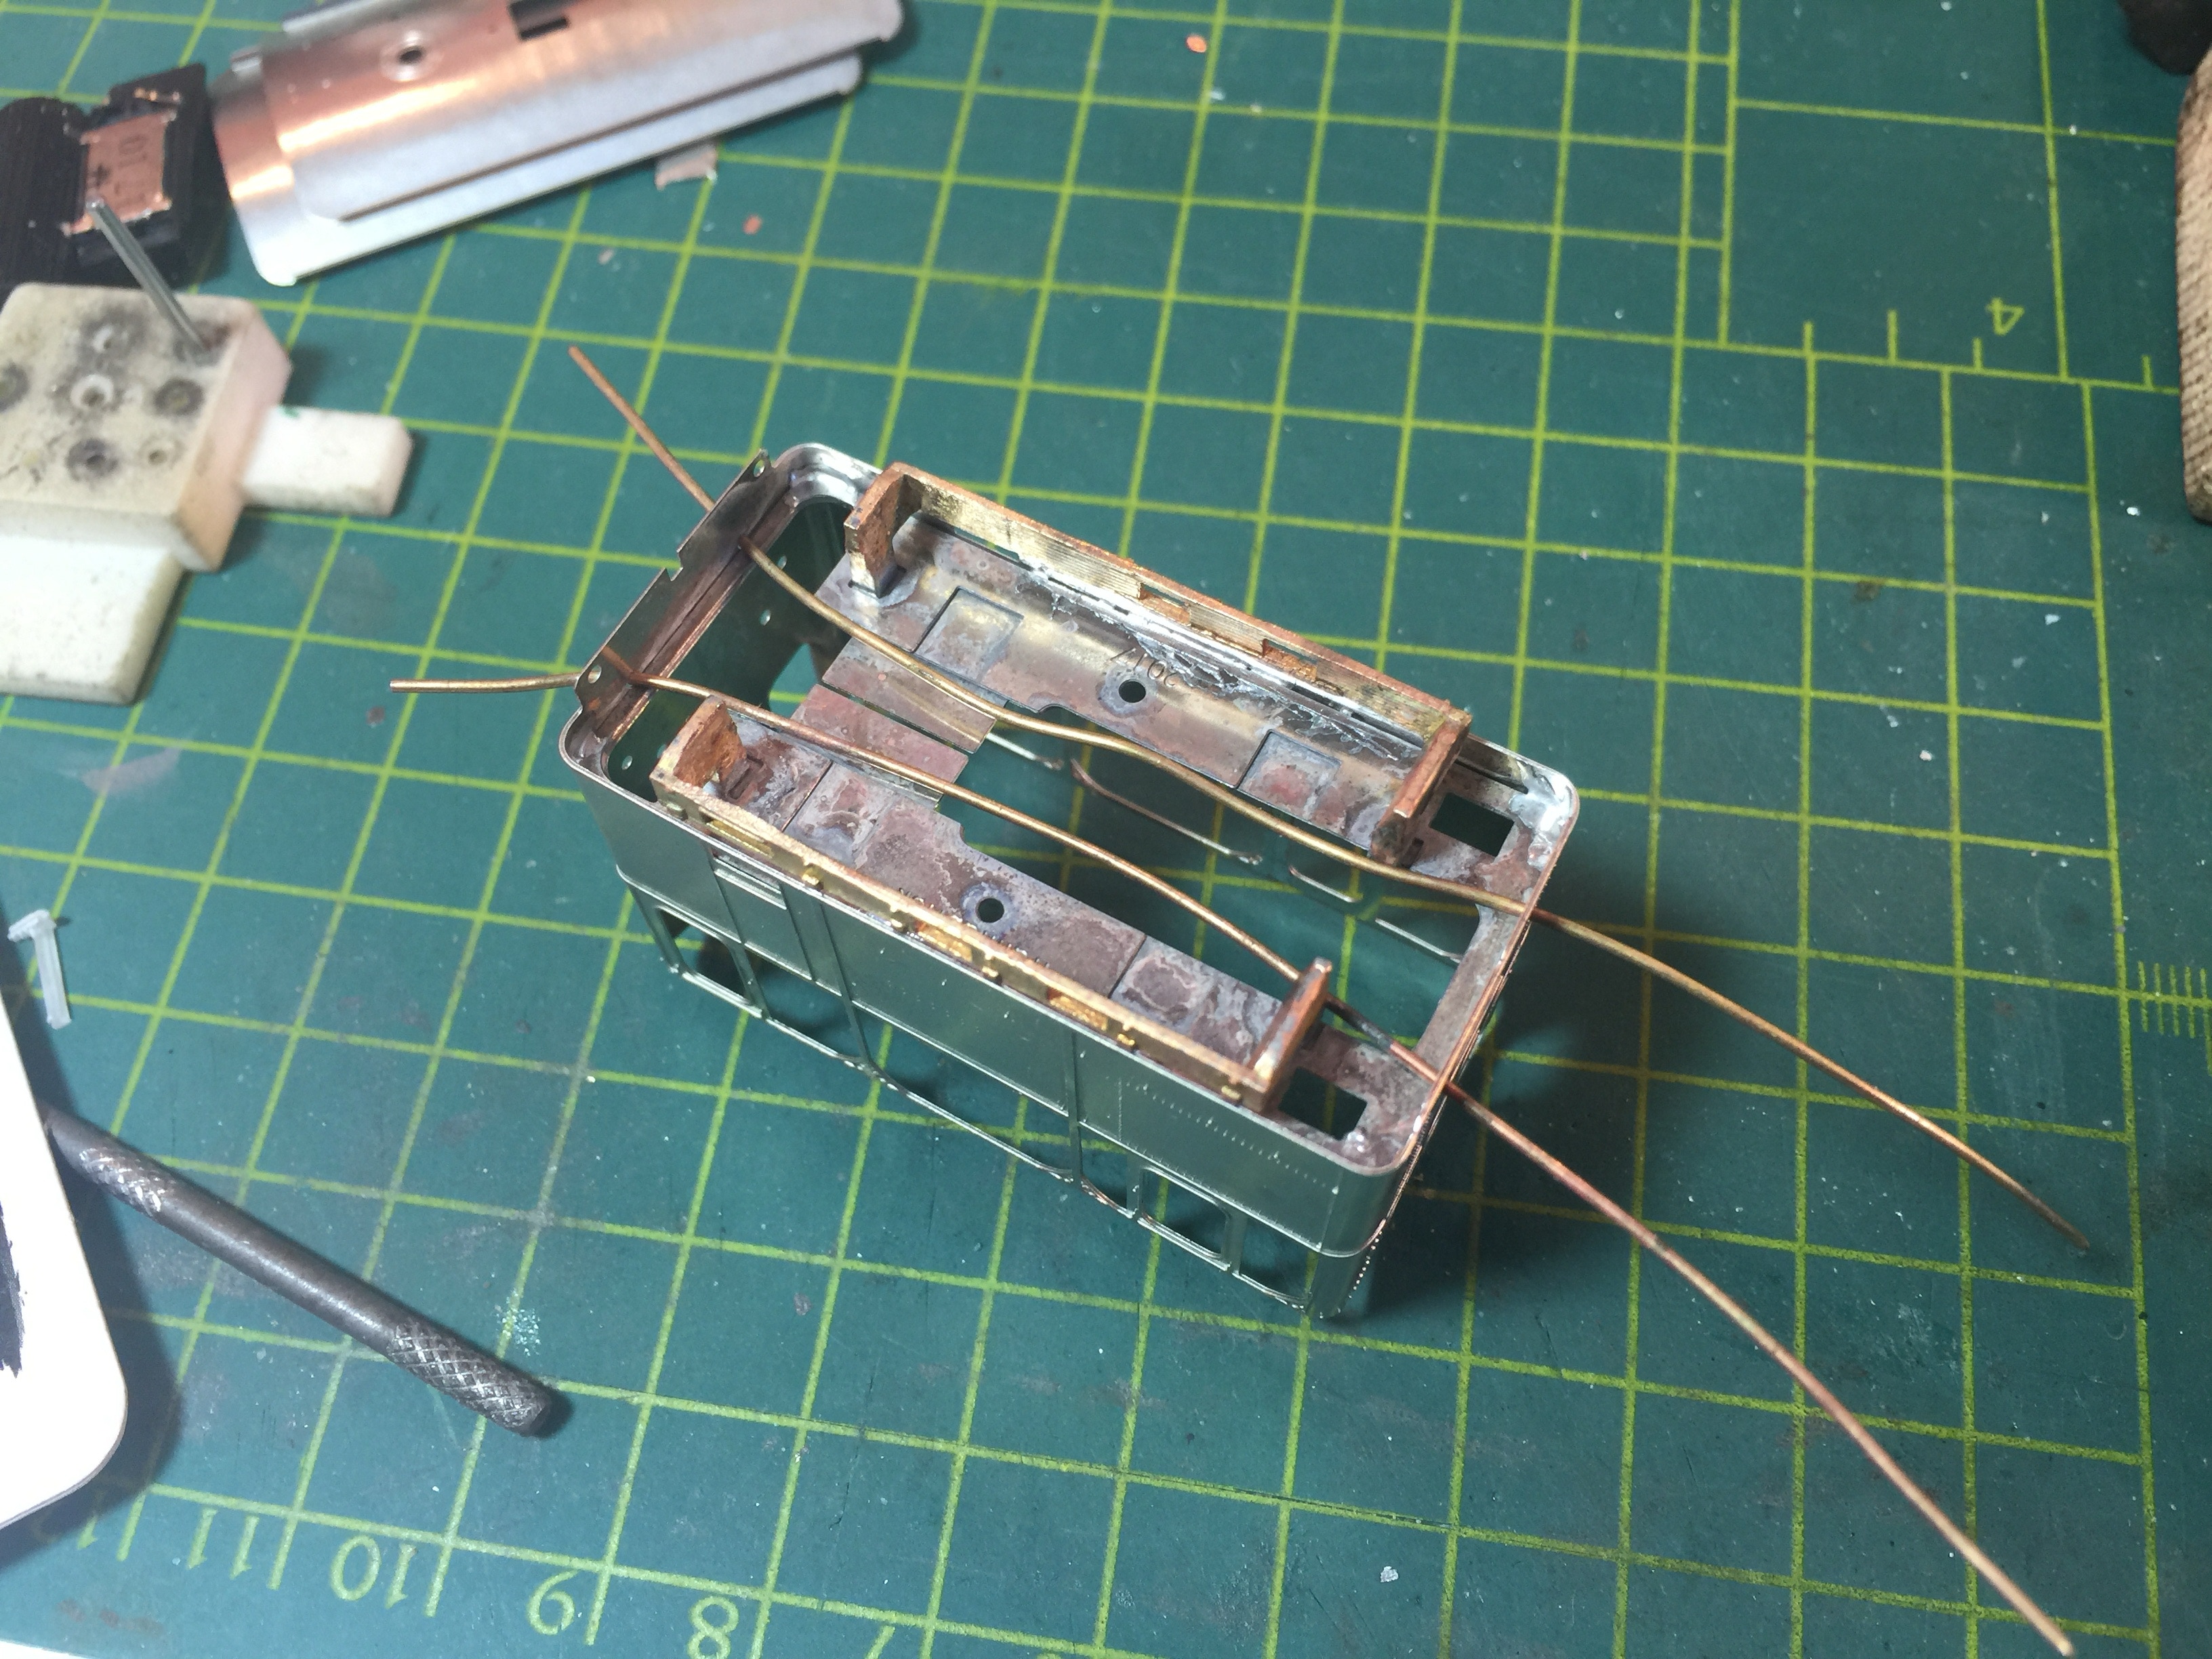
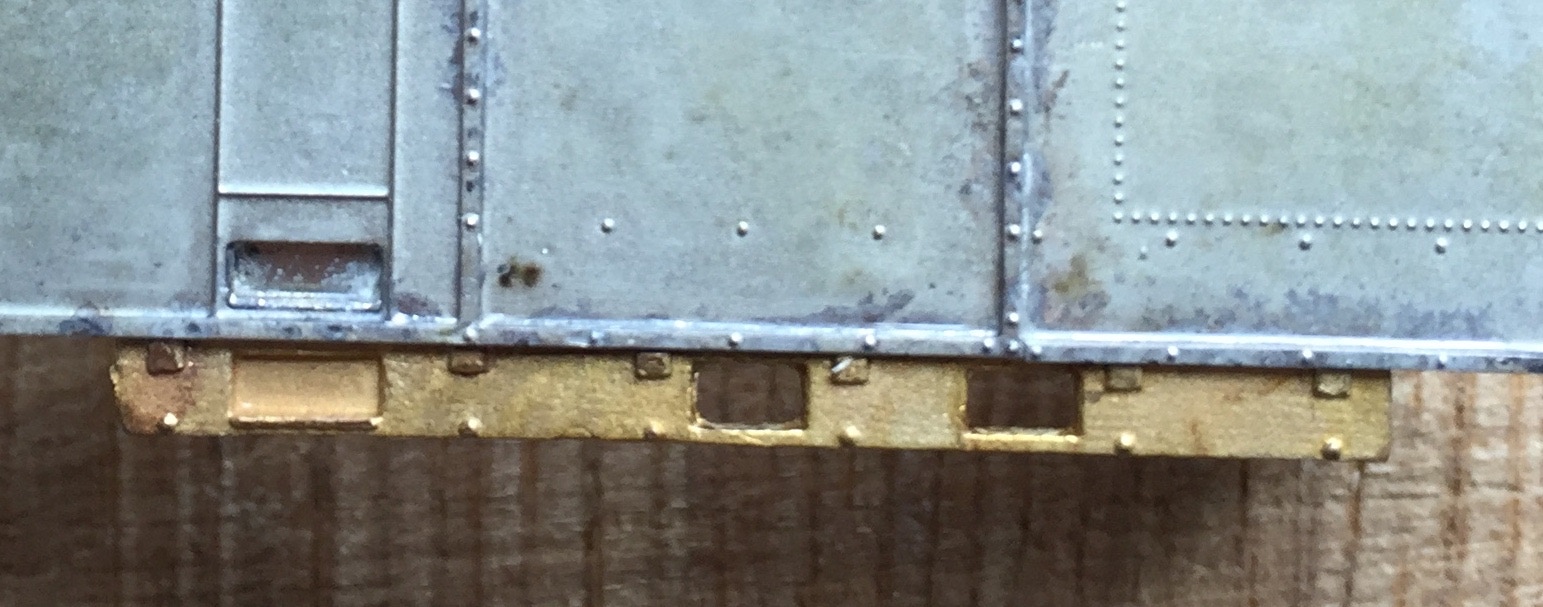
De allereerste bestellingen hebben een zwarte mal gekregen om om de juiste hoogte van de bodemplaat af te stellen. Maar die heb je eigenlijk niet meer nodig. Ik kreeg de tip van Ronald Urbanus om de schorten eerst op de bodemplaat te solderen, voordat je de bodem vastzet aan de kast. Zo zullen de schorten altijd goed aansluiten op de kast, zonder veel moeite. De hoogte van de vierkante pinnen van schorten zelf is perfect, die hoef je niet aan te passen. Om er zeker van te zijn dat de gaten voor de remslangen niet afgesloten worden door de bodemplaat, kun je een 0,8 mm (messing) draad door de voorzijde naar de achterkant steken. De bodemplaat steunt dan op de twee draden.
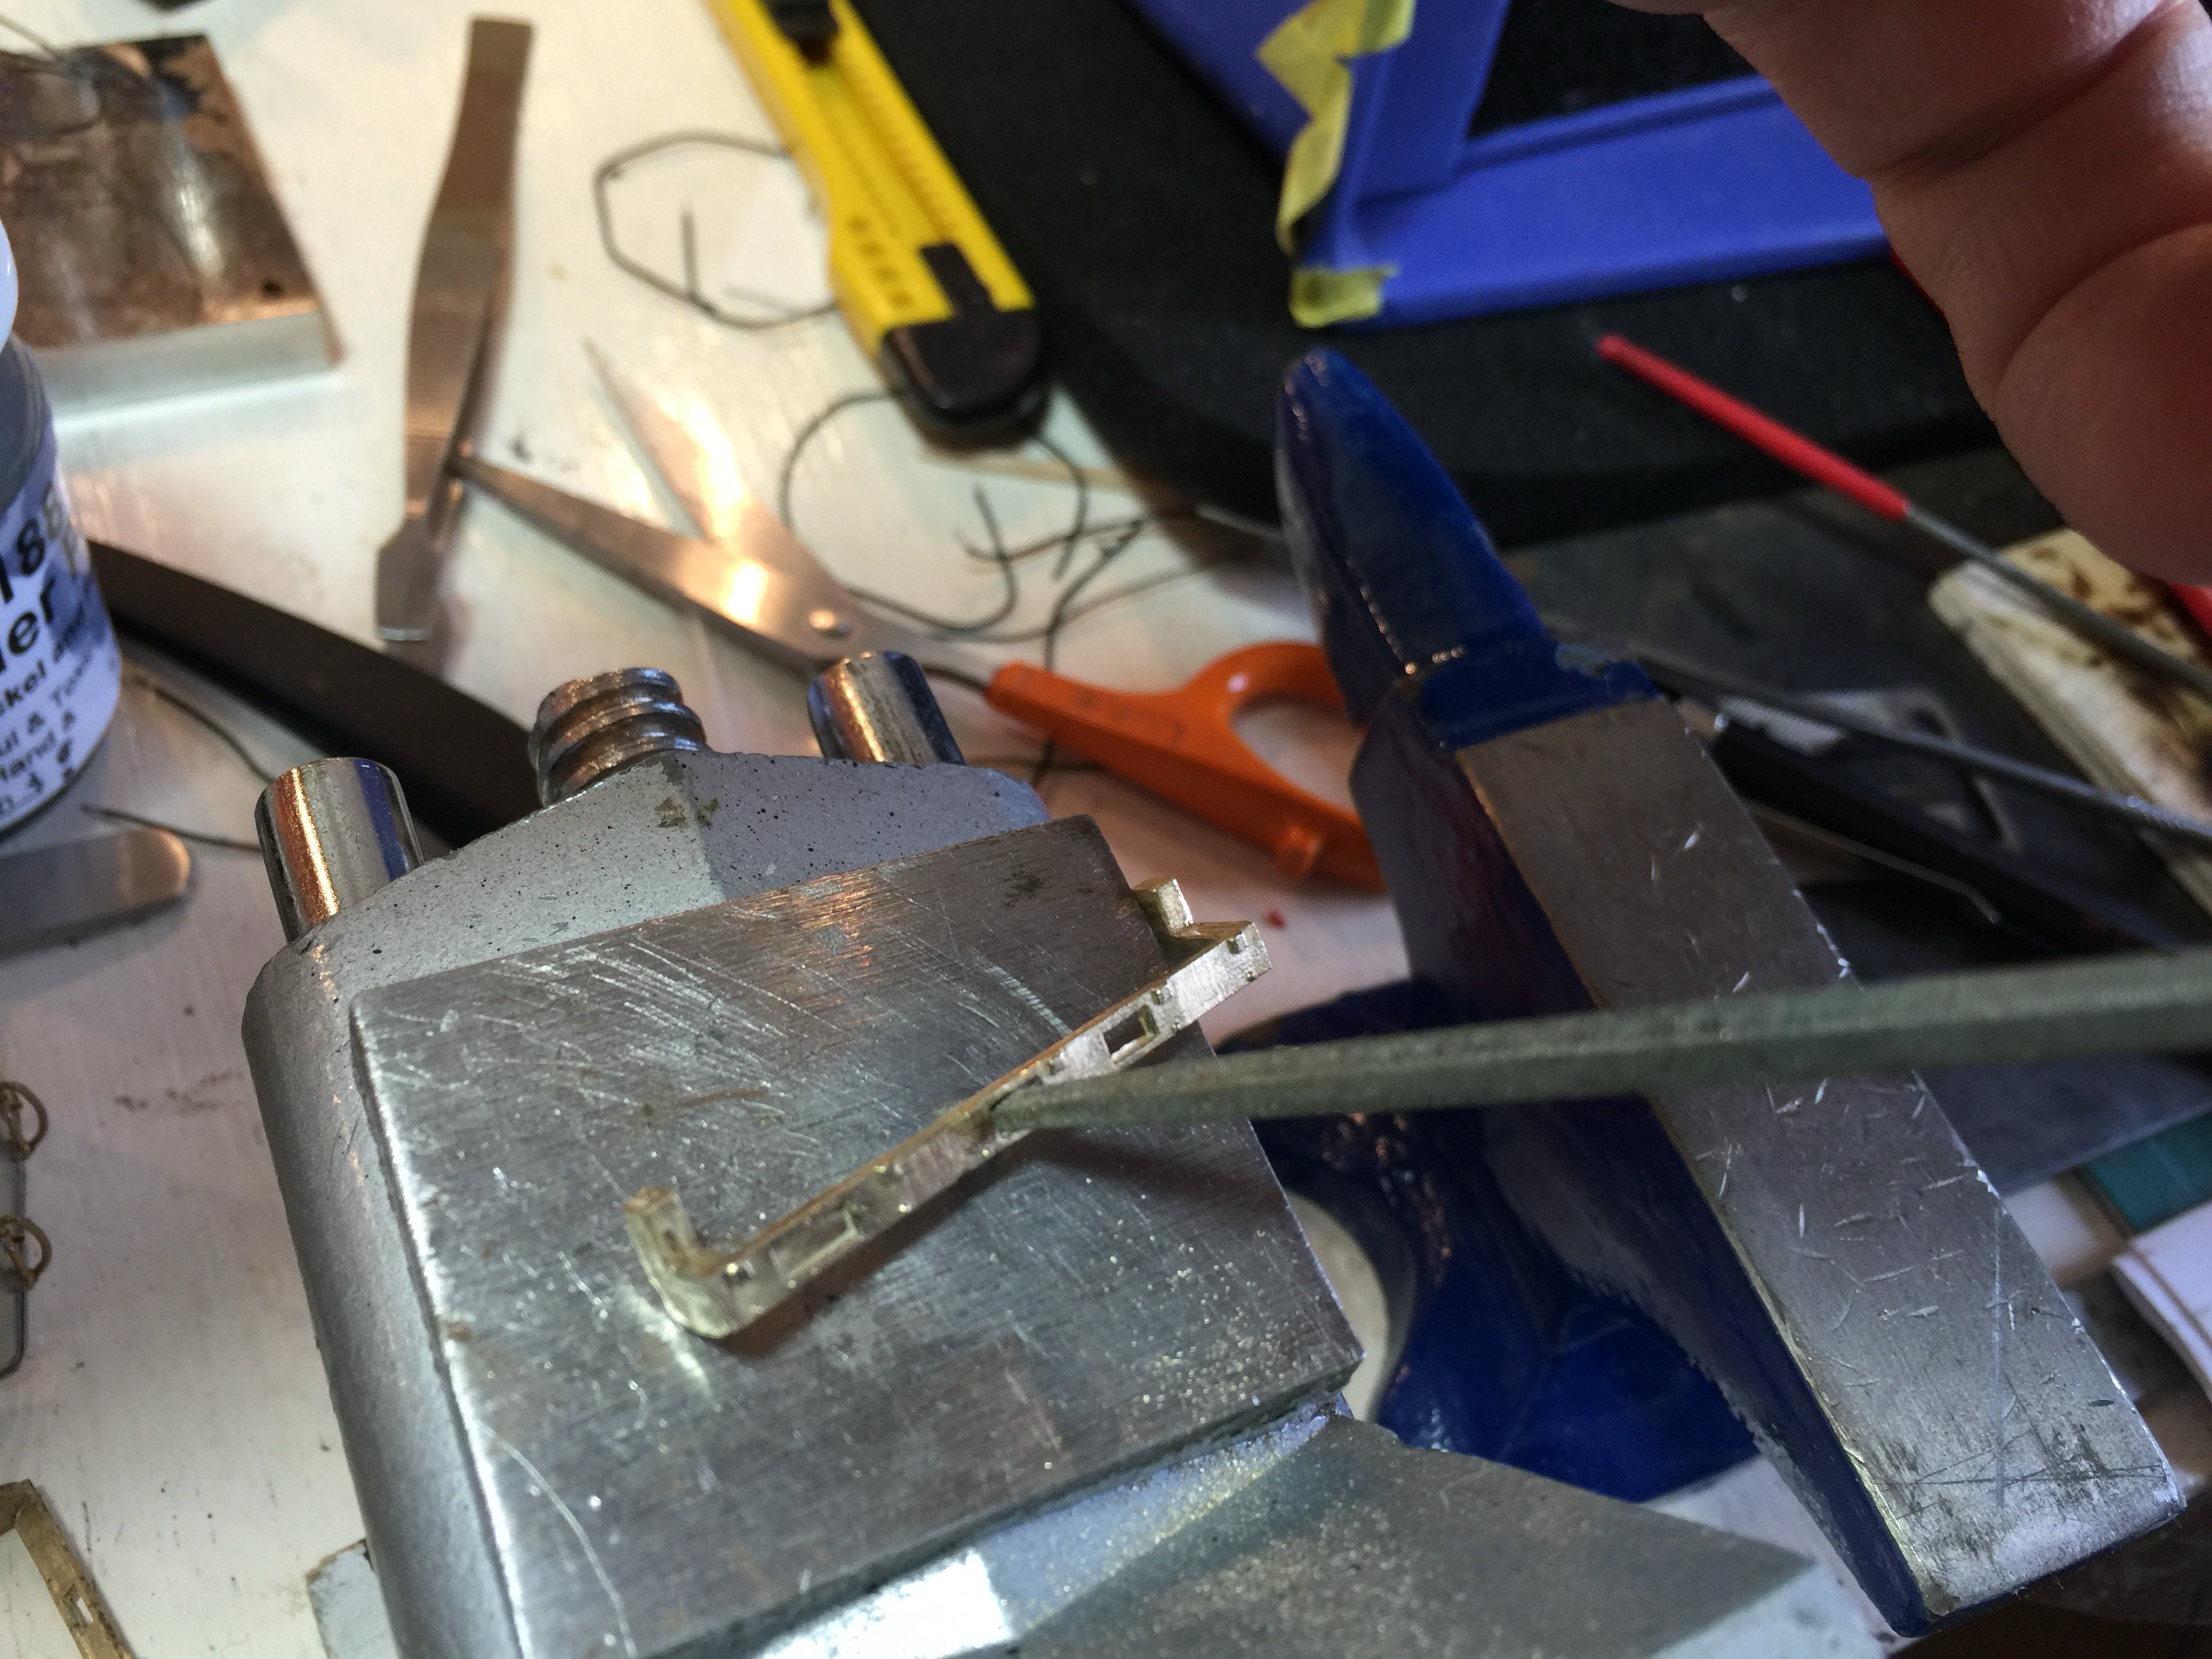
Vijl de twee schorten (6 en 7) schoon en zorg dat de twee rechthoekige gaten open zijn. Wees voorzichtig, want een schort buigt makkelijk. Gebruik eventueel een miniboor.

File the two skirts (6 and 7) and make sure that the two rectangular holes in the skirts are open and clean. Be careful, as the skirt flexes easily if you push it too hard. If possible, us a mini drill with diamond filing drills.
The first few orders received a tool to adjust the bottom plate at the correct height. But you don’t need this. Ronald Urbanus gave me the tip to first solder the skirts on the bottom plate, before you fix the bottom to the box. This way, the skirts will always connect without a gap to the box. The height of the pins of the skirt are perfect, you don’t need to file those. To make sure the holes for the vacuum break pipes aren’t closed off by the bottom plate, you can put a 0.8 mm (brass) wire through those holes, from the front to the back. The bottom plate will then be supported by the two wires.
Voor H0, vijl het uitstekende stukje messing aan de achterkant van de schorten af. Anders is er grote kans dat dit tegen de koppelstang aan loopt. Niet nodig voor H0m en H0e.
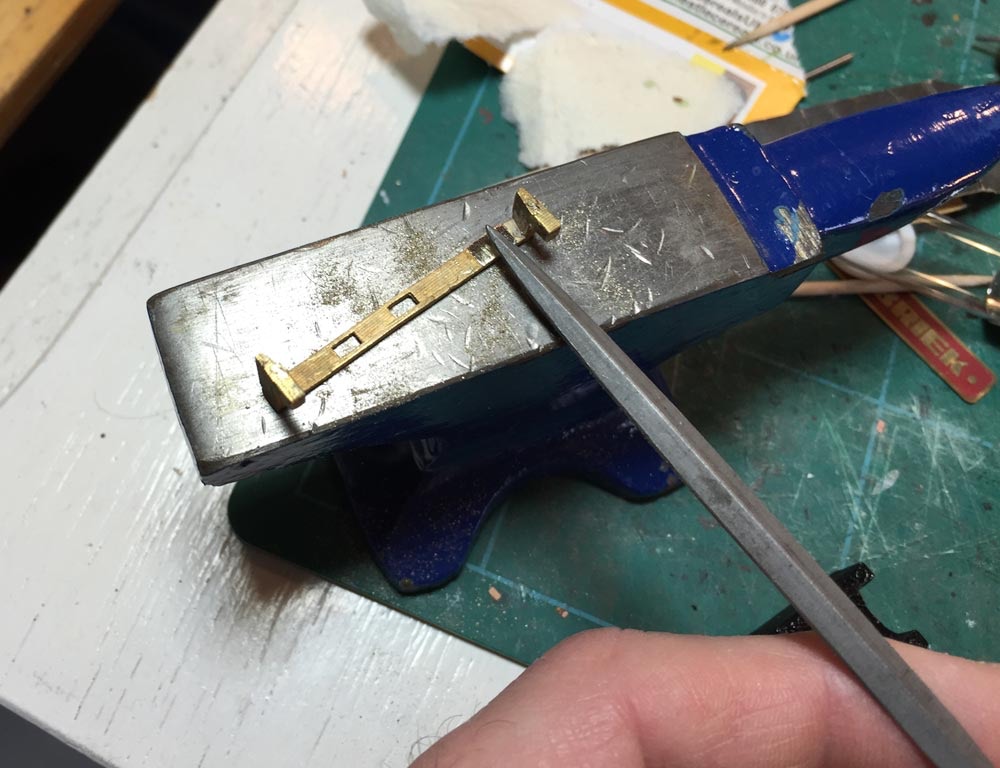
For a H0 drive, file the protrusive part on the rear of the skirt flat. Otherwise the pin of the coupling rod will touch it. Does not need to be done for H0m and H0e
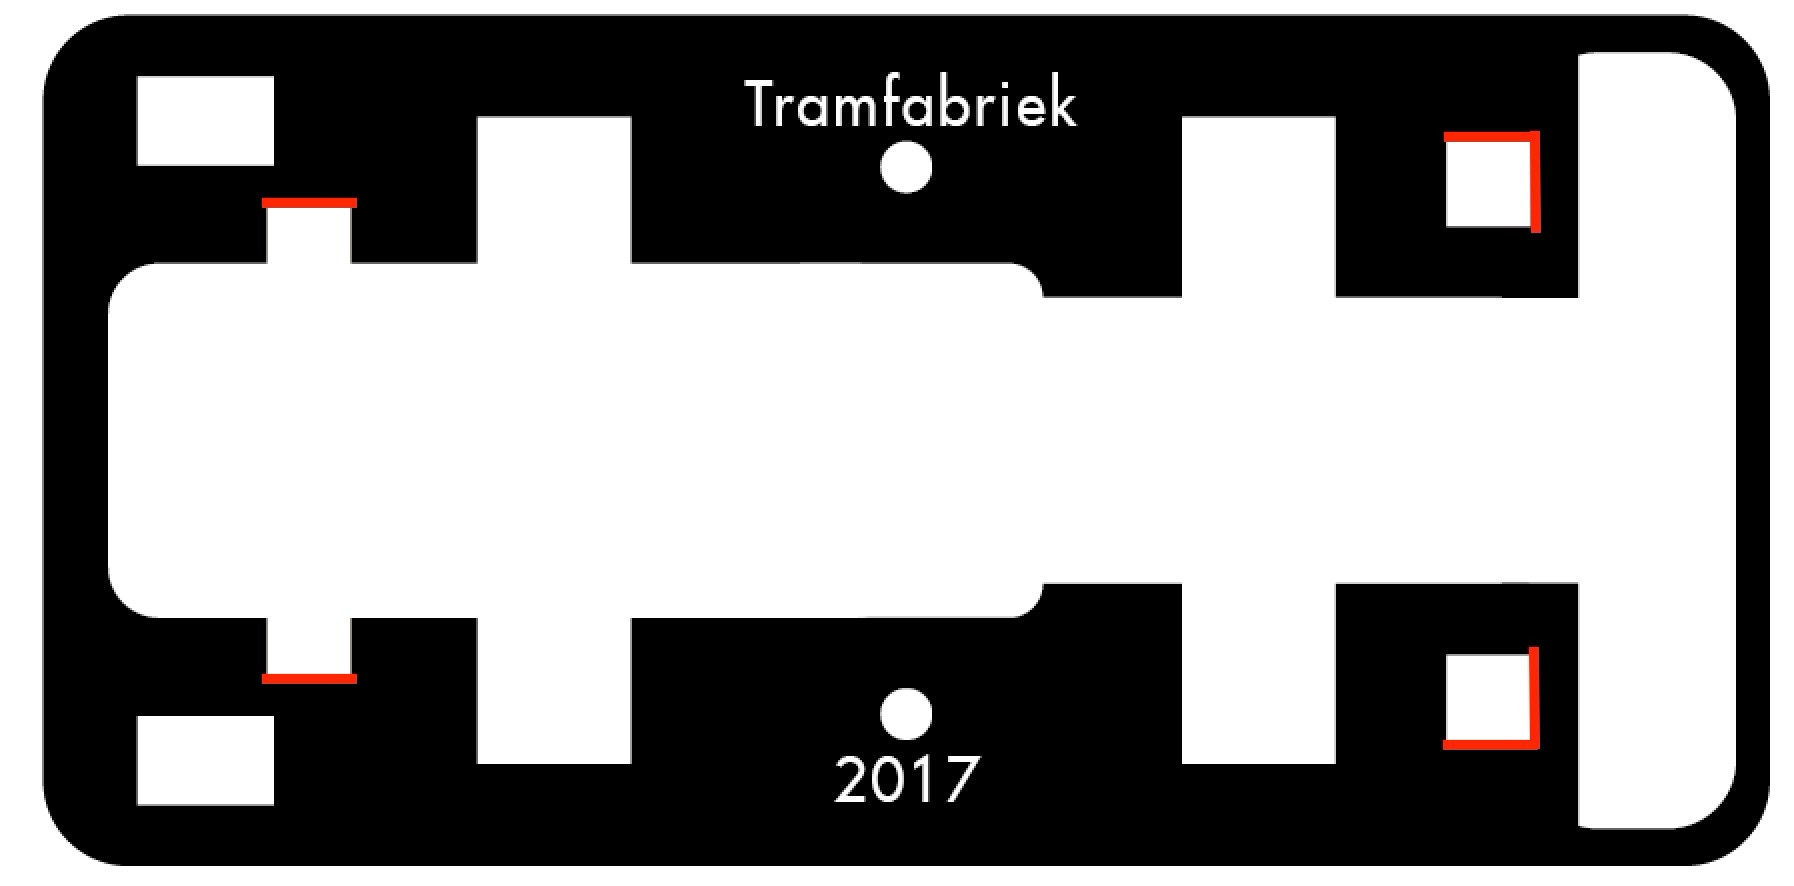
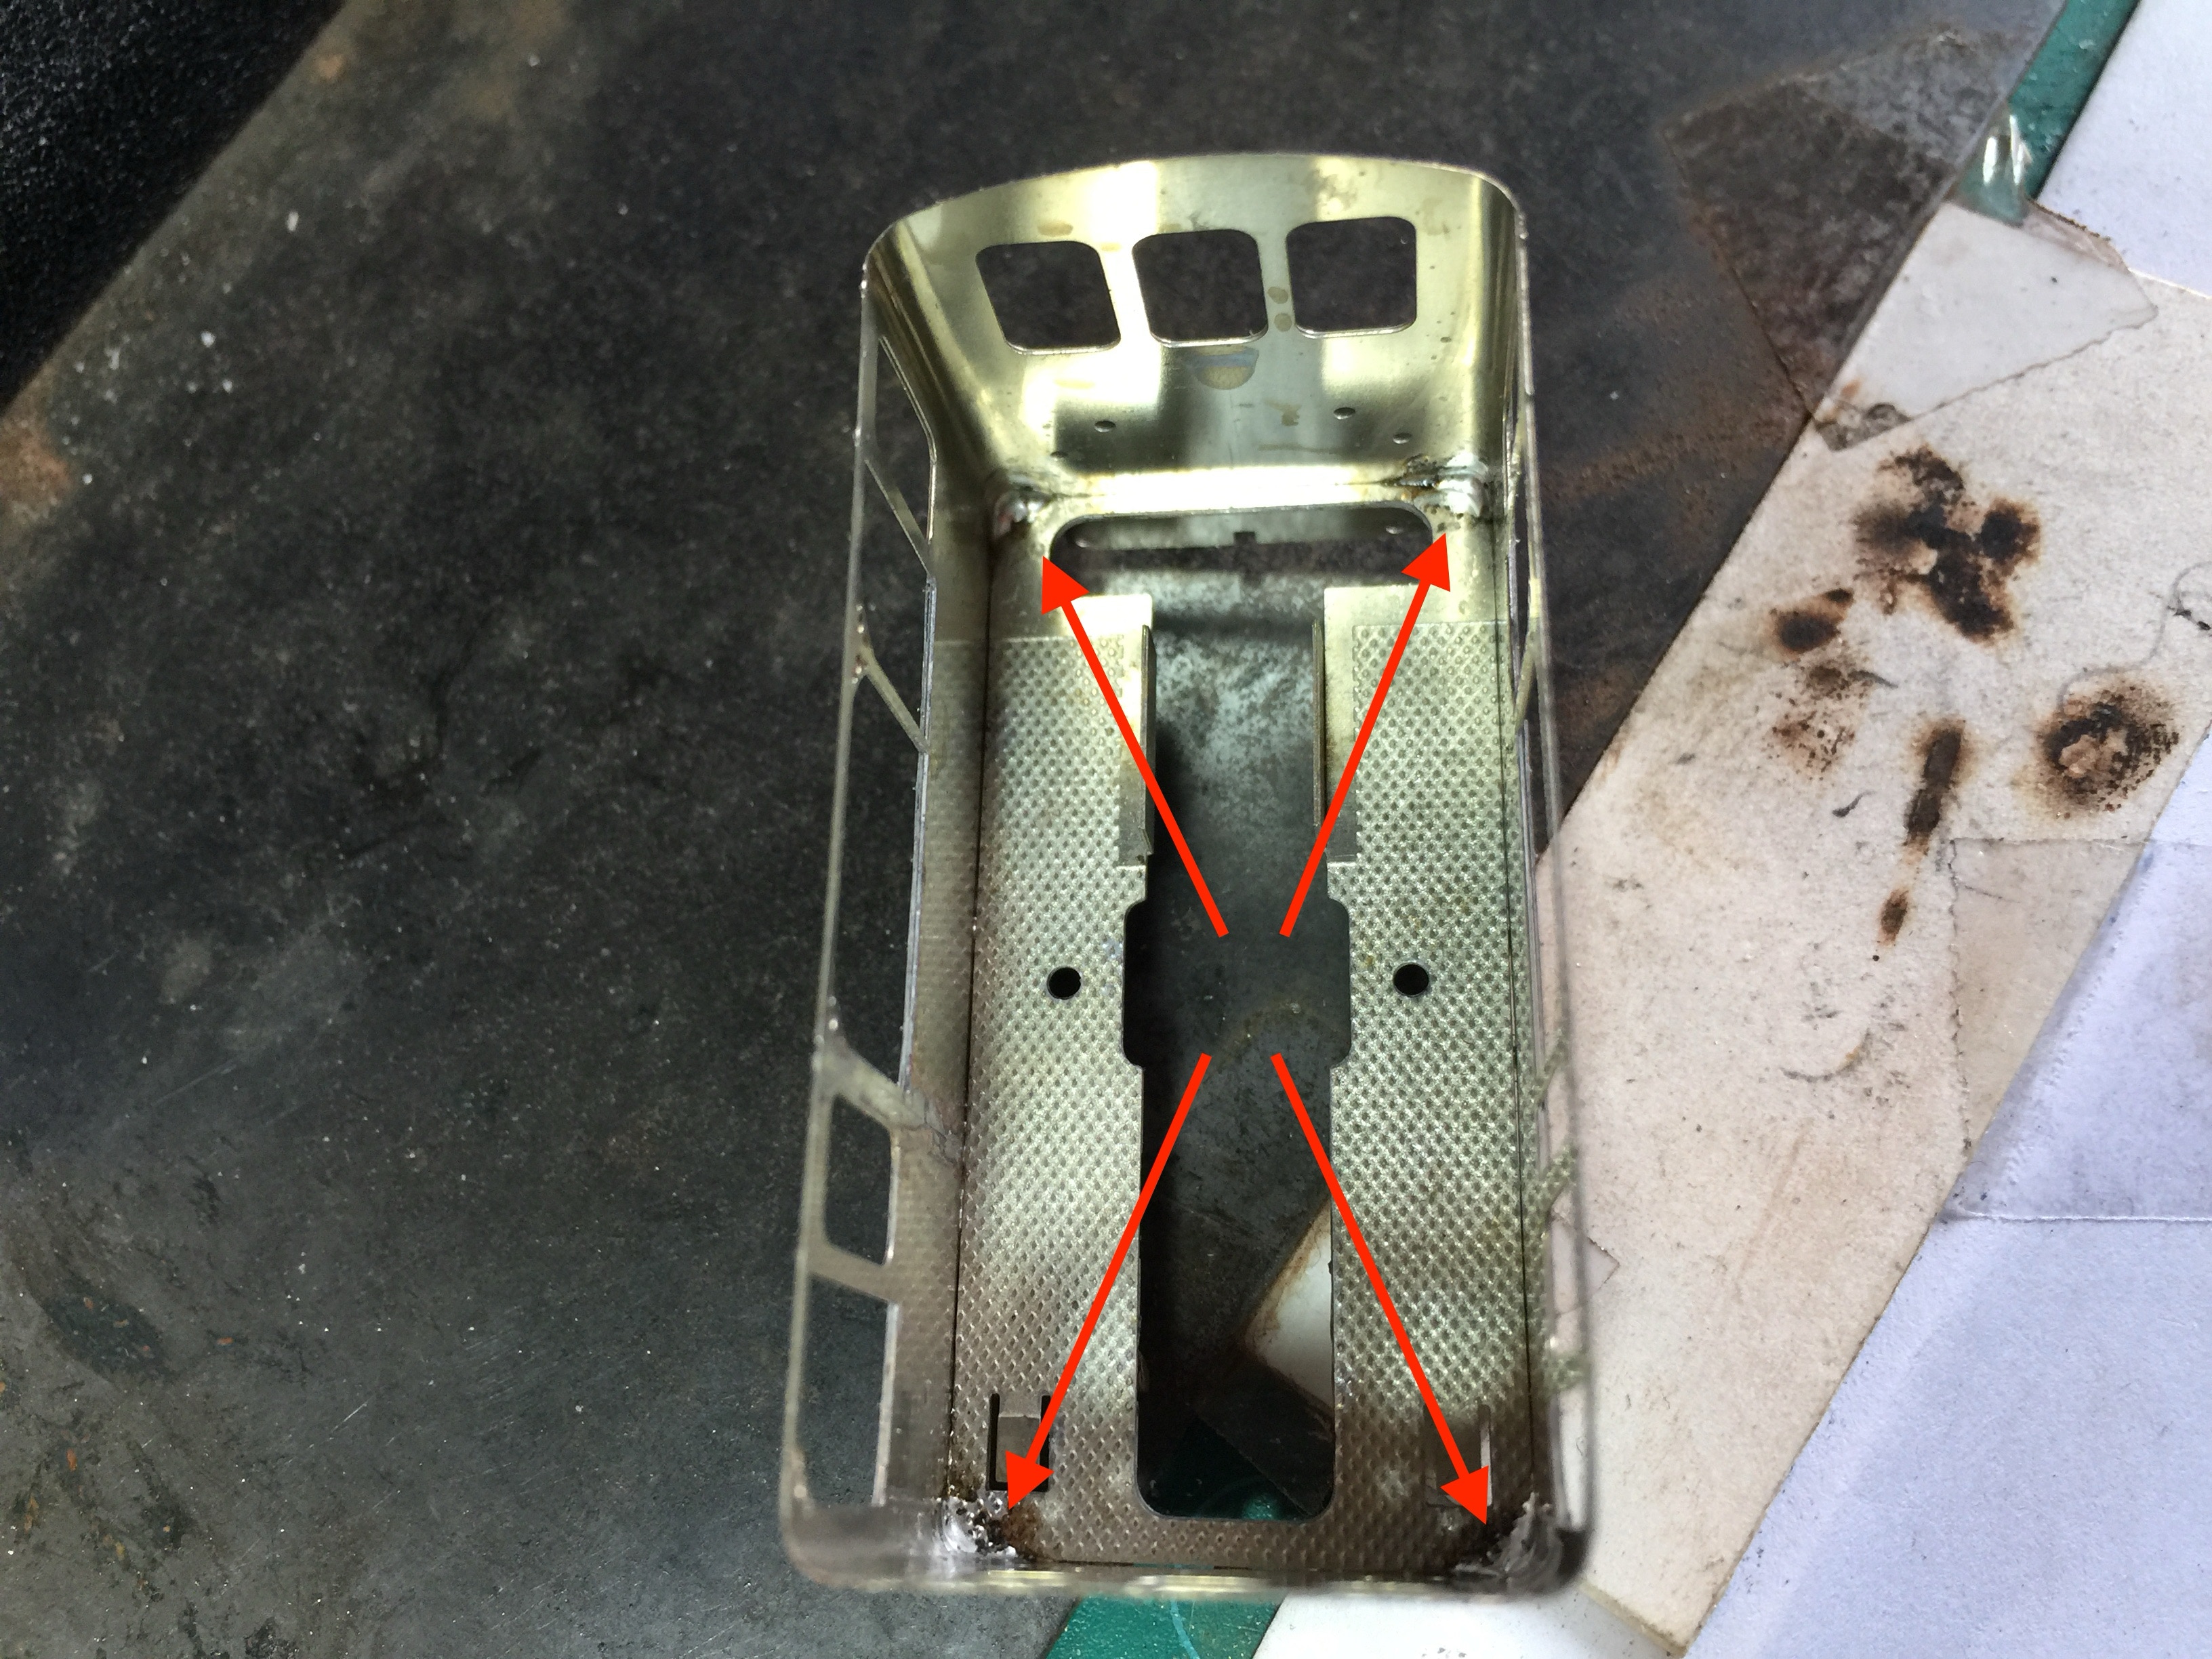
Kijk op de tekening waar je de schorten moet plaatsen. Hij moet tegen de rode randen aanliggen. Het opstapje van de deur komt zo ook daadwerkelijk onder de deur te liggen. Controleer dit nadat de schorten bevestigd zijn.
Check on the drawing where you have to place the skirts. The red lines indicate which parts the pins of the skirt have to touch. This way, the doorstep will be straight below the door. Check if this is correct.
Smeer soldeerpasta in het bevestigingspunt en zet een schort recht. Zet het met een klem vast en soldeer/lijm het.
Apply some soldering paste on the connection part on the bottom plate and put one skirt in place with a clamp on each pin. The solder the skirt with a torch.
Controleer of het eerste schort recht staat en zet dan de tweede vast.
Check if the first skirt is (still) straight and then fix the second skirt.
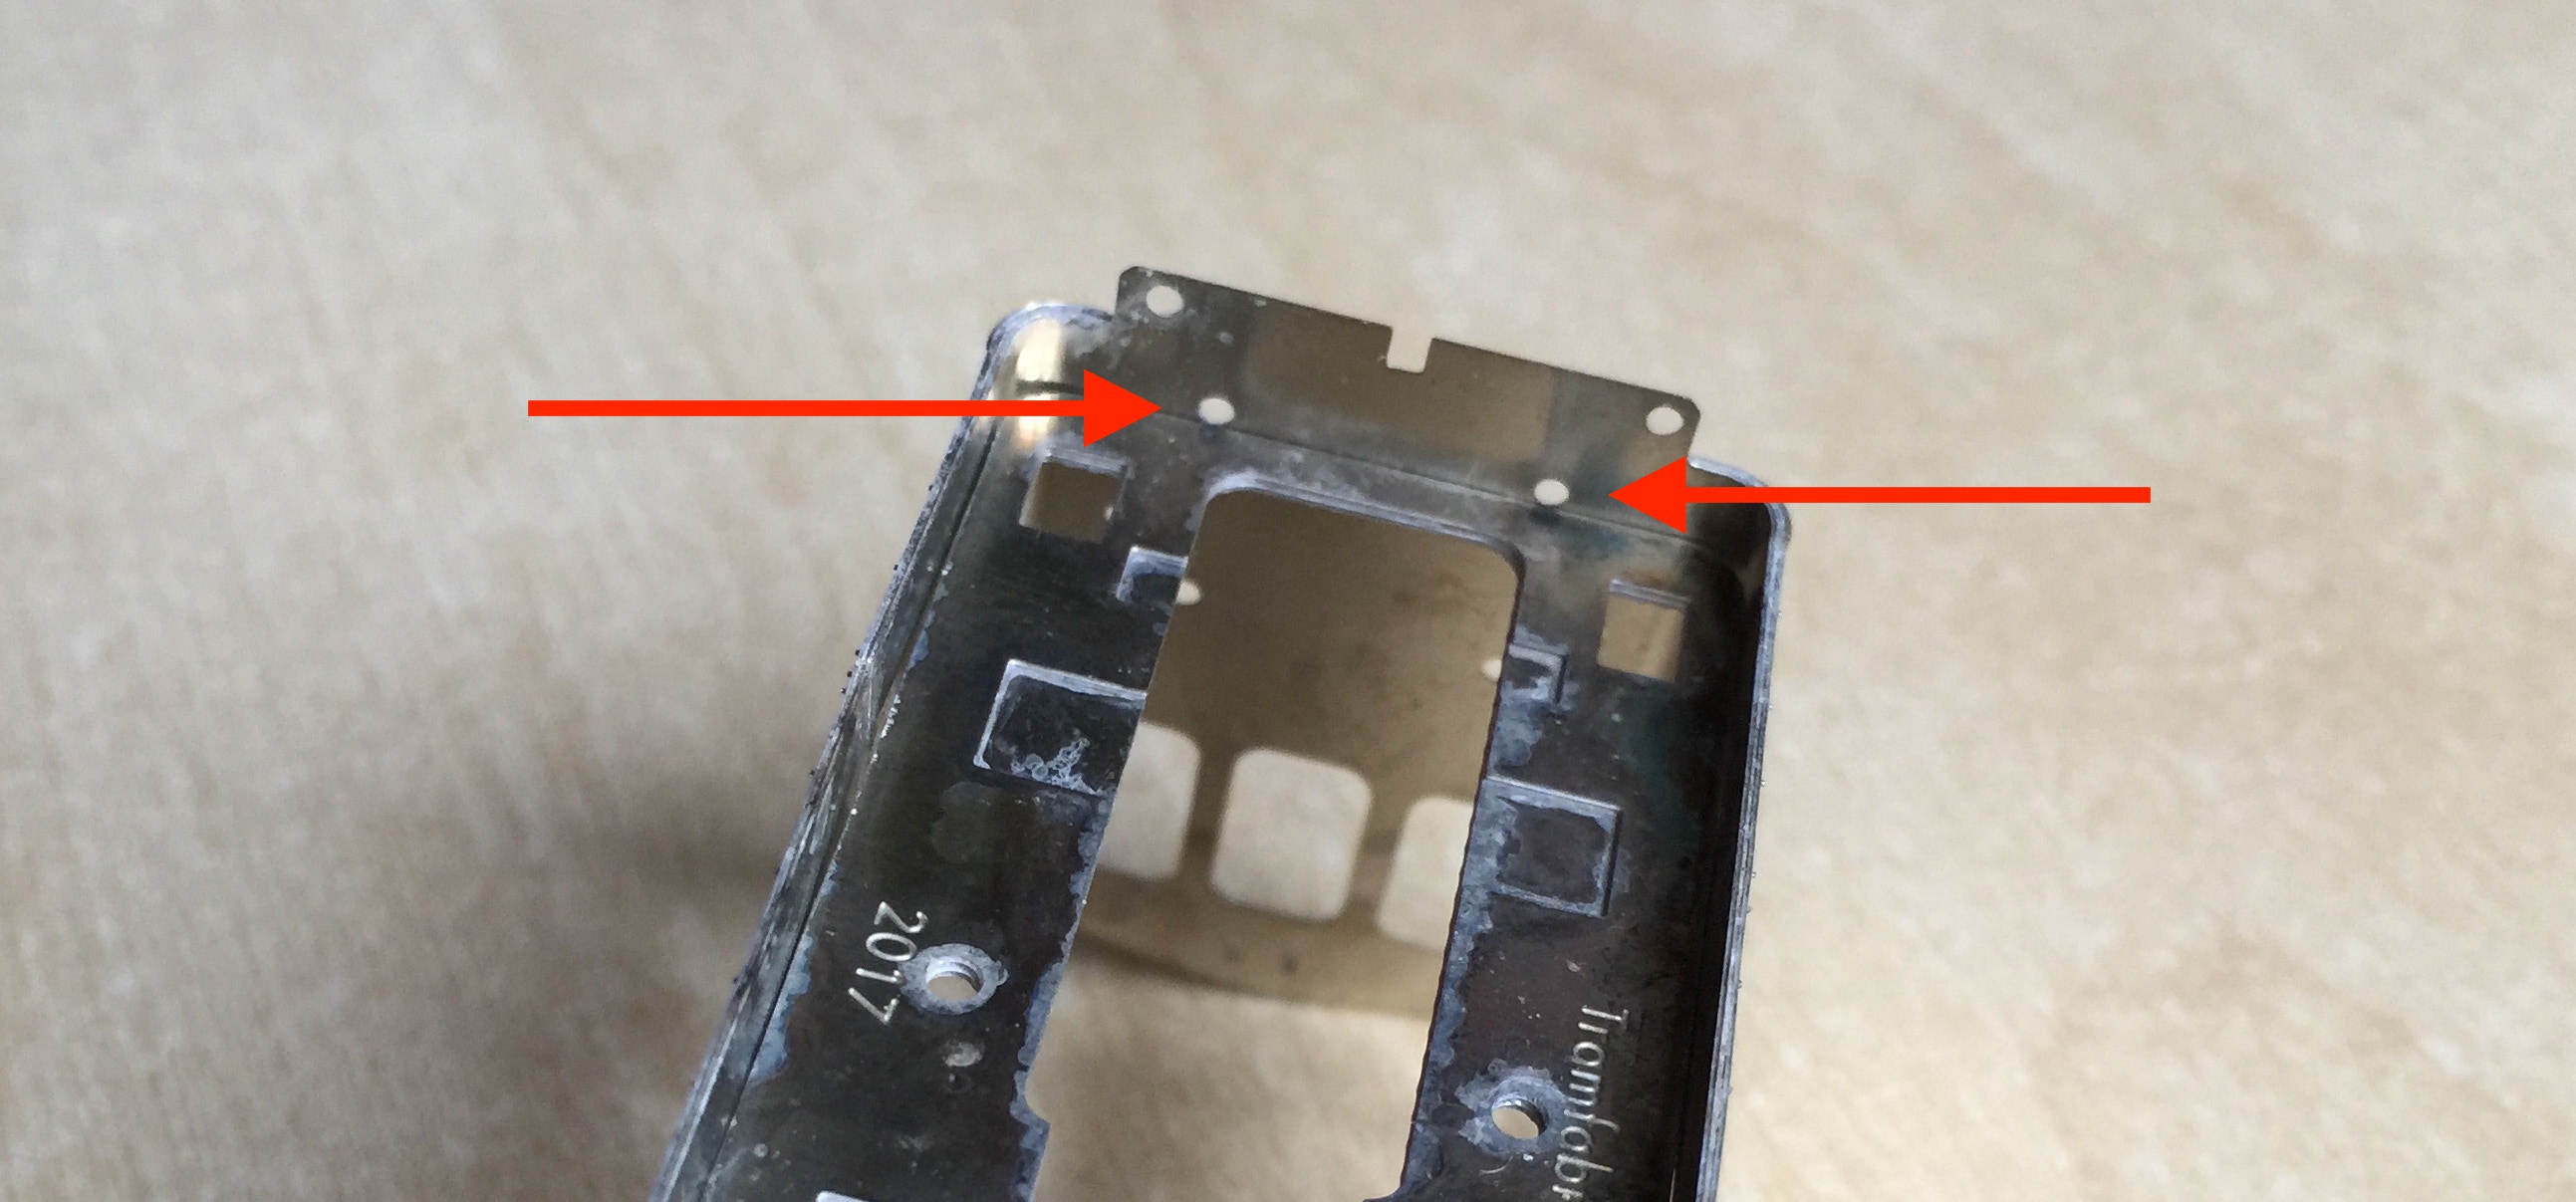
Bij het passen van de bodemplaat wel even er op letten dat de bodemplaat boven de aangegeven gaatjes voor de remslangen valt.
Foto rechts: Door twee messing staafjes met de dikte van het gat (0,7mm) van de voor- naar de achterkant te halen, heb je een hulp bij het bepalen van de juiste hoogte. De bodem ligt dan op het messing. Wel goed controleren of de schorten tegen de kast aan liggen, zonder kier. En recht.
Hoeken vastzetten. Dit kun je het beste aan de onderkant doen.
Check if the holes for the vacuum pipes are open and the bottom plate is immediately above it.
Bij het passen van de bodemplaat wel even er op letten dat de bodemplaat boven de aangegeven gaatjes voor de remslangen valt.
Picture above: By pulling two 0.7 mm brass wires through the holes, you have a support for the bottom plate, to assure the accurate height. Check there is no gap between the tram box and the side skirts. And the bottom plate straight.
Fix corners. It’s best to approach this from the bottom.
Bodemplaat op een paar punten aan de zijkant vastzetten.
Fix the long sides of the box to the bottom plate on a few spots
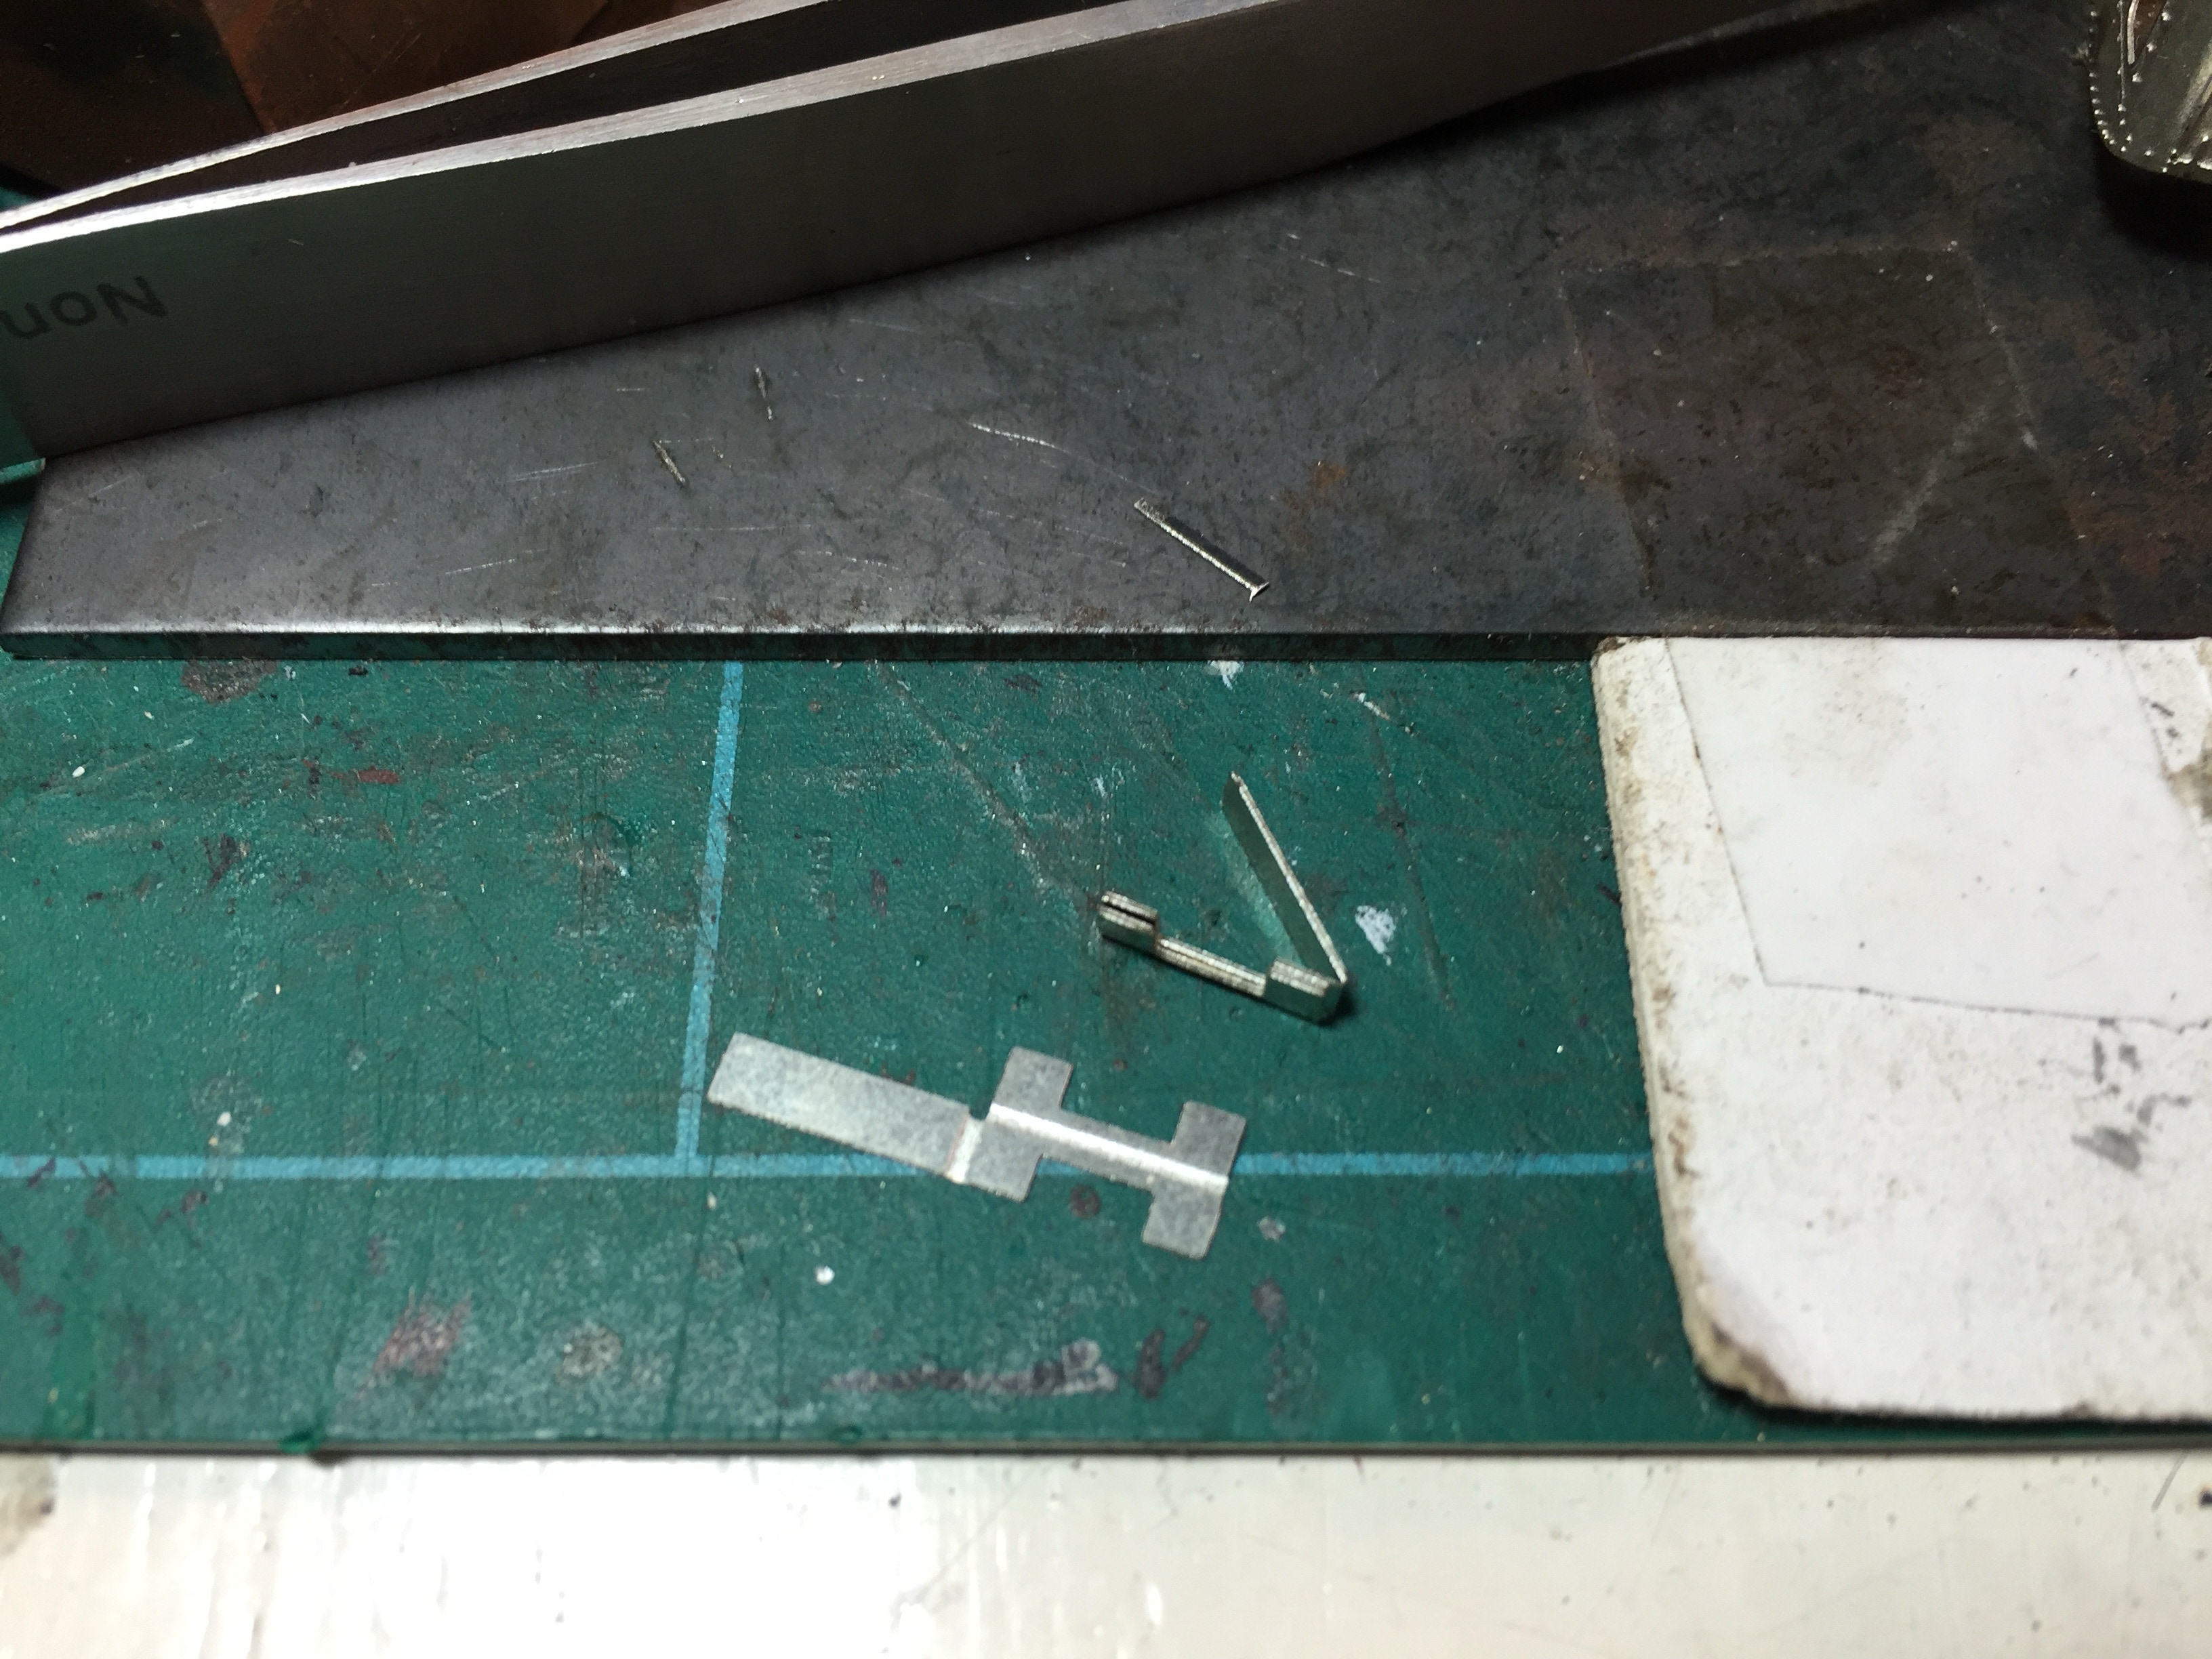
Nu is de achterkant van het opstapje bij de deur aan de beurt. Vouw deze volgens het plaatje.
Next up is the backside of the doorstep. Fold these in two, like a harmonica.
Zet het opstapje aan de binnenzijde vast (dichte zijde naar binnenzijde gericht, dikke zijde naar onderen gericht). Je moet nog wel iets vijlen van de bovenrand, anders past ie niet tussen het schort en de bodemplaat.
Fix the doorstep to the inside of the tram, between the bottom plate and the skirt. You will need to file off a bit of to make it fit. File of the side with the opening of the ‘U’, not the bottom part.
Zo ziet het er dan uit. De rand van de kast ligt gelijk met/op de rand van de schorten en let op de uitlijning van de treden bij de deur.
This is how the step should look like. De edges of the hole in the box are aligned with the edges of the step.
•