

UK based
Prices for UK customers are shown inc 20% VAT
Other countries, inc EU, prices shown are ex VAT.
Roco H0e ombouw
naar klokankermotor


Conversion Roco H0e
to coreless motor

UK based
Prices for UK customers are shown inc 20% VAT
Other countries, inc EU, prices shown are ex VAT.
Roco H0e ombouw
naar klokankermotor
Conversion Roco H0e
to coreless motor
Wat je nodig hebt voor de Tramfabriek conversieset
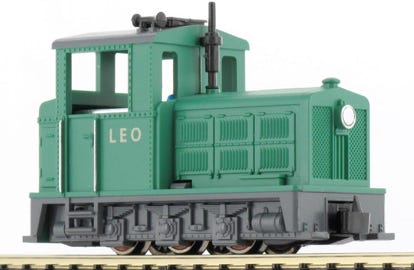
- Een diesellocomotief van Roco, type industrieel smalspoor.
- Een kleine, platte schroevendraaier
- Soldeerbout
Monteertijd: 20 minuten
What you need for conversion set
- Diesel locomotive by Roco, industrial narrow gauge type
- Small flat screwdriver
- Soldering iron
Installation time: 20 minutes
1
1
2
2
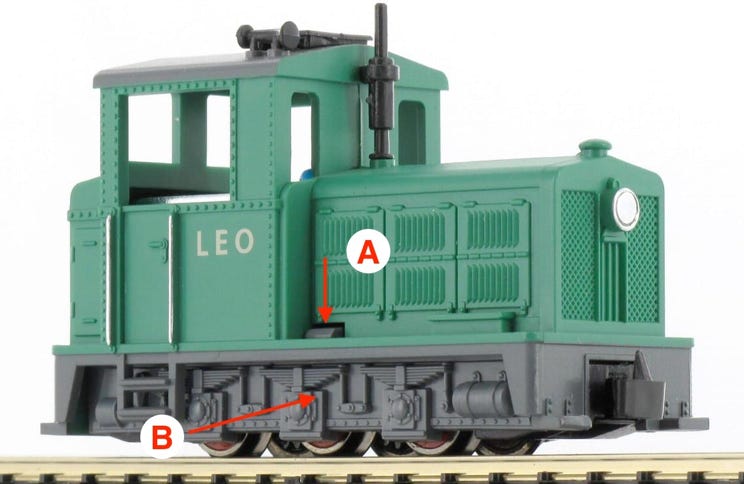
Kap losmaken
Aan beide zijkanten zit de kap met een palletje van het onderstel vast (A). Druk aan beide kanten het onderstel naar binnen (B) en trek de kap omhoog.
Remove plastic cover
On both sides the whole top part of the tram is held on the bottom part with a tab on each side (A). Squeeze the bottom skirts (B) and lift the top part up.
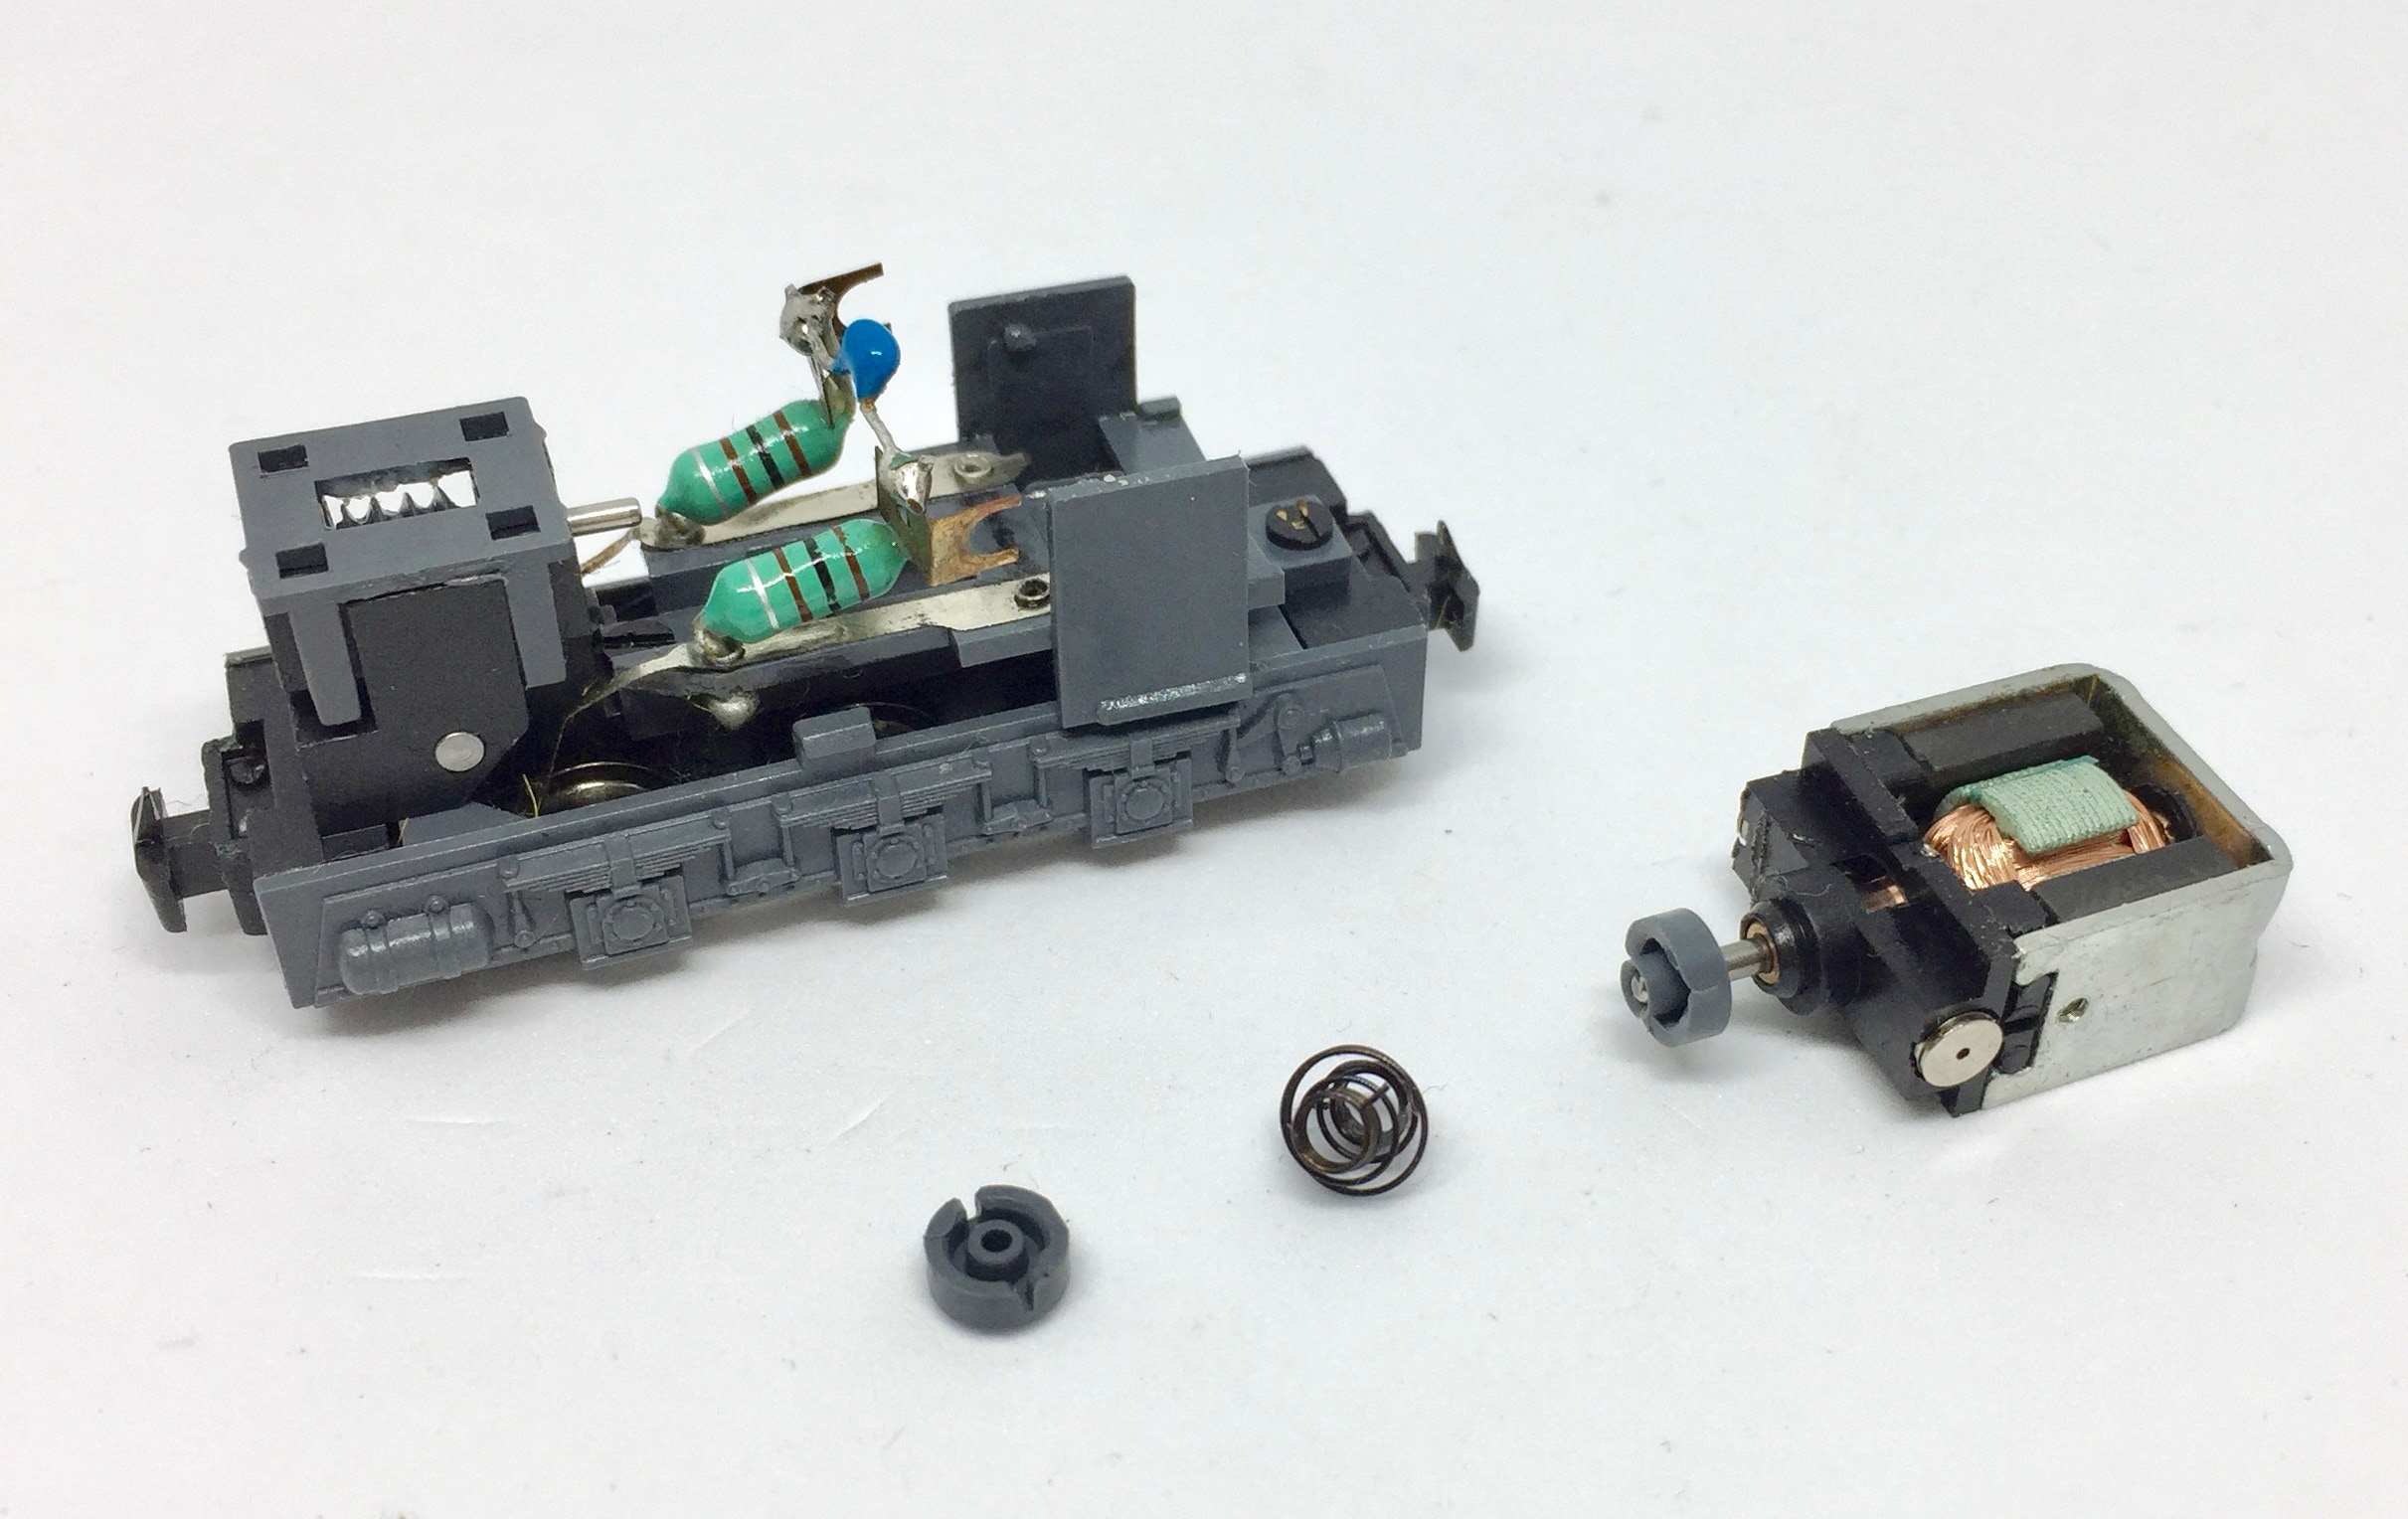
Onderdelen verwijderen
Haal de motor en de kardanonderdelen van de aandrijving af. De motor zit geklemd tussen de twee grijzen tabjes en is makkelijk te verwijderen.
Remove parts
Remove all parts pictured. The motor is squeezed between the two grey tabs and is simple to remove.
3
3
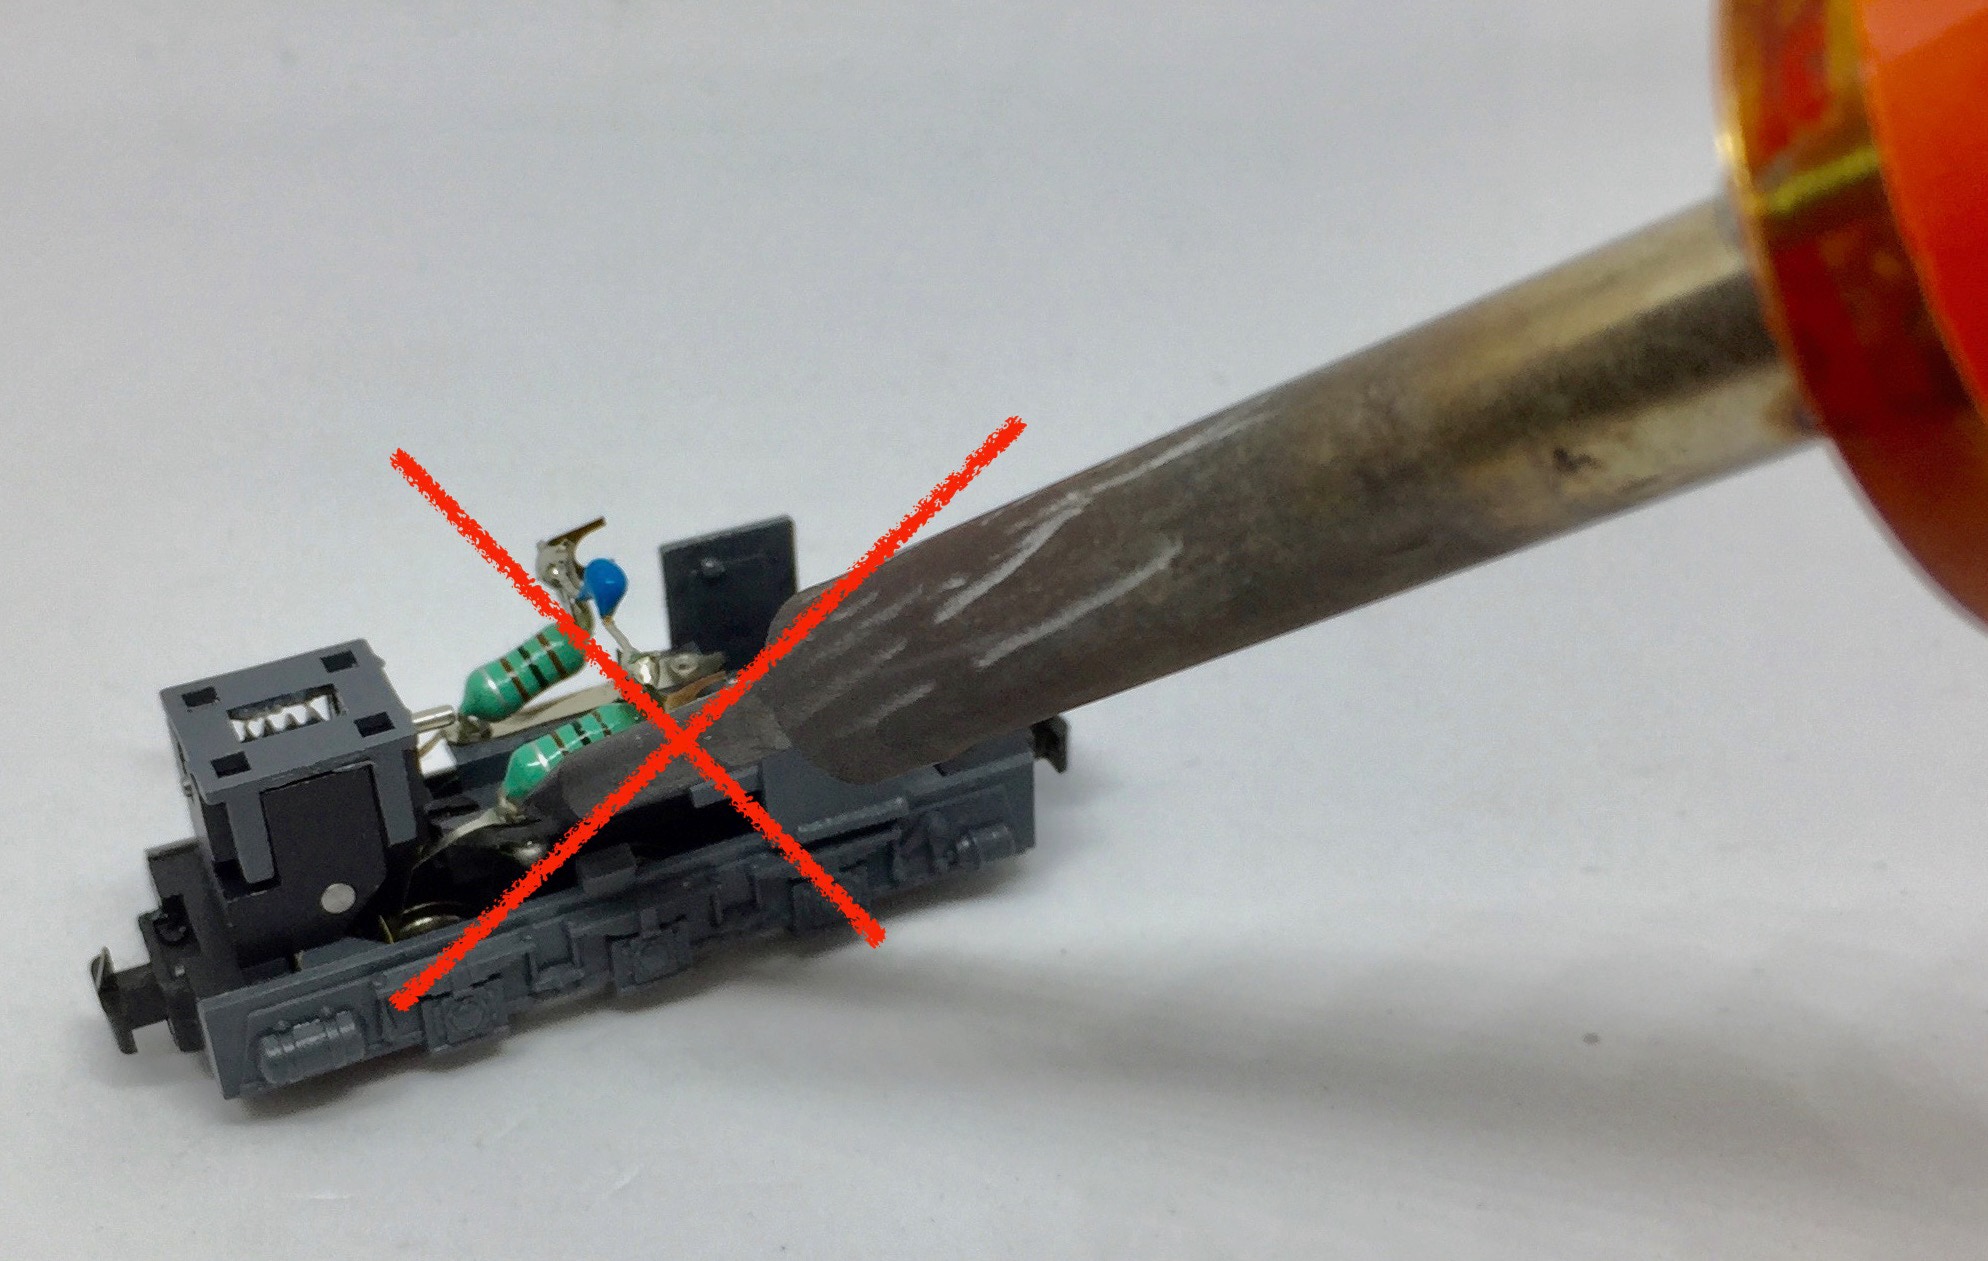
LET OP: Op de volgende, onderstaande plaatjes ontbreken de inductors en condensator. Volg dit voorbeeld niet, maar laat die onderdelen op hun plaats.
PLEASE NOTE: In the following pictures below, the inductors have been removed. Don’t follow this example, leave the inductors and capacitor in place.
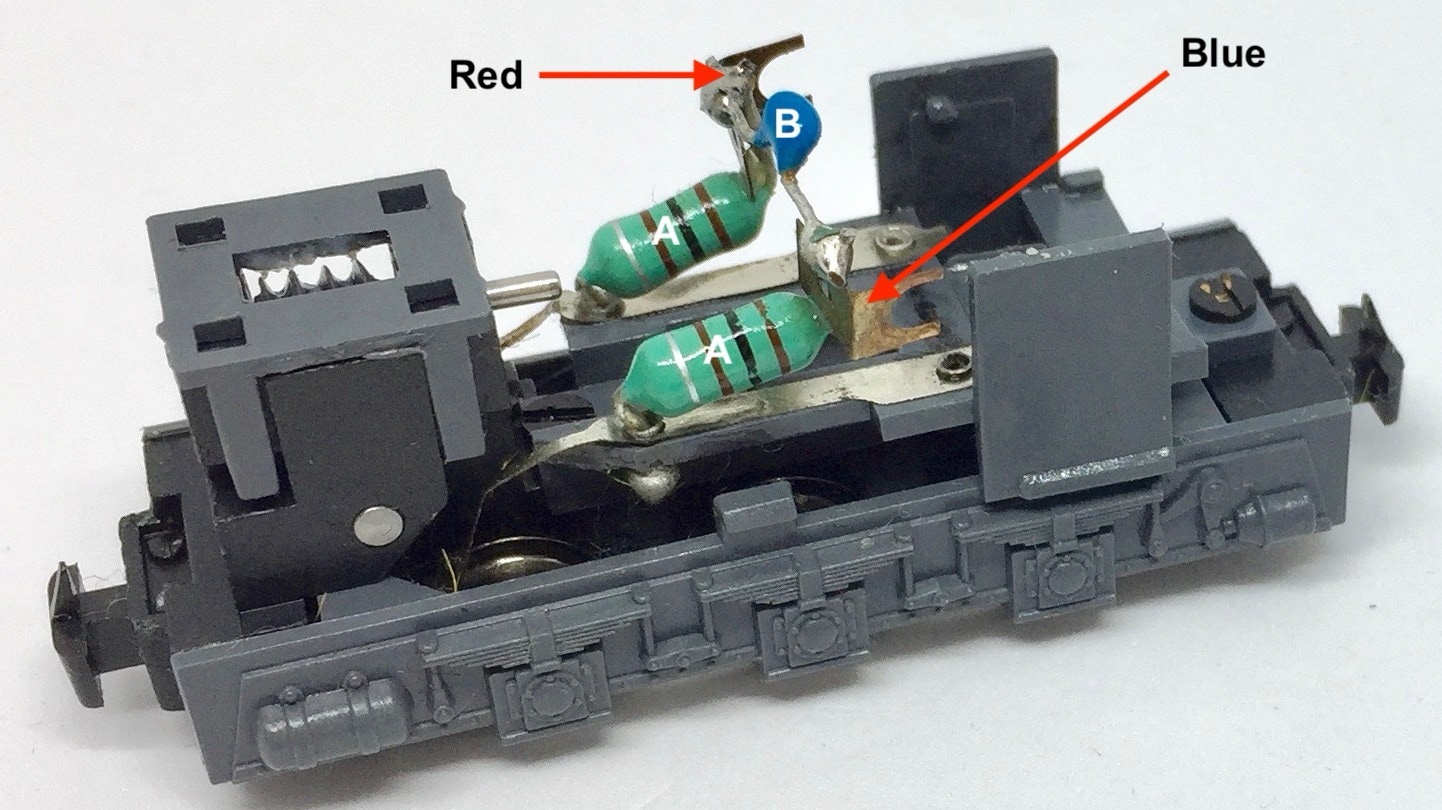
Inductors en condensator
Let op: soldeer de inductors (A) en condensator (B) niet los. Soldeer de draden van de motor aan de punten aangegeven met de rode pijlen. Voor de duidelijkheid, de inductors zijn géén weerstanden.
Inductors and capacitor
For optimal performance, leave the inductors (A) and the capacitor (B) in place. Solder the wires of the motor to the point indicated with the red arrows.
4
4
5
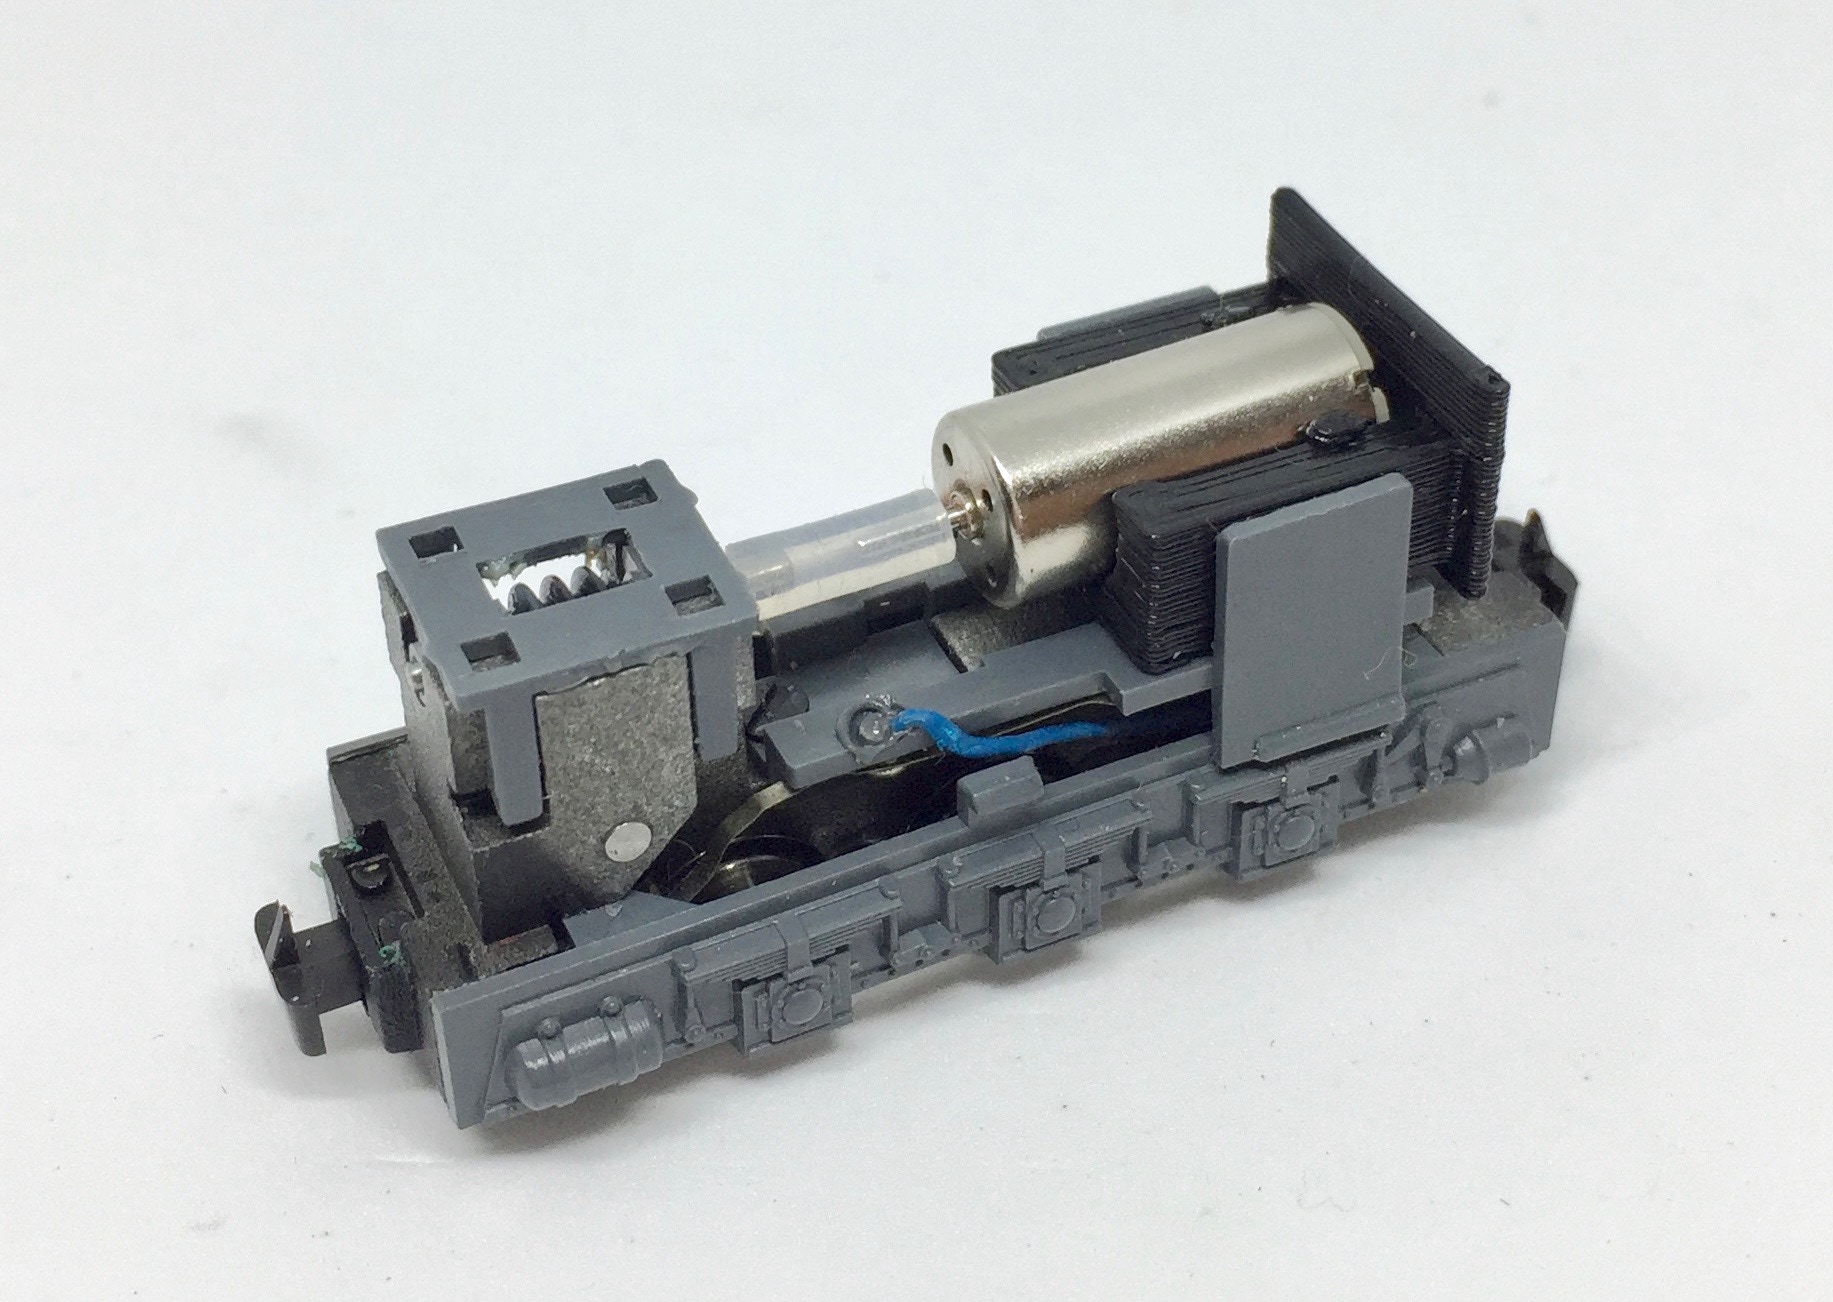
Klik de vervangende motor op zijn plek
De kans is groot dat het siliconen buisje een tikje te lang is. Snij of knip dit dan iets korter zodat het buisje aan beiden kanten niet aanloopt.
Press the replacement motor in its place
Chances are that the silicone tube is a tiny bit too long. Cut this a tiny bit shorter, so the ends of the tube do not touch anything on either side.
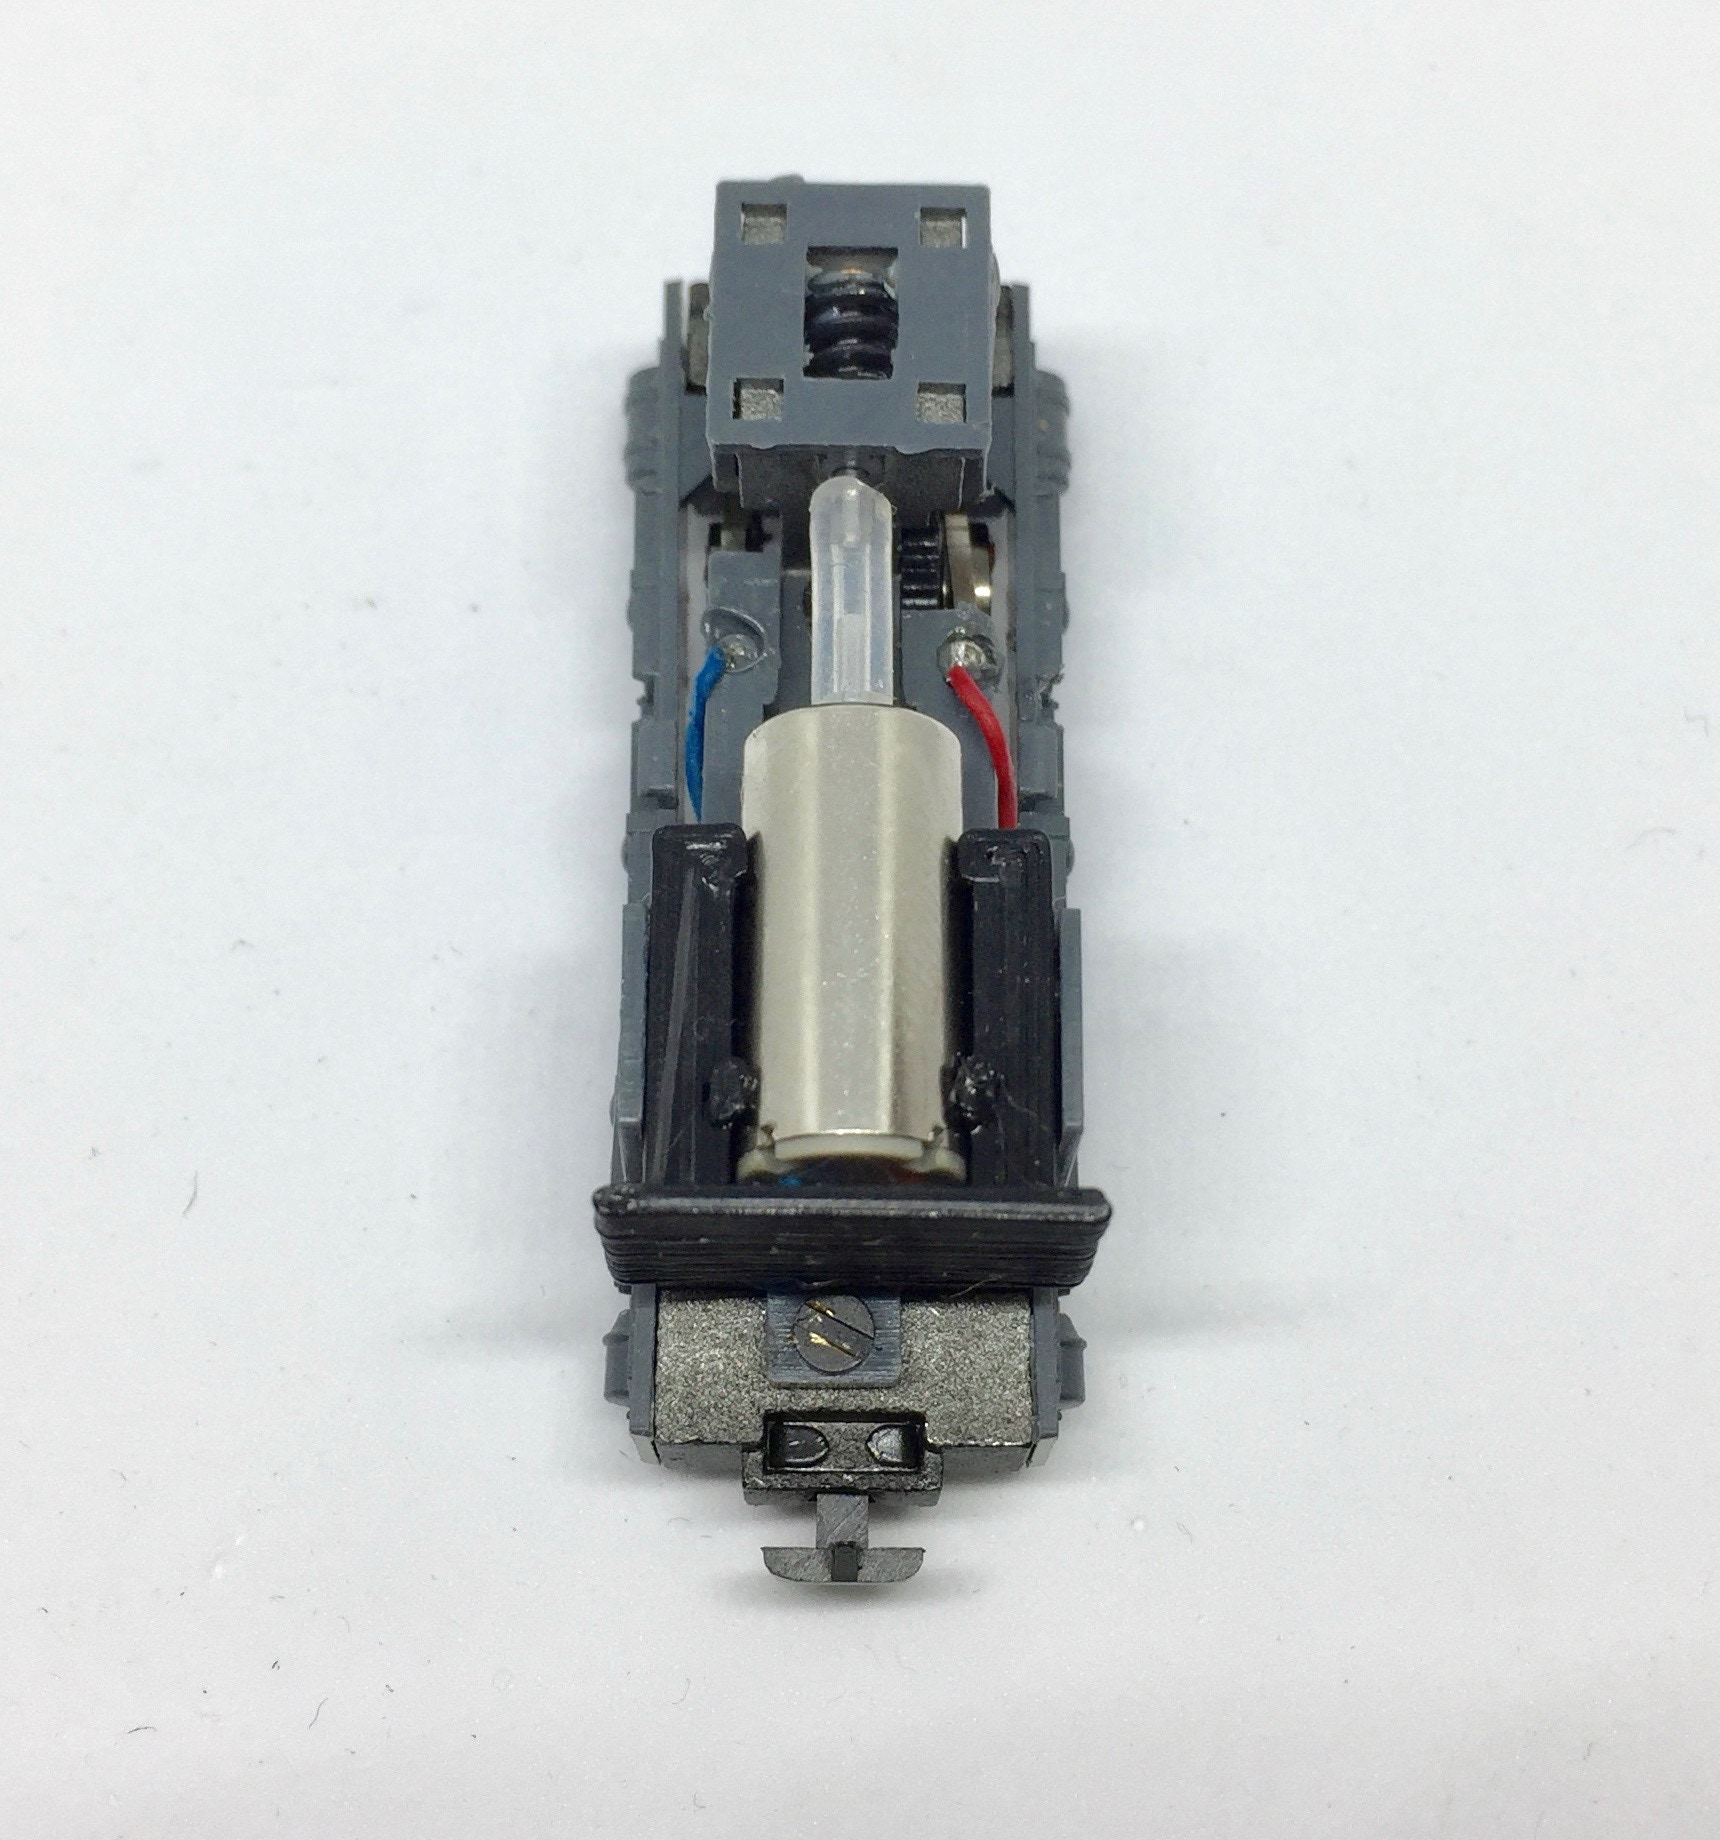
Soldeer de draden
5
Leid de draden via de onderkant van de motor naar de contactpunten van de stroomafname. Rood is rechts en blauw links, in de rijrichting gezien.
What if the motor slips?
Guide the wires in place, below the motor. Red is right, in the direction of travel. Blue is left.
A coreless motor is powerful, but doesn't have as much torque as a classic 3 or 5 pole motor. If there is resistance, the model won't run. Check for split or broken gears. The gears of this model are prone to wear out when they’ve done much running. If you can't see anything wrong with the gears, take all the wheels out and run the motor without the wheels. The motor should now drive the worm and the gear below without any problem. If it still slips, investigate the worm casing for dirt and clean it. If it runs fine, which I expect, test the wheel sets one by one. Place only one axle with gear and wheels under the model, close the bottom and test it. If the motor slips, do the same thing with another another wheel axle until you find which one is causing the problem. It might be one or all of them. In my experience, it normally is only one. These wheels can be ordered as spare parts from Roco. The part number for the wheelset is 114060, the gear with axle 86512. Please be aware that these are ordered per one piece, not a set of three. Here a direct link to the spare part list.
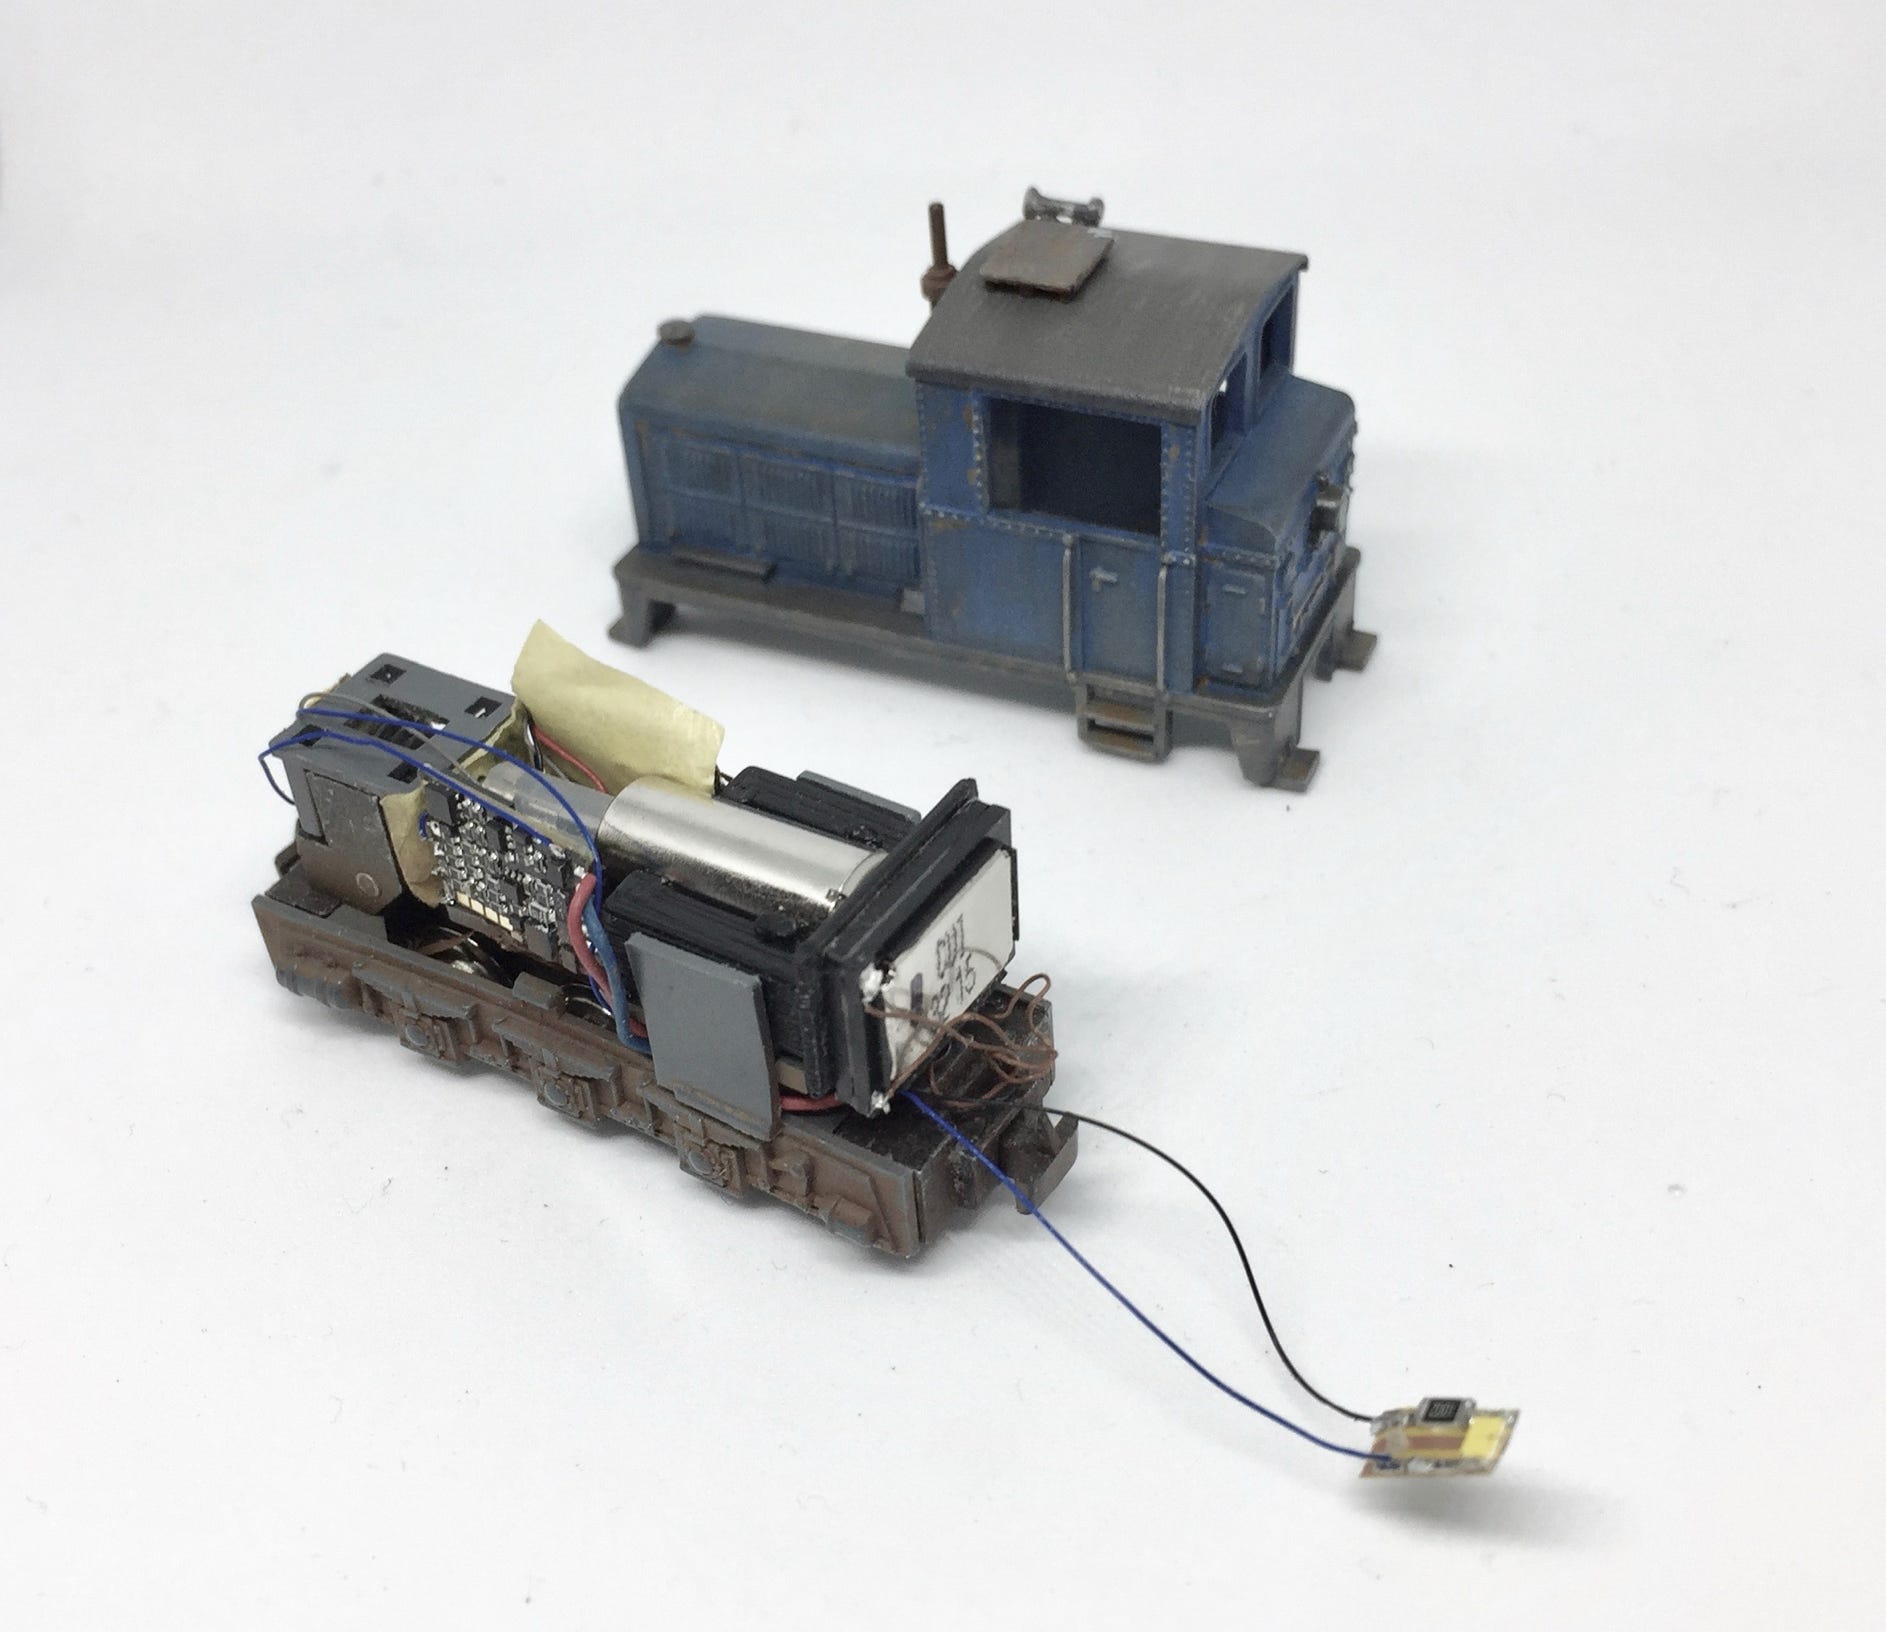
Klaar! Done!
Solder the wires

Als je van een uitdaging houdt, kun je ook een versie met geluid maken! Hier met Zimo MX622 en Uhlenbrock Intellisound 4 Micromodul (ik zou nu de D&H SH05A adviseren) decoders. Ik zou dan wel nog een Stayalive in het dak monteren.
If you are up for a challenge, you can make a sound version! For this example I’ve used Zimo MX622 en Uhlenbrock Intellisound 4 Micromodul (I would now advise the D&H SH05A) decoders. I would advise to fit a Stayalive under the roof.

•