

UK based
Prices for UK customers are shown inc 20% VAT
Other countries, inc EU, prices shown are ex VAT.


UK based
Prices for UK customers are shown inc 20% VAT
Other countries, inc EU, prices shown are ex VAT.
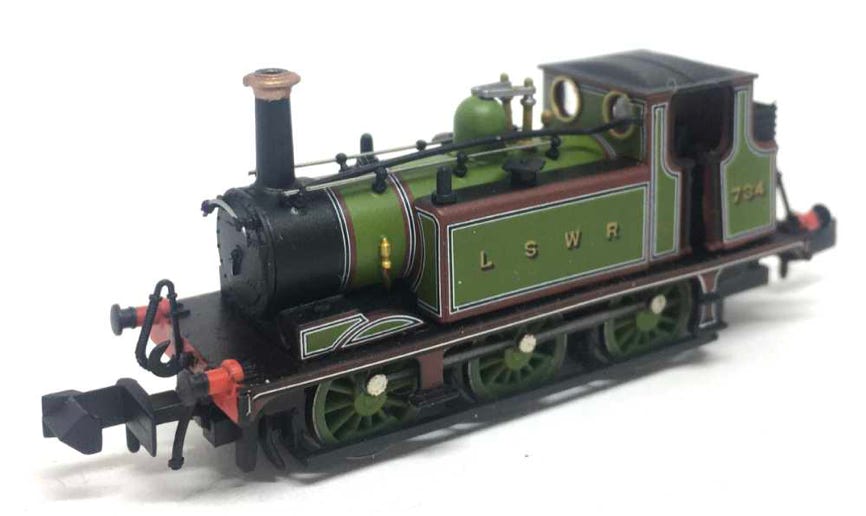
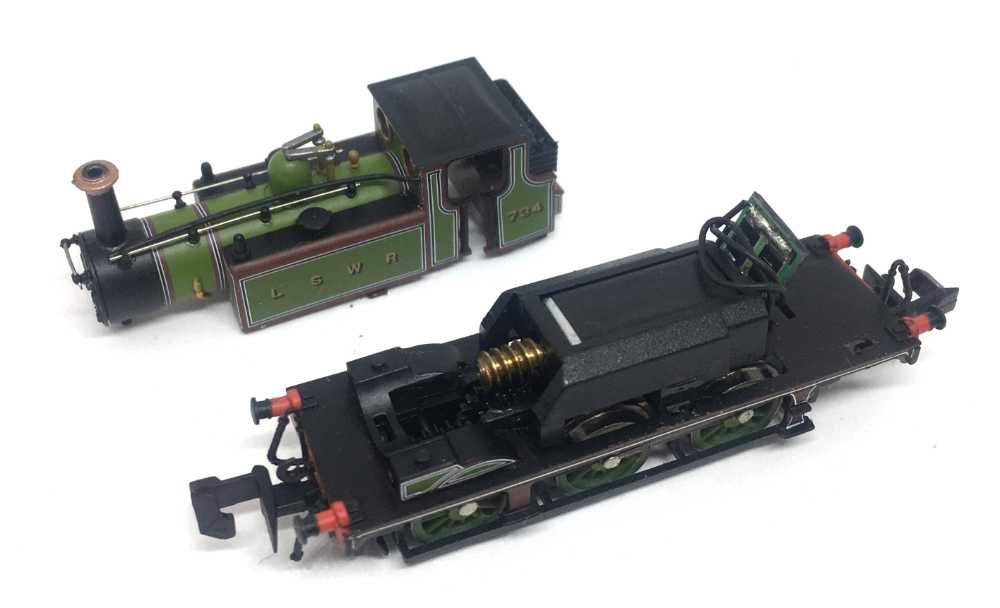
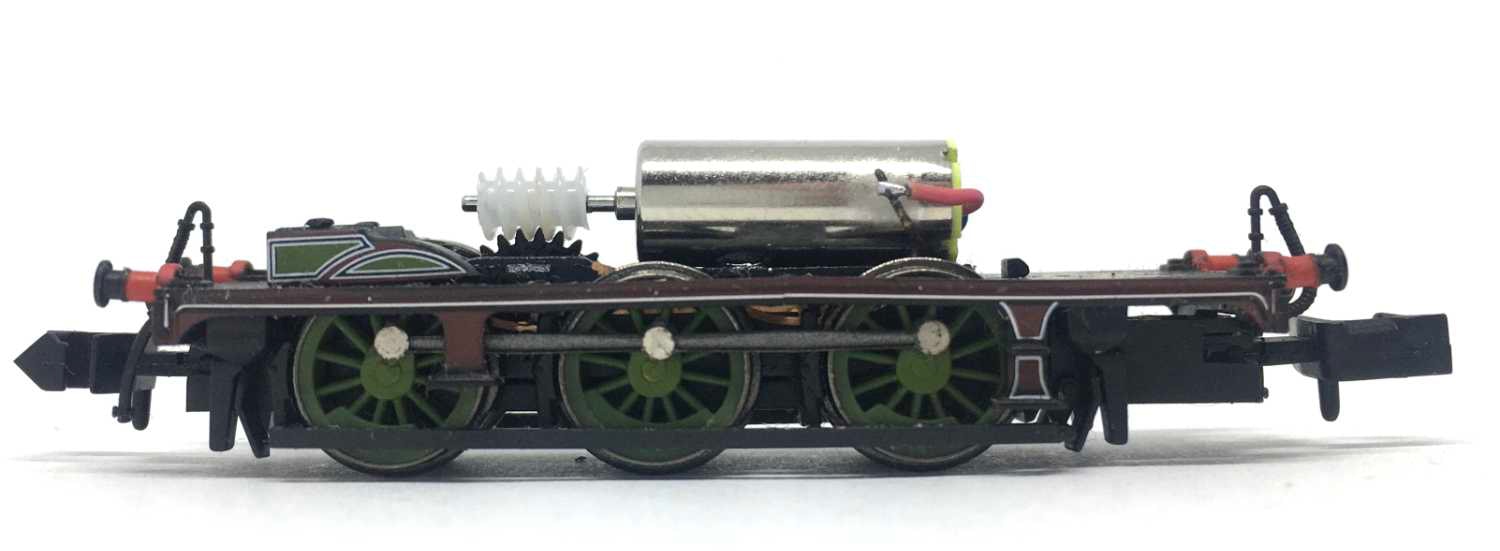
Dapol A1/A1X Terrier
Conversion to 12V coreless motor
Smoother running at low speeds, quieter and space for a hidden decoder.
Fits all Dapol Terrier N gauge models.
Question? Just reach out!
What you need for conversion set
- The model and upgrade kit
- Small Phillips screwdriver
- Soldering iron 15W/25W
- Sharp, thin knife
- General model making tools
Installation time: Around 40 minutes
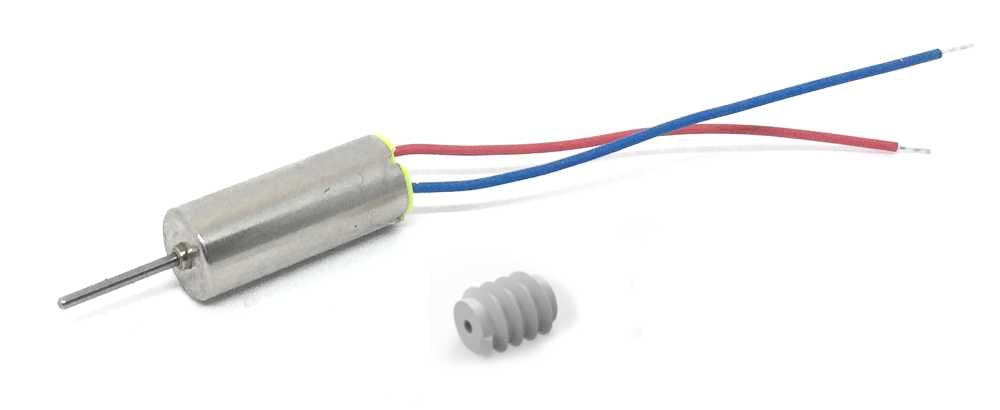
Contents of the kit.
Take apart
1
2
3

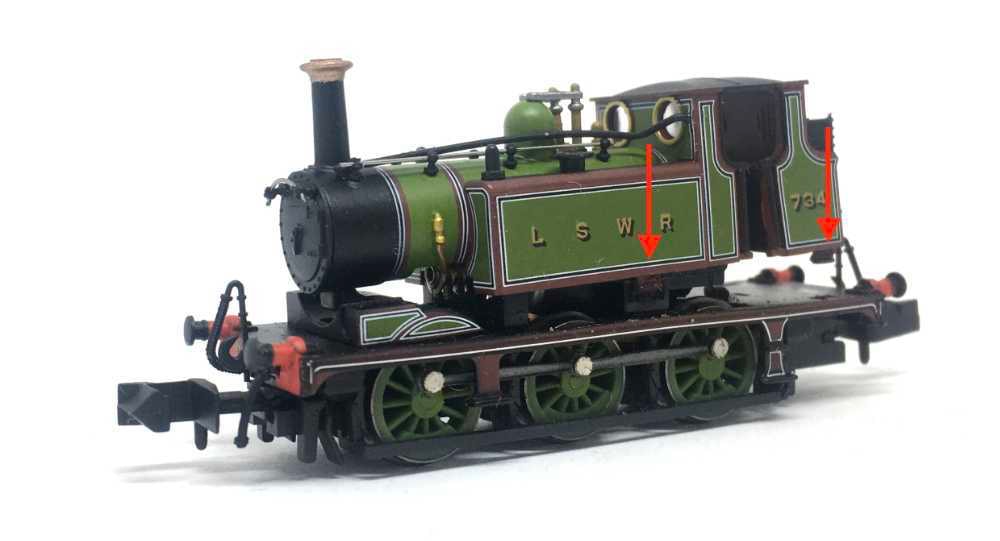
Lift he housing off by wiggling the housing and pull it up, away from the chassis.. The arrows show the metal tabs that hold the housing in the plastic frame.
The process below shows the model without the under frame with the wheel, but you don’t have to take that off. This was just for the experimental fase of developing this kit. The motor housing is glued and the motor can only be removed by cutting the motor cradle off.
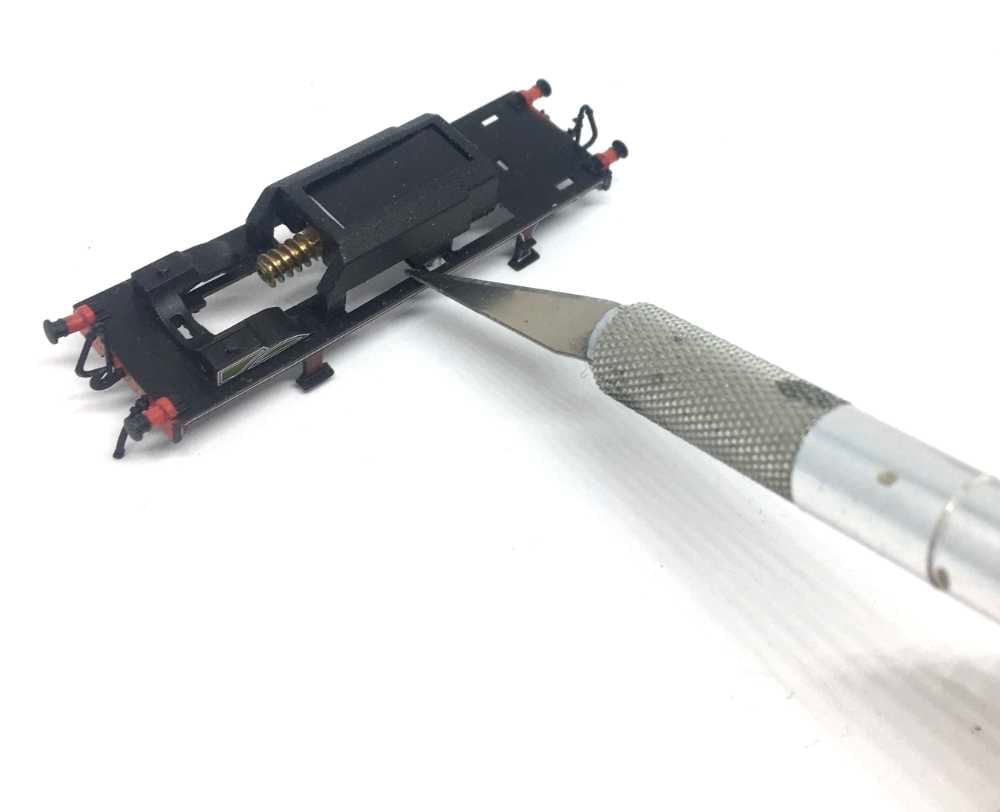
With a sharp knife, cut the motor housing off on the part indicated, at both sides.
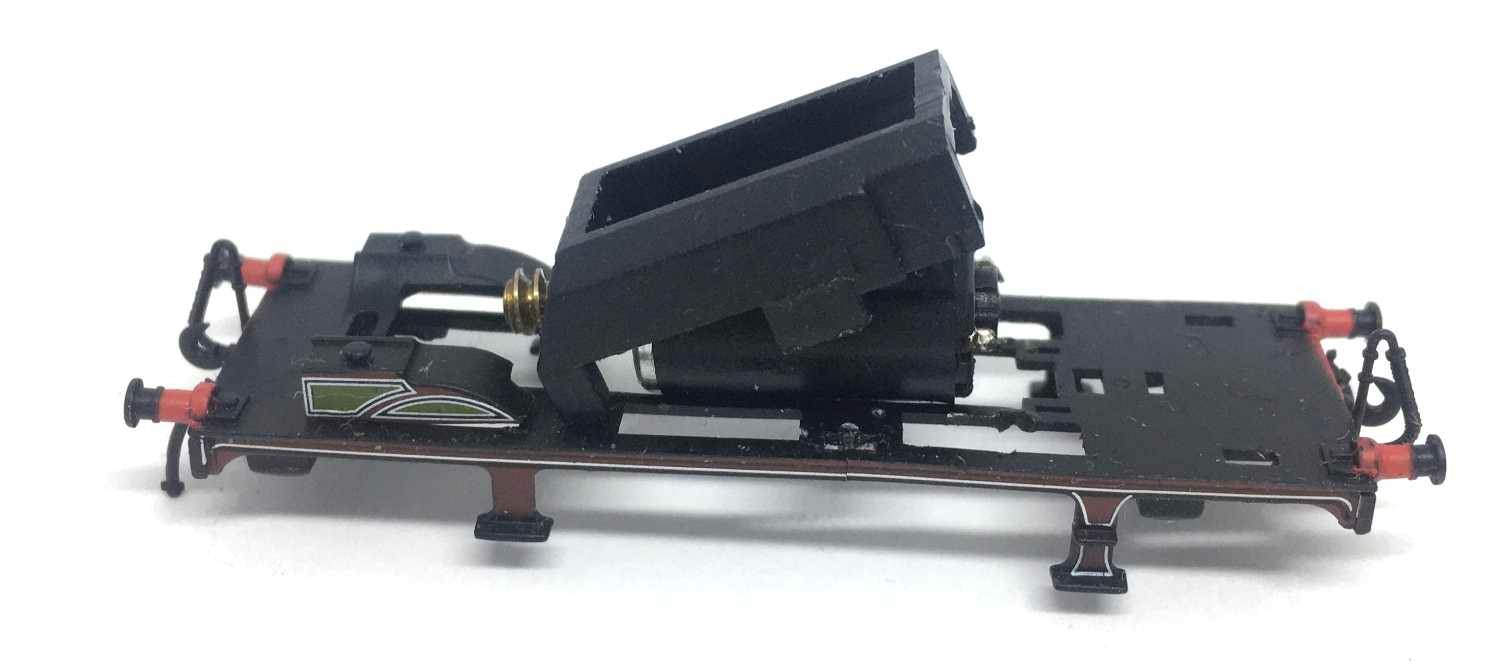
4
Lift the motor cradle off until it breaks off. You can also use the knife to cut it off. you don’t need the cradle anymore for this project.
5
6
Desolder the old motor wires from the contacts.
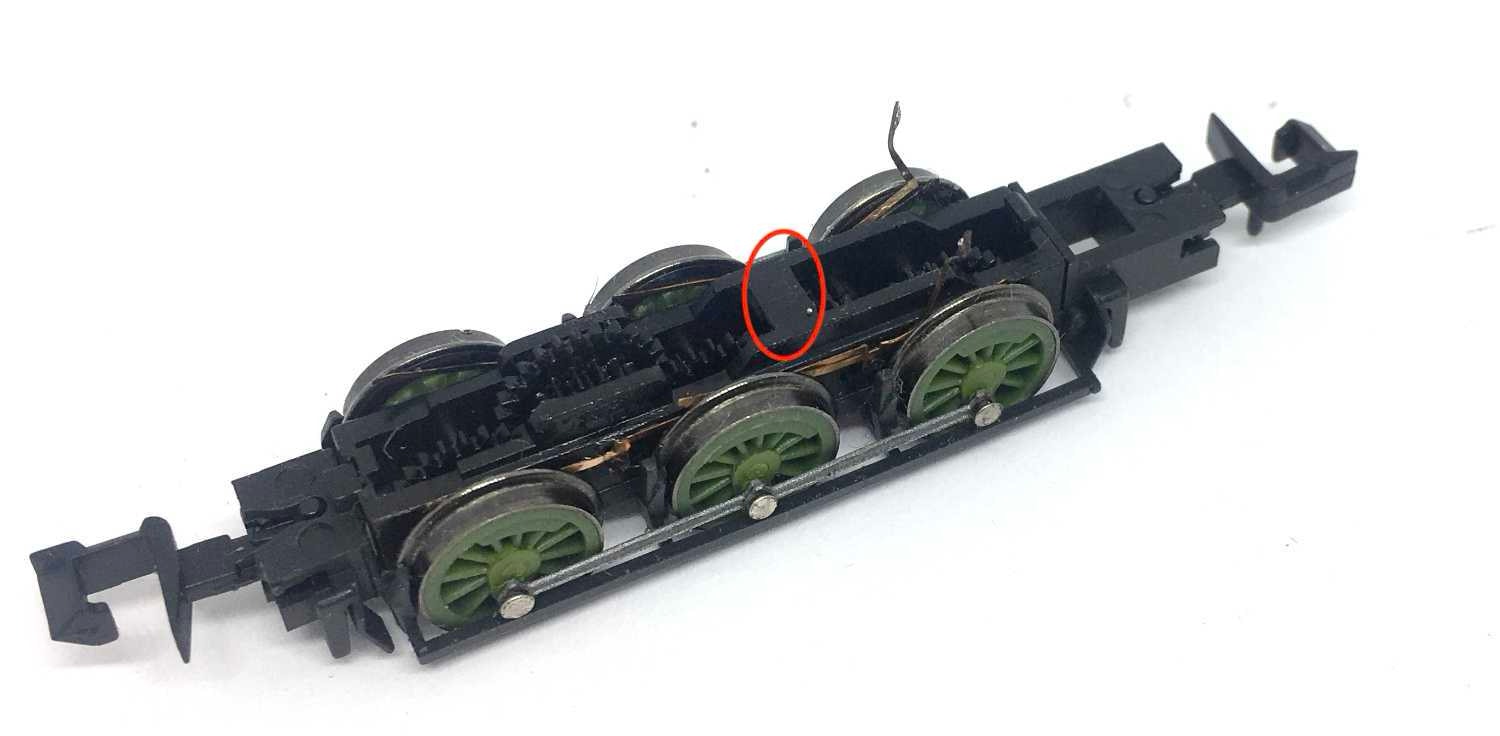
In the picture below the frame of the footplate is not fitted, but as I told you before not to remove it, the above footplate should still be on your wheels frame.
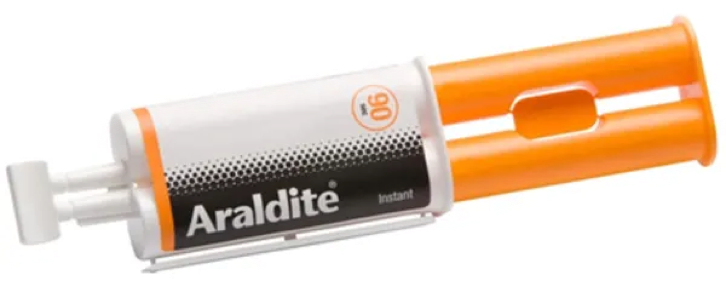
The circle indicate the location of the EPOXY glue (two components glue), to fit the motor. Again, the footplate frame needs to be in place! Be careful to use a small drop, so it will not leak on the gears.
I use Araldite Instant 90 seconds glue
7
Cut the wires to size. Before proceeding, be aware of the right side of the cables. The blue cable connects to the right side (seen in the forward direction).
With the glue carefully pasted, press the motor with gear fitted on the glue. Hold the motor straight and in place for 90 seconds, until the glue dried sufficiently and the motor doesn’t move.
8
Solder the wires to the contacts. Blue wire to the right side, red wire to the left side. If you have this reversed, your train will ride in the opposite direction of your other models.
9
Test the model. When running well (though you might experience bad contact, as the weight of the housing is missing), by pressing the tender cover back over the frame and off you go.
Digital
Fit the dummy plug again and first test your model with DC analogue power. If it all works well, you can fit a decoder. Train-O-Matic does an excellent 6 pin decoder, available here from the Tramfabriek.
For optimal performance, you need to change some CV settings on a decoder. For several decoder brands, the ideal CV settings can be found by clicking here.
END
•