UK based
Prices for UK customers are shown inc 20% VAT
Other countries, inc EU, prices shown are ex VAT.

KASTENLOK INDEX


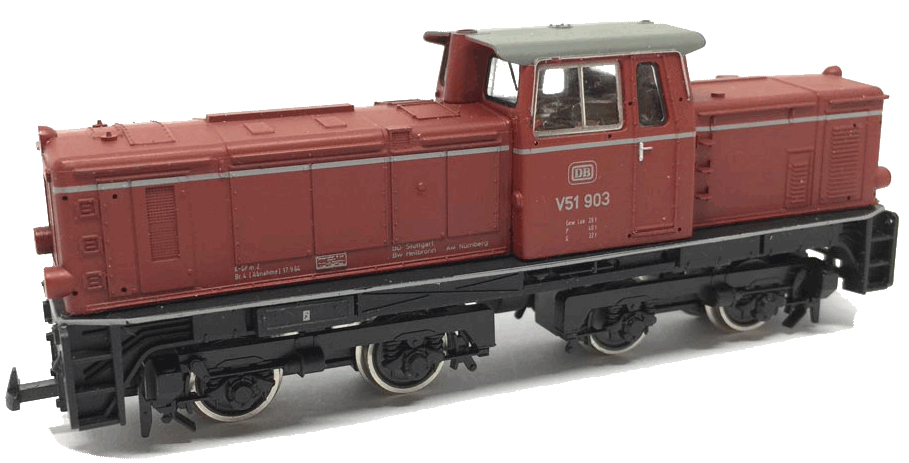
Conversion Bemo V51 V52 BR 251 (1:87)
to coreless motor
UK based
Prices for UK customers are shown inc 20% VAT
Other countries, inc EU, prices shown are ex VAT.
KASTENLOK INDEX
Conversion Bemo V51 V52 BR 251 (1:87)
to coreless motor

Question? Just contact Sven!
1
2
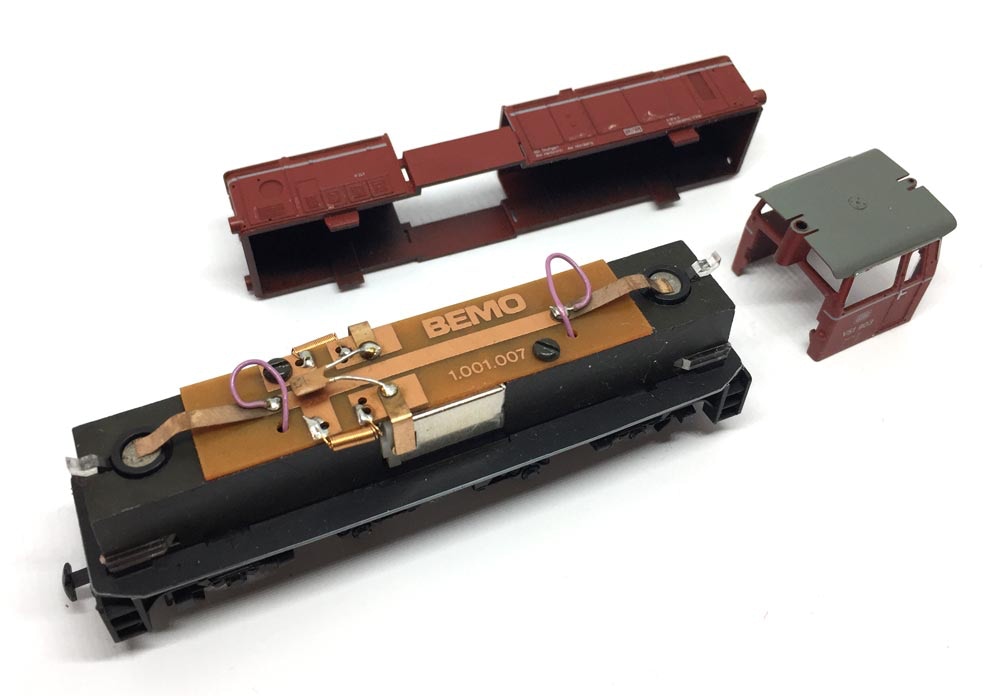
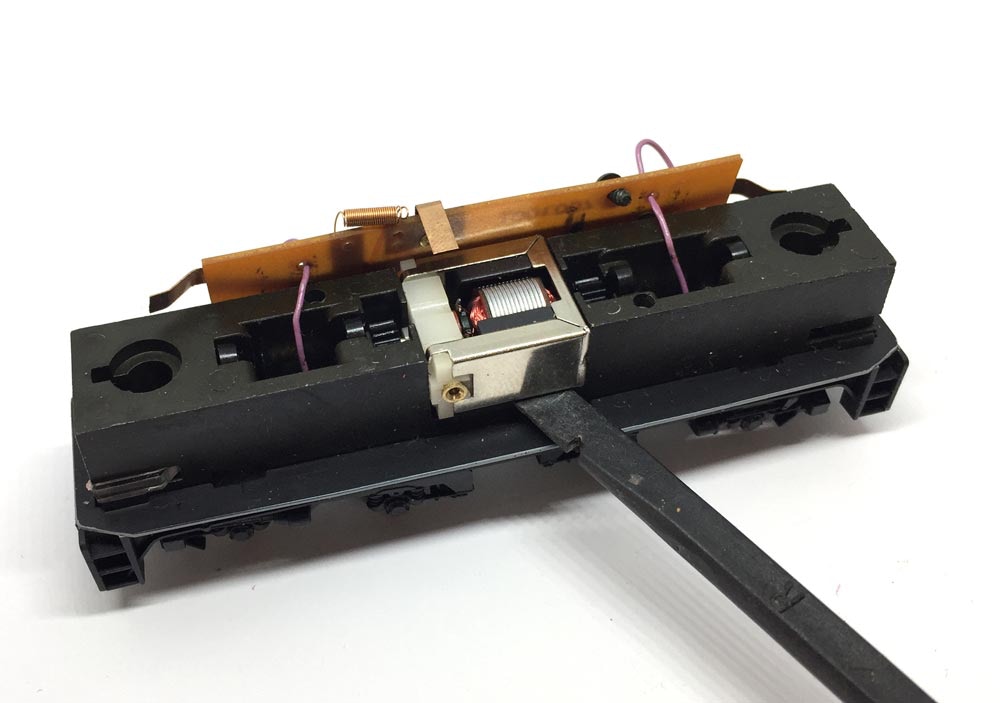
Remove housing
On four points the housing of the train is held on the foot plate with a tab. When you look under the model, move a bogie to the side, then you can see the tab. Release the housing from the chassis by putting a screwdriver in the hole and move the red tab inwards, toward the wheels. Then lift the housing straight up. Please note, you don’t have to take the cabine off separately, it can just stay together with the engine housing section.
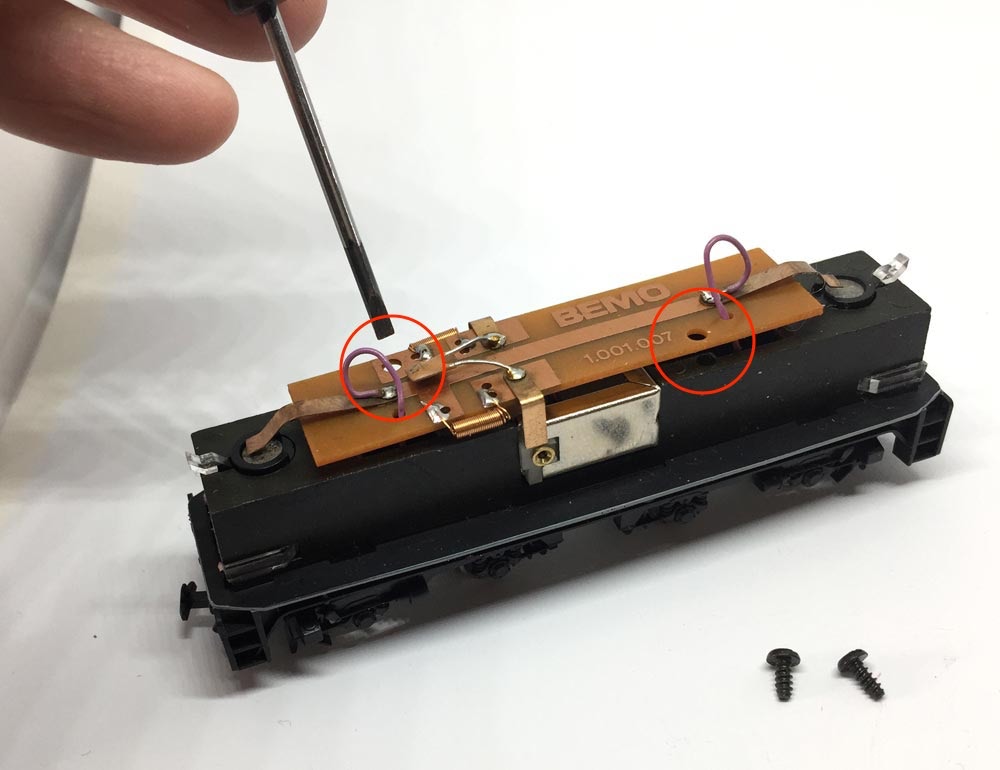
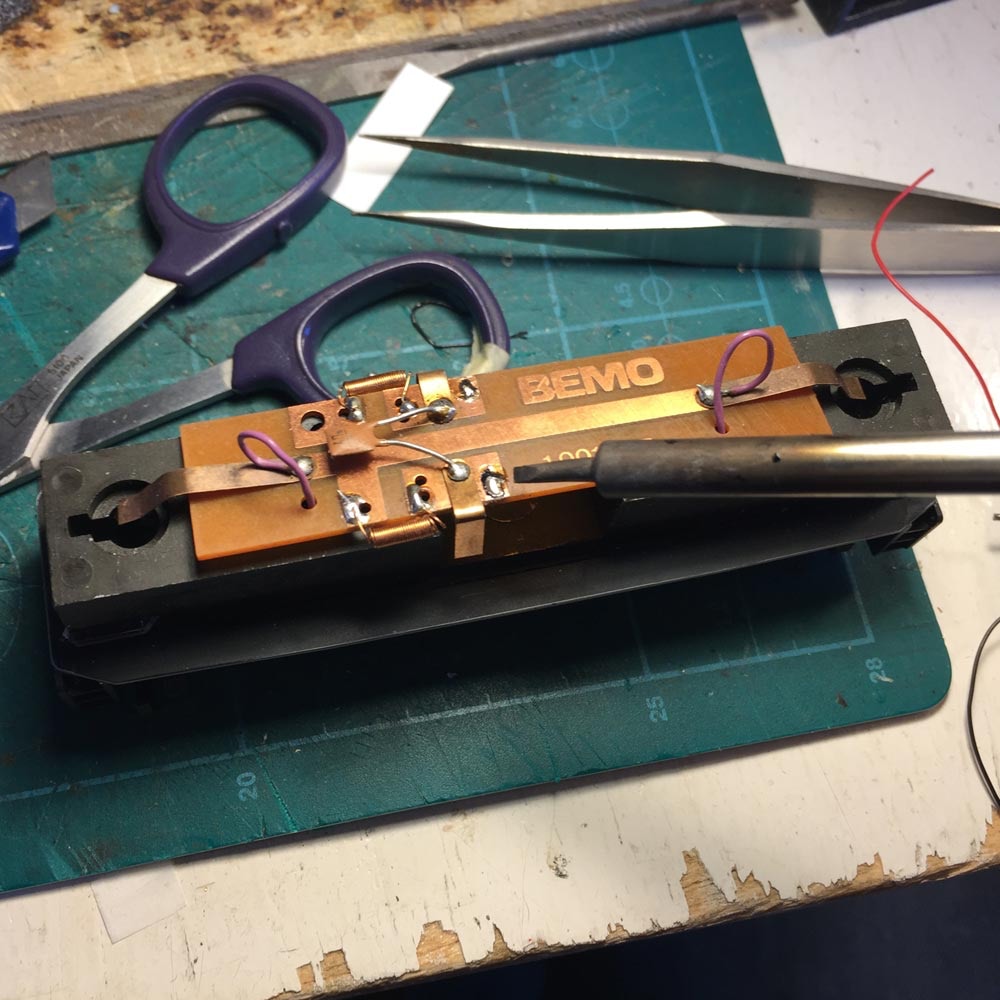
Remove screws from electronic components board
Location of screws is indicated with the two red circles.
3
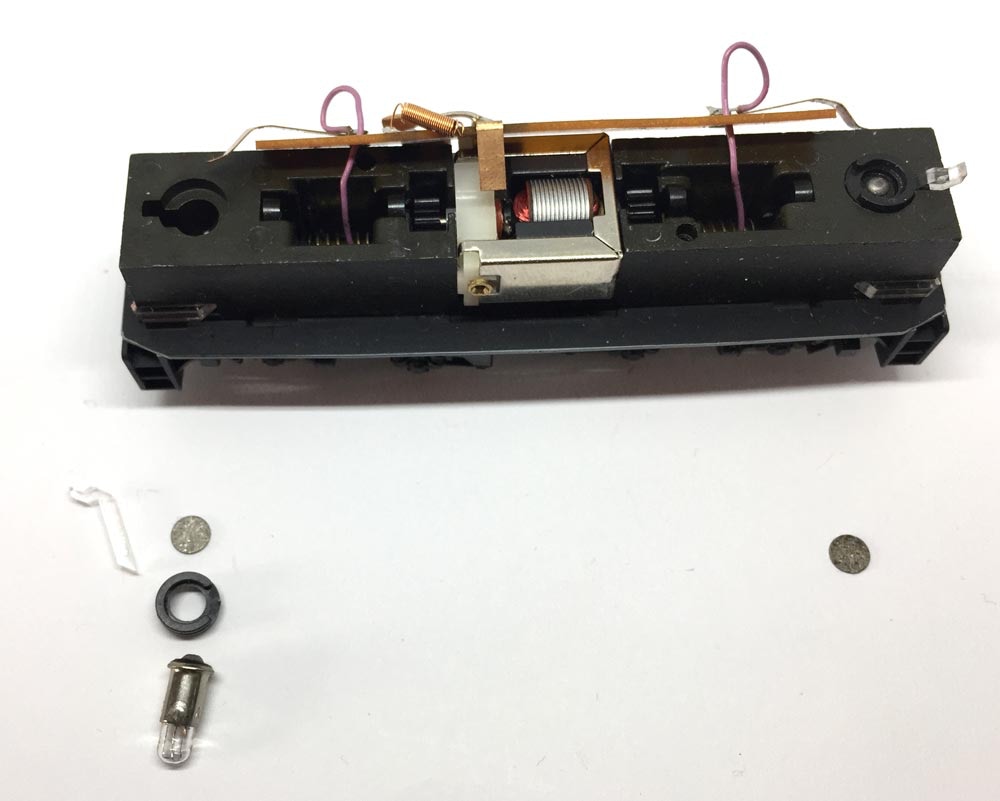
Remove the board
After removing the screws, the board can be taken off. Be careful not to loose the components for the two lights, as they will fall out now when you turn the train upside down. Better to take them out and put them aside. Also pay attention to the plastic pieces for the lights on the four edges. They might fall out as well, while working on the train.
Don’t cut any cable!
4
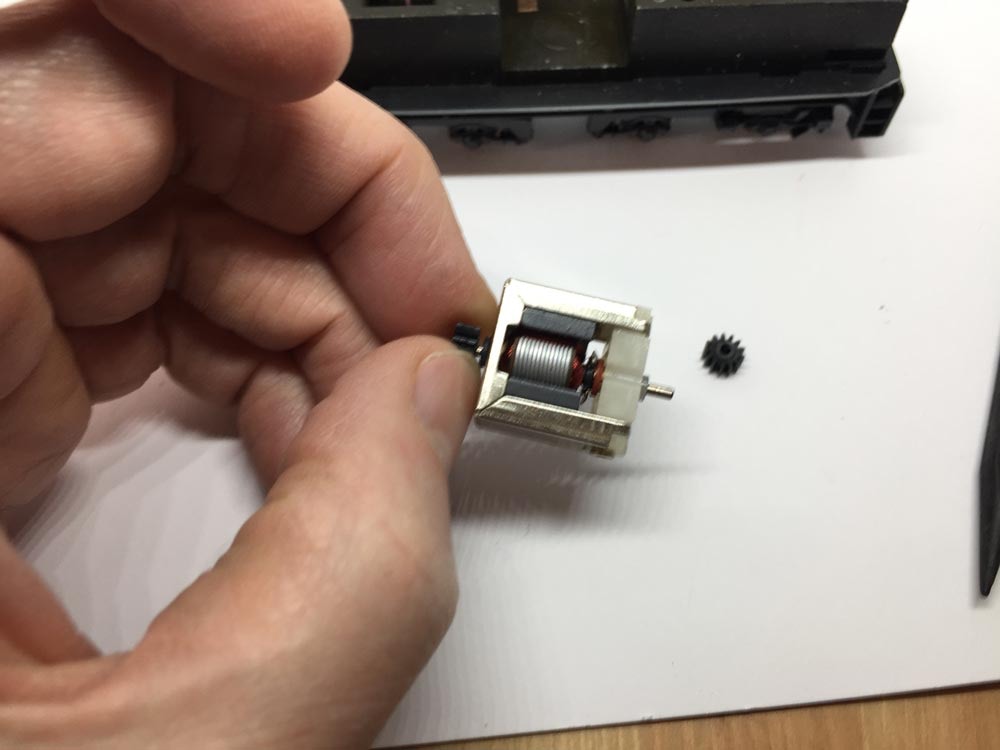
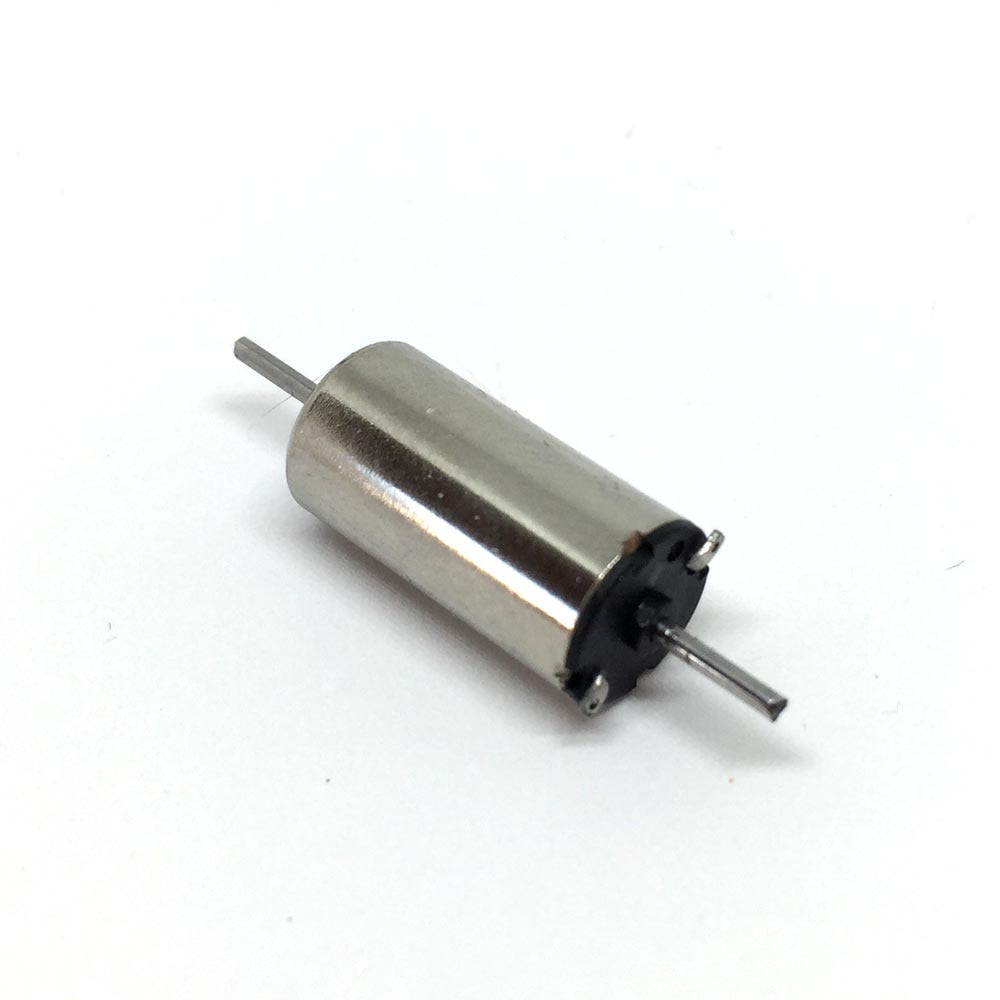
Remove motor
Lift the motor out of its place, by putting a screw driver or probing tool under it.
5
Take the gears of the motor axle
The two black gears on each side of the motor can be pulled off by hand.
6
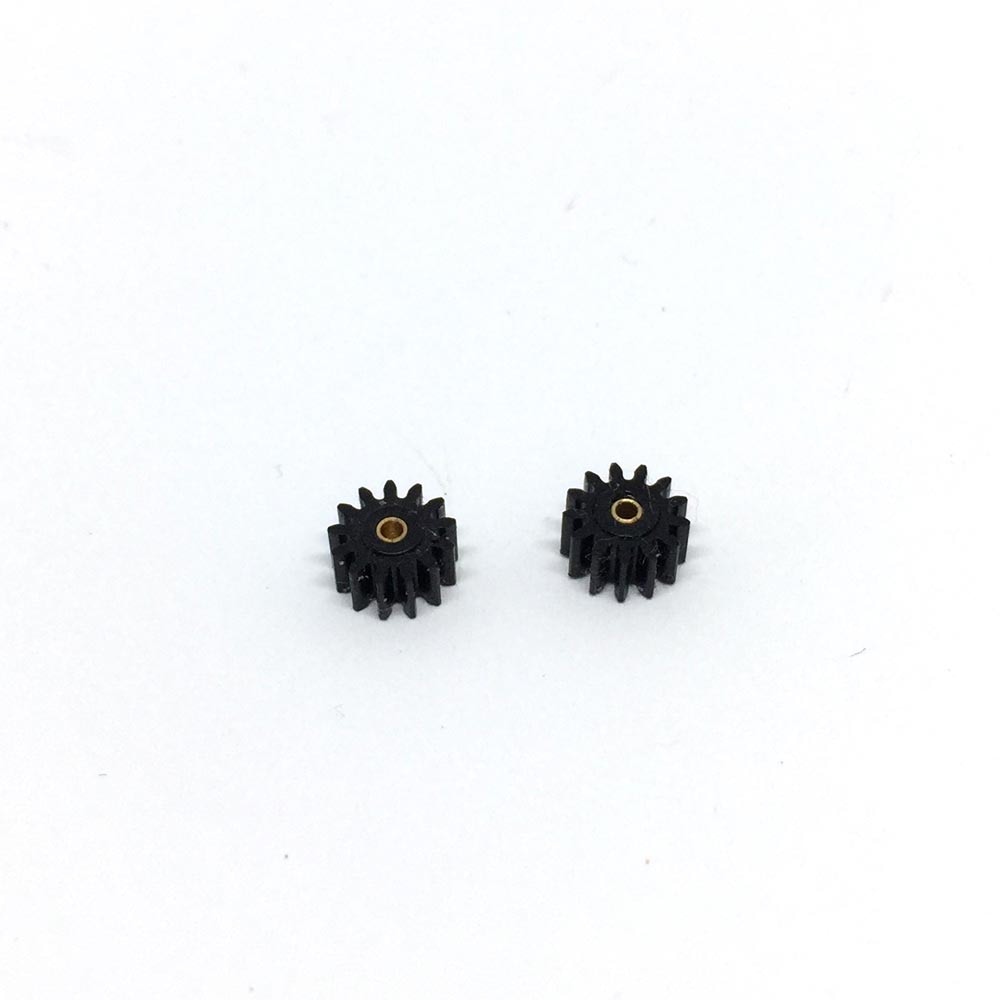
Fit the adapters
The brass adapters are 3 mm long and have an inner diameter of 1 mm. Press them inside each gear.
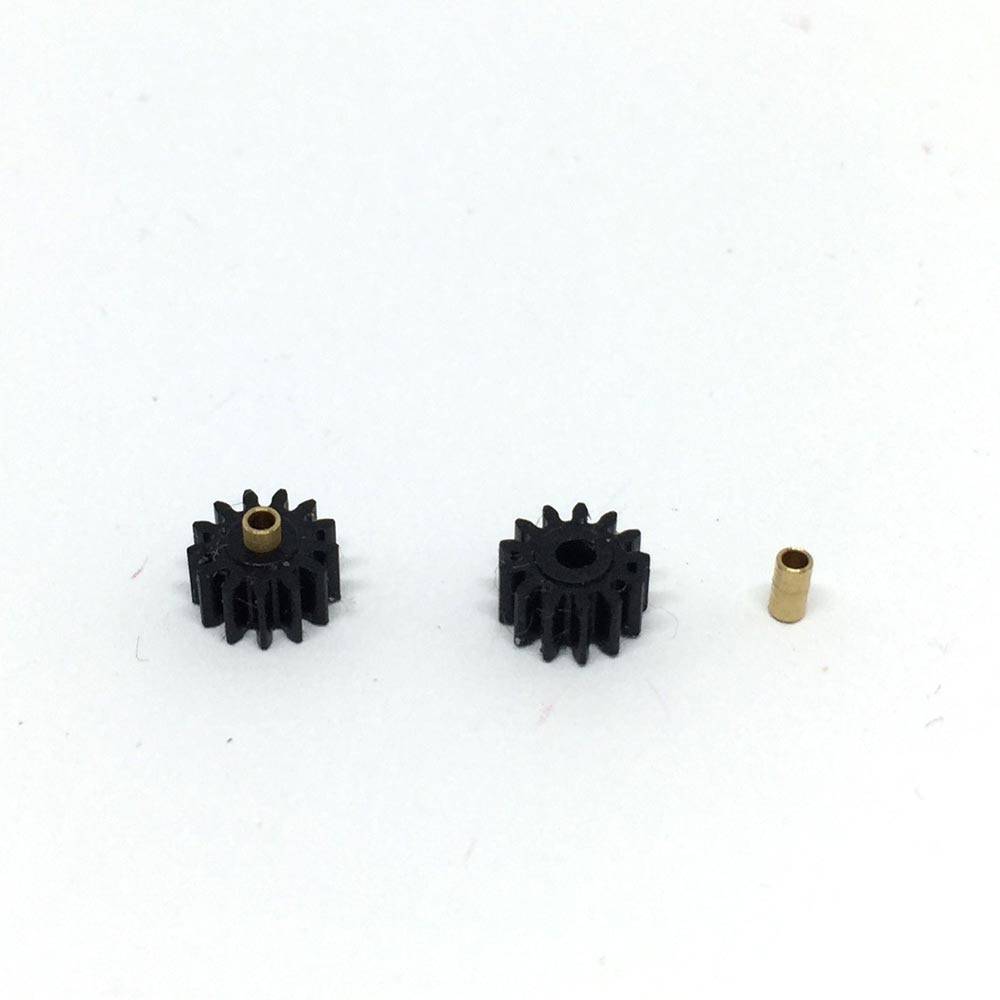
Be careful not to get glue in the motor shaft. I use a kitchen tissue over the shaft to get the Loctite or superglue that will be pushed towards the bottom when fitting the adapter. Leave about just over one millimeter free between motor and adapter. The total length should be about 43 mm.
7
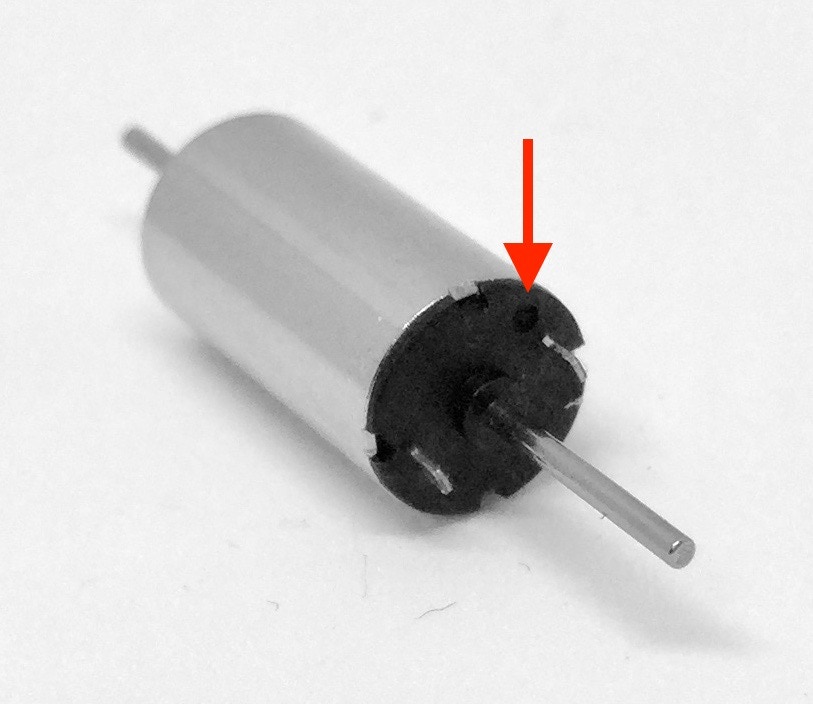
Bend power terminals
The power connectors on the motor should be bend. If this is not the case already, bend the connectors outwards 90 degrees with your nail.
8
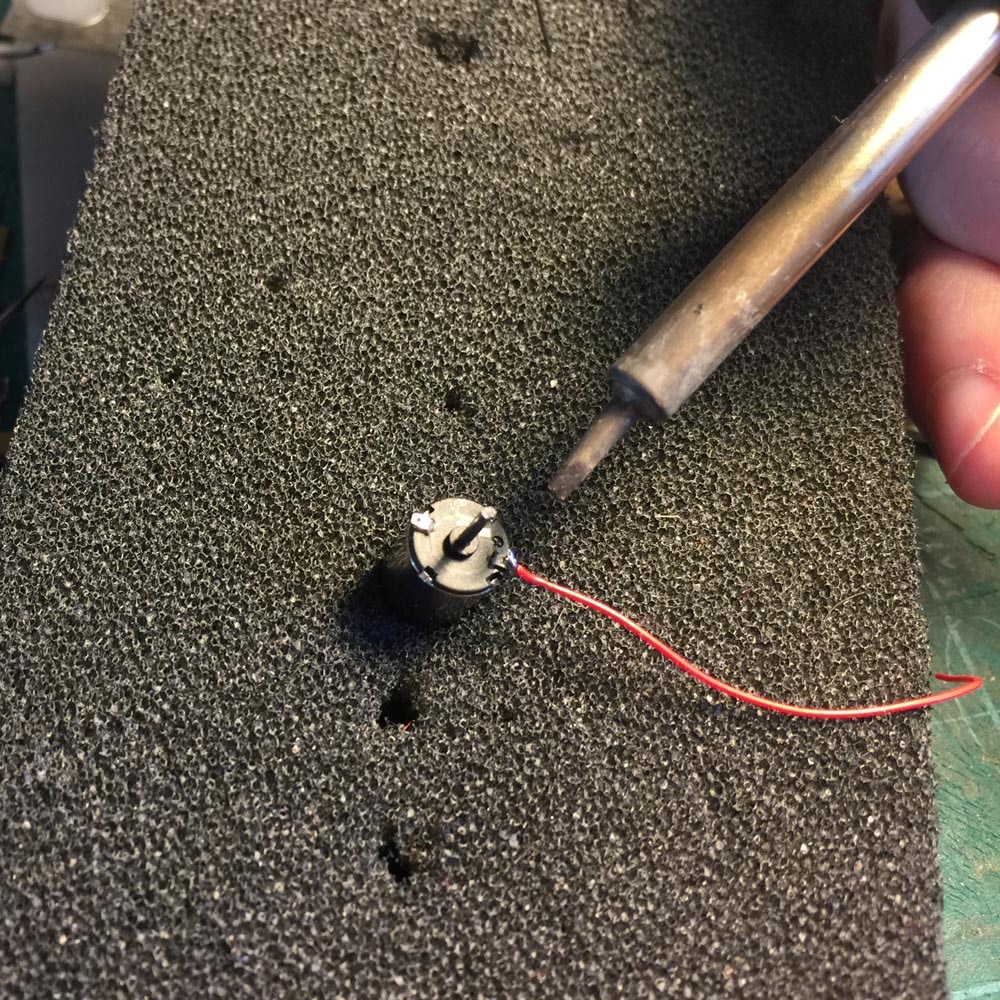
Solder wires to the motor
There is a round mark next to the plus pole of the motor. This is traditionally a red wire. Solder a black wire to the other connector. You can use any colour you like, but as long as you remember which is plus and which is minus. When you install the motor in the train chassis, make sure the connectors are not touching the frame. It’s therefore you have bent the connectors.
To make it easy to solder wires, I make a small hole in foam and press the motor in it.
9
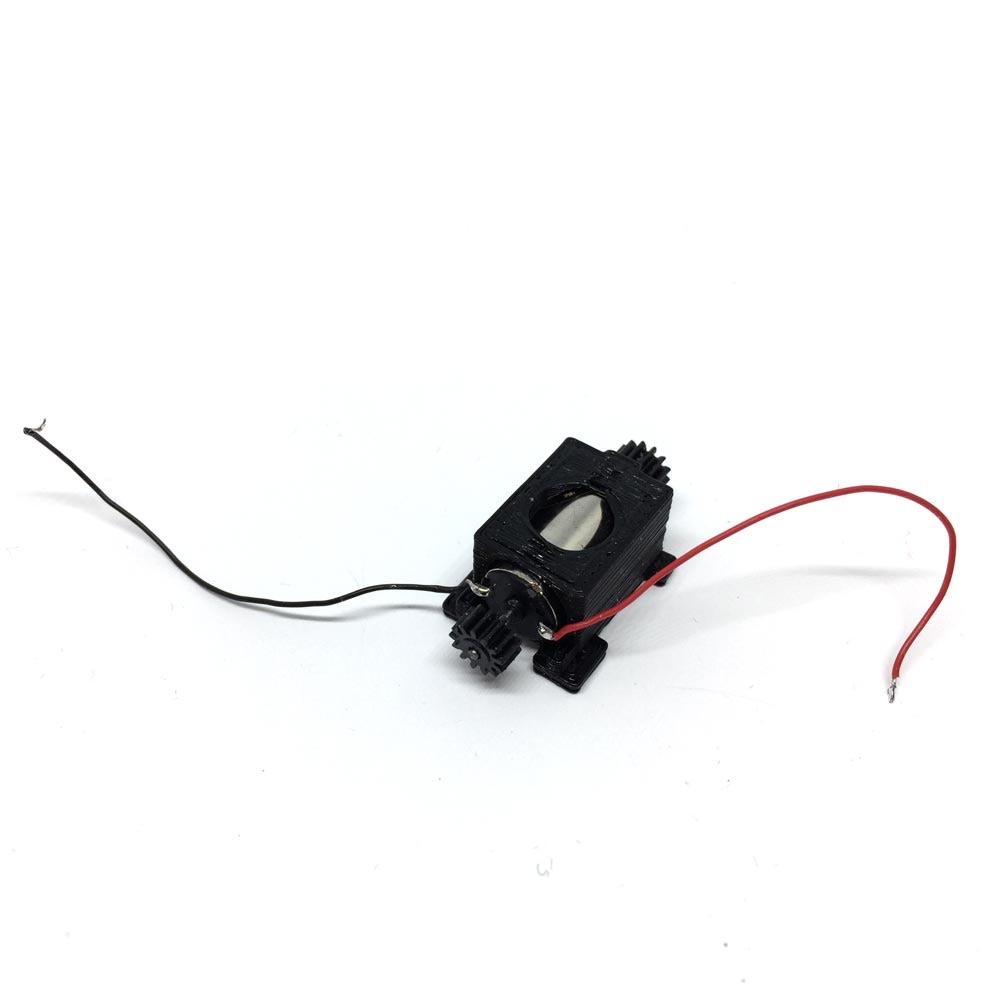
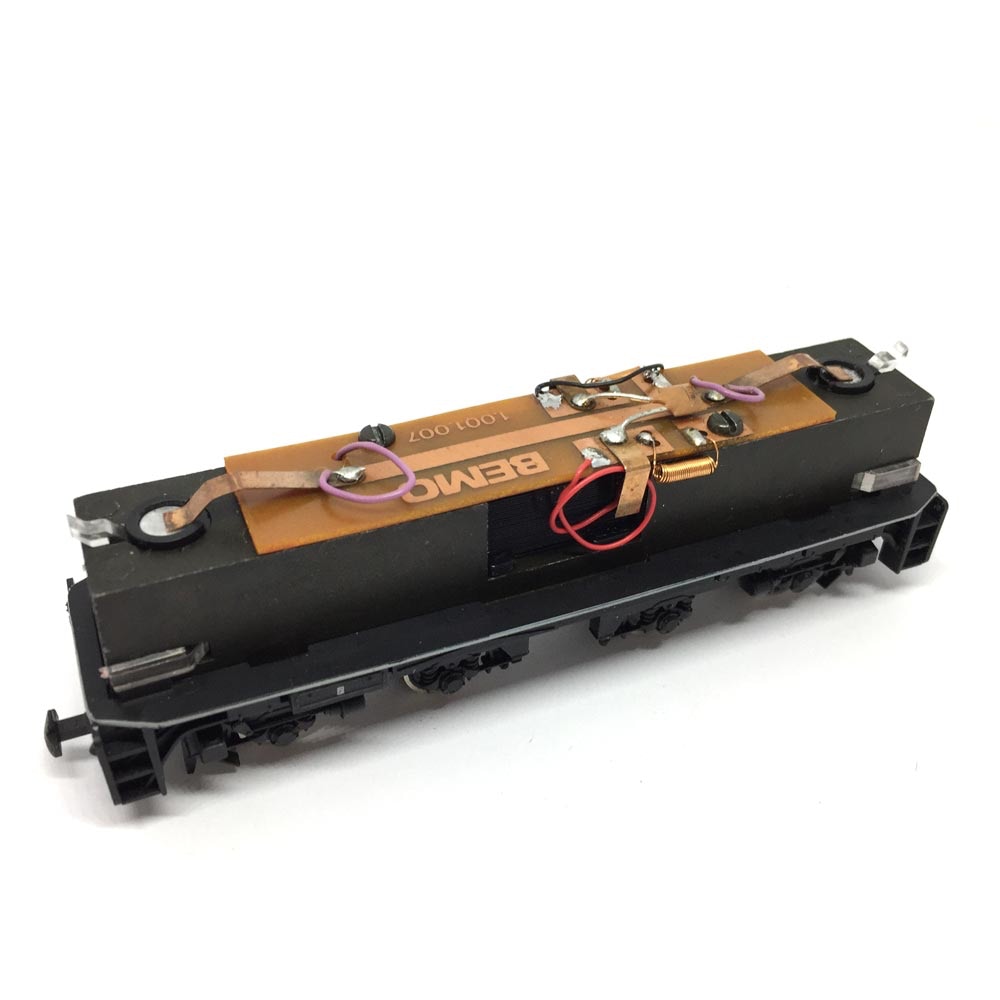
Push the motor in the casing and fit gears
See image how the motor is placed in the casing. Then use superglue to glue the gears on the axles of the motor. The distance from one end of the gear to the other end of the gear on the original motor is 29 mm. But if you have a look inside the chassis and check where the gears have to go, this is a bit flexible. Check before you glue the gears in place!!
10
11
12
Solder motor wires to board
Put some wire solder with resin core on the indicated connector on the board. T
The red wire will go on the right side in the forward direction of travel. Black on the other side.
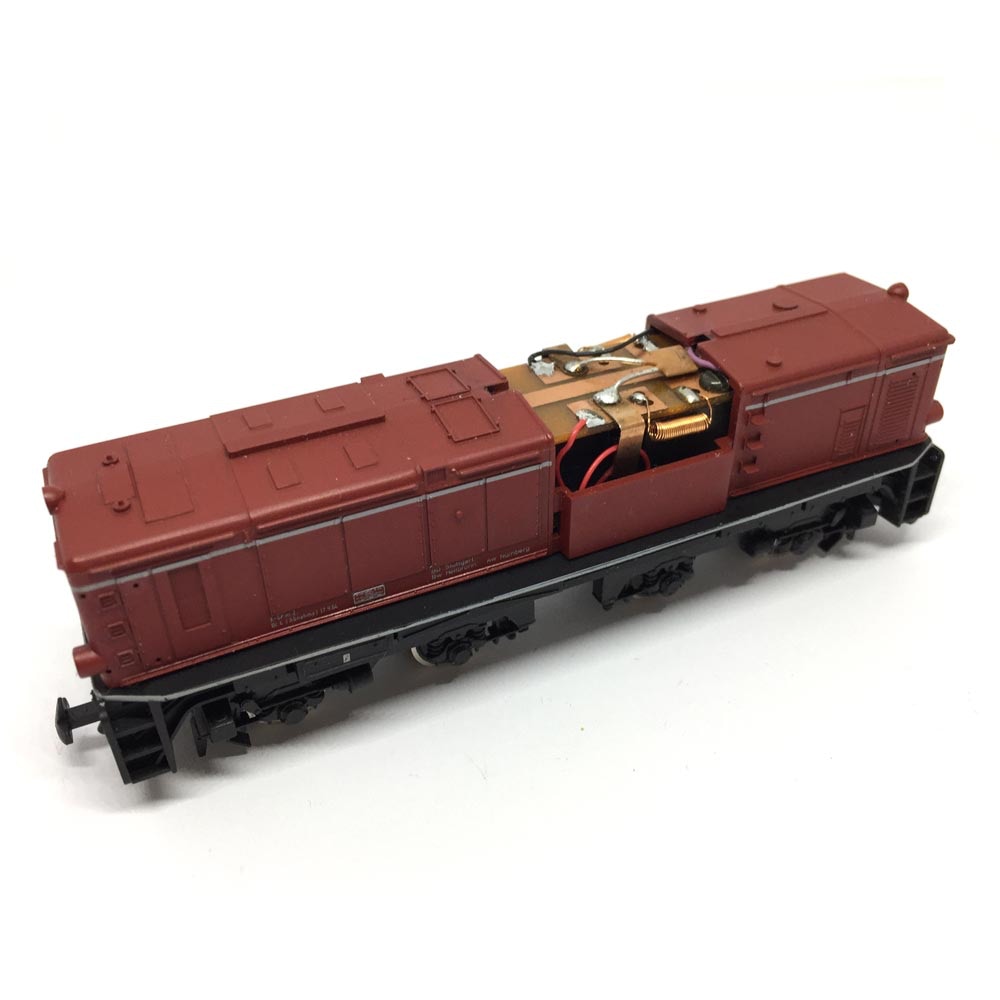
Fit board and test.
Re-fit the light components, place the board and screw it back in place. Test if it works and check if the correct front light turns on when you drive it. If the wrong light is on, it means you have to swap the connection of the cables.
Extra tip: If, when running, it’s very noisy, the worm and gears most likely are too close to another. Cut a fitting piece of an A4 paper and put this under the motor casing to raise the motor assembly a tiny bit.
Replace housing
If everything works as should, replace the housing. It all just snaps in place.
Done!
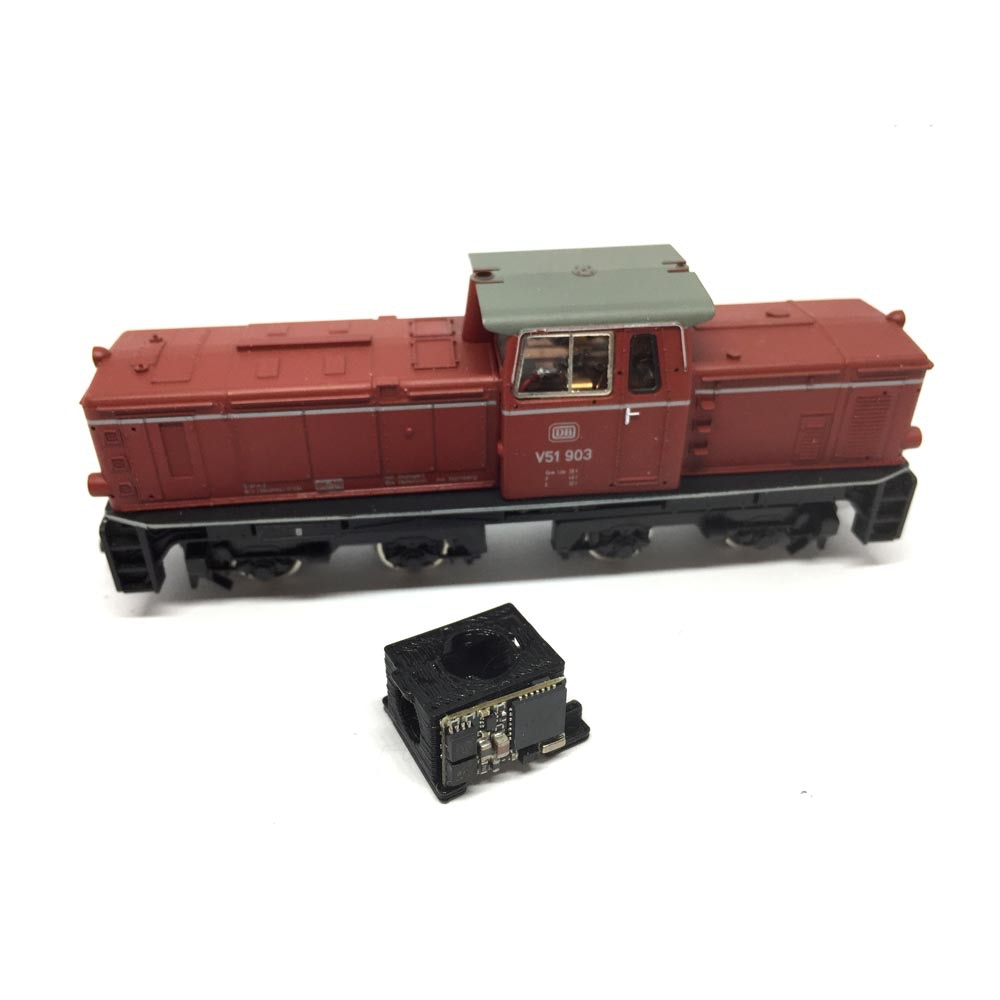
If you are going to attach a decoder, check here for the CV settings (link). On the image a Zimo MX622 is shown, but there are even smaller decoders that would take up less space. After installing the motor upgrade, there is space to hide a decoder out of sight.
•